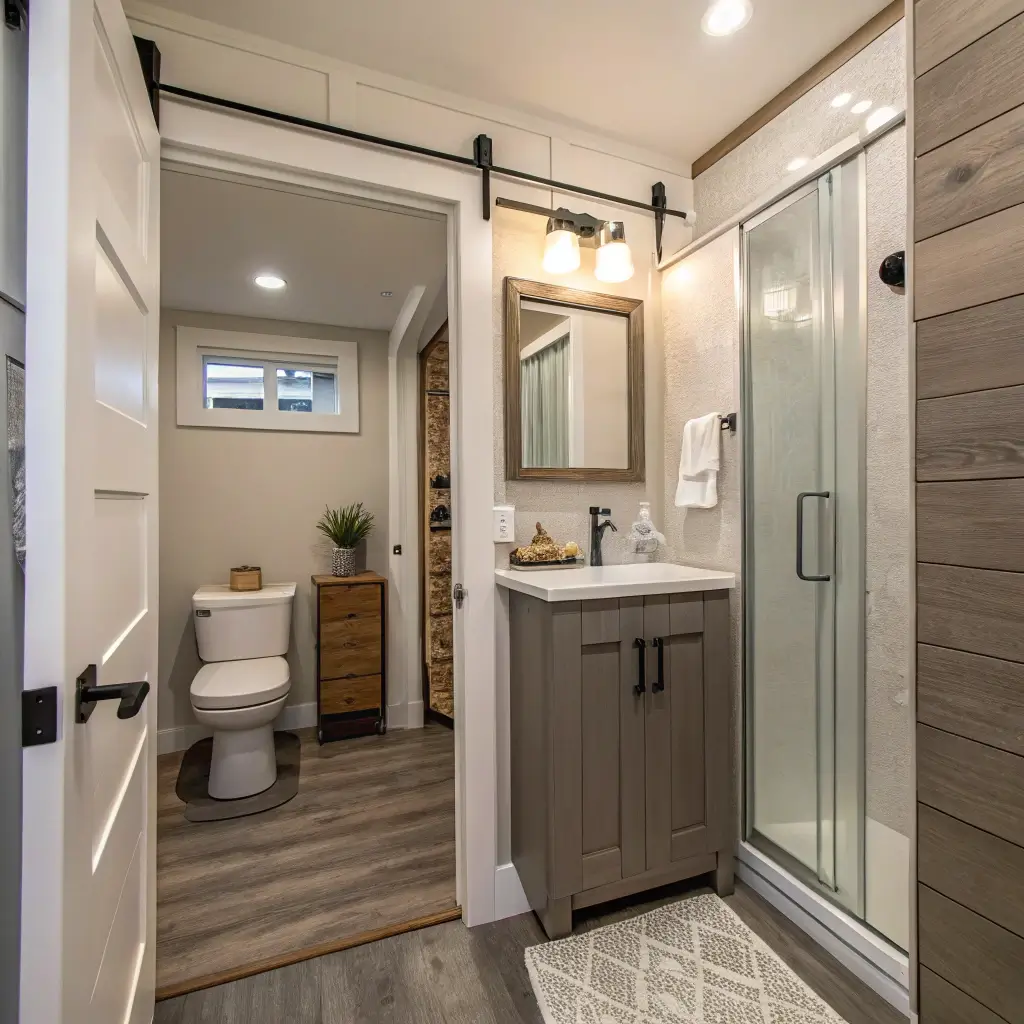
15 Practical Small Bathroom Layout Ideas for Any Home
Look, I get it. You’re staring at your tiny bathroom right now, wondering how on earth you’re supposed to fit everything you need without feeling like you’re showering in a closet. Trust me, I’ve been there. My first apartment had a bathroom so small that I could literally touch opposite walls while standing in the middle. Not exactly the spa-like retreat I’d dreamed about, right?
But here’s the thing—small bathrooms don’t have to feel cramped, claustrophobic, or frustrating. With the right layout, even the tiniest powder room can become a functional, stylish space that makes your morning routine actually enjoyable. I’ve spent years experimenting with different configurations, making plenty of mistakes along the way (RIP to that oversized vanity that blocked the door halfway), and I’ve finally cracked the code on what actually works.
So grab your measuring tape and maybe a cup of coffee, because we’re about to transform that shoebox bathroom into something you’ll genuinely love. These 15 layout ideas aren’t just theoretical Pinterest dreams—they’re practical, real-world solutions that work in actual homes with actual space constraints.
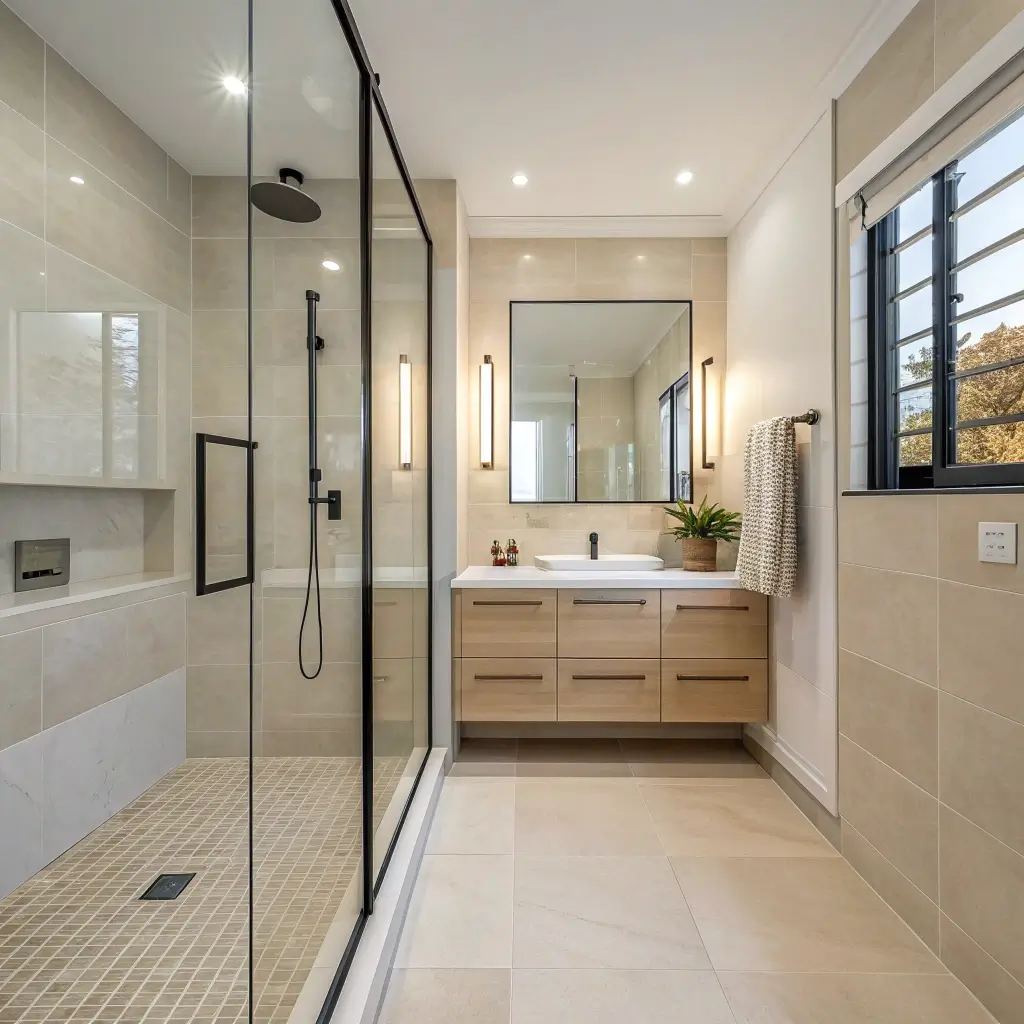
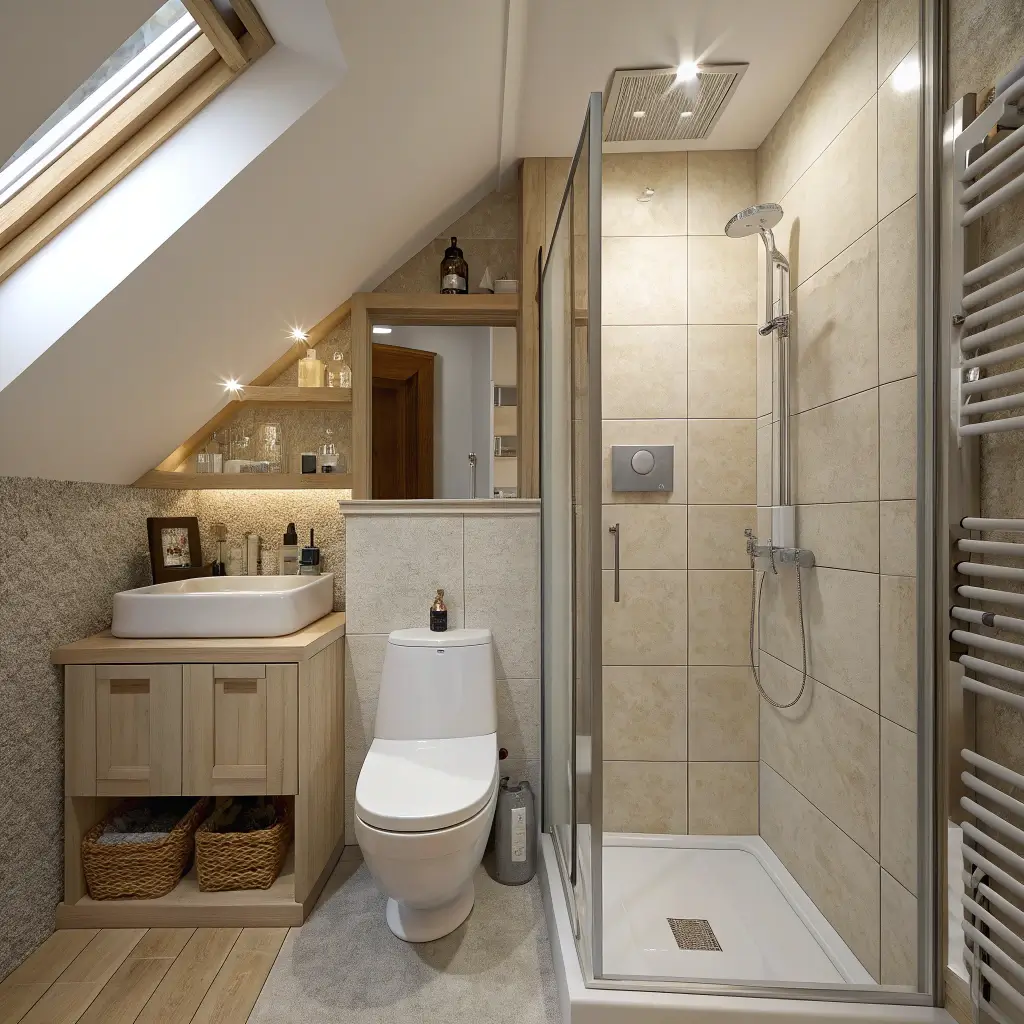
1. Corner Shower Smart Layout
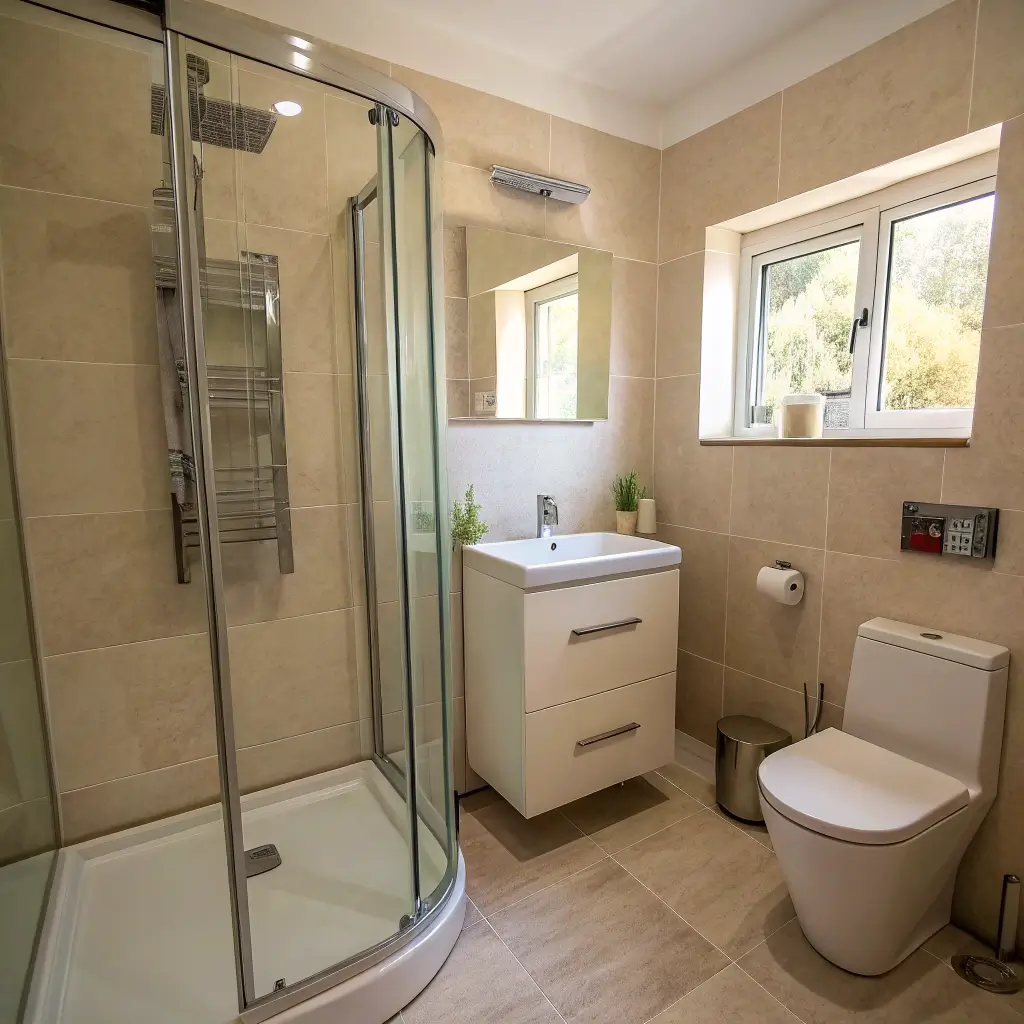
Let’s kick things off with what I consider the unsung hero of small bathroom design—the corner shower. Seriously, why doesn’t everyone talk about this more?
The corner shower layout maximizes your floor space by tucking the shower into an otherwise wasted corner. Think about it: corners typically just collect dust or maybe hold a sad little trash can. But when you install a neo-angle or quadrant shower enclosure in that corner, you suddenly free up precious square footage in the center of your room.
I installed a corner shower in my guest bathroom last year, and the transformation was honestly ridiculous. The room went from feeling like a cramped afterthought to an actual functional space where guests don’t bump their elbows on everything.
What Makes This Layout Work
Here’s why the corner shower layout deserves your attention:
- Opens up the center of the room for easier movement
- Creates visual flow because your eye travels around the perimeter
- Works with various shower sizes from compact 32×32 inches to more generous 36×36 inches
- Pairs beautifully with curved glass doors that soften the angular feel
- Leaves room for a standard vanity on an adjacent wall
The key to nailing this layout? Choose a frameless or semi-frameless glass enclosure. Heavy frames make small spaces feel even more claustrophobic, while clear glass maintains that open, airy vibe you’re after.
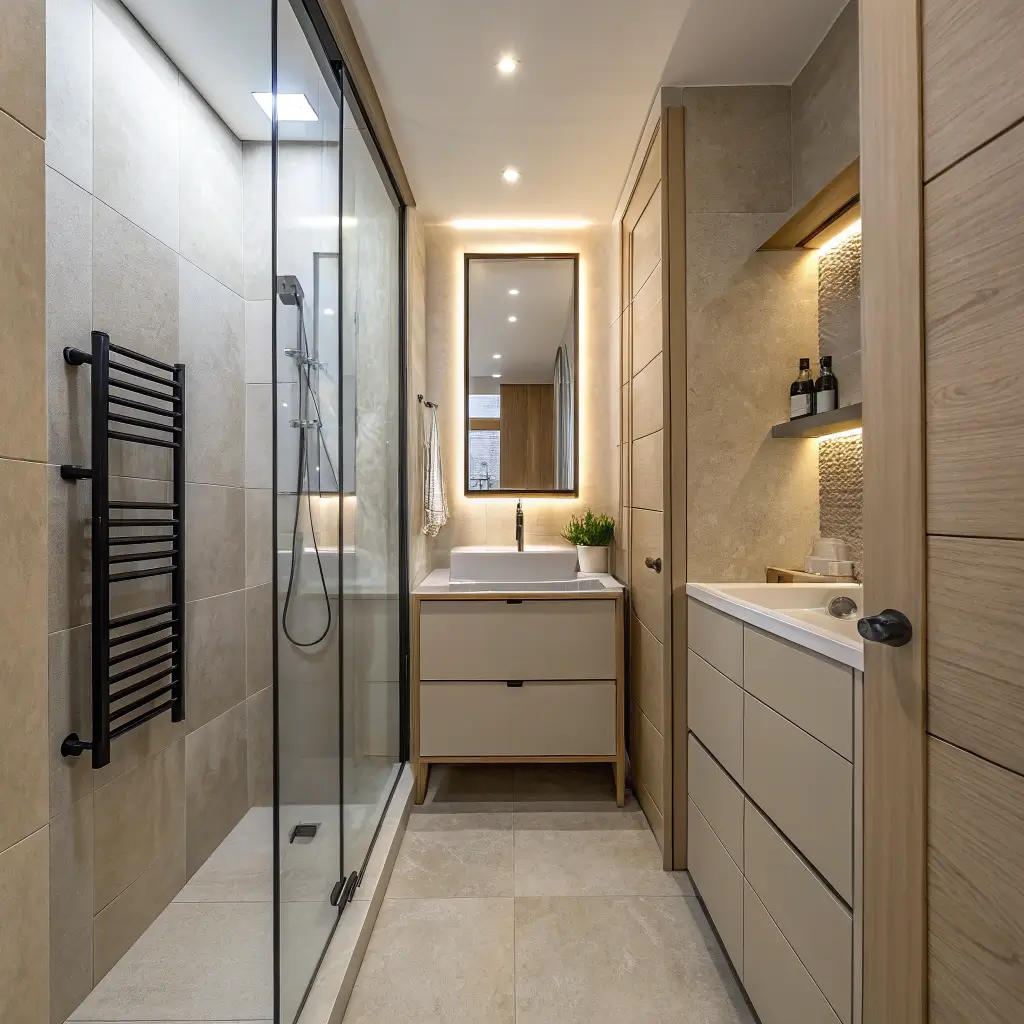
2. Floating Vanity Space Saver
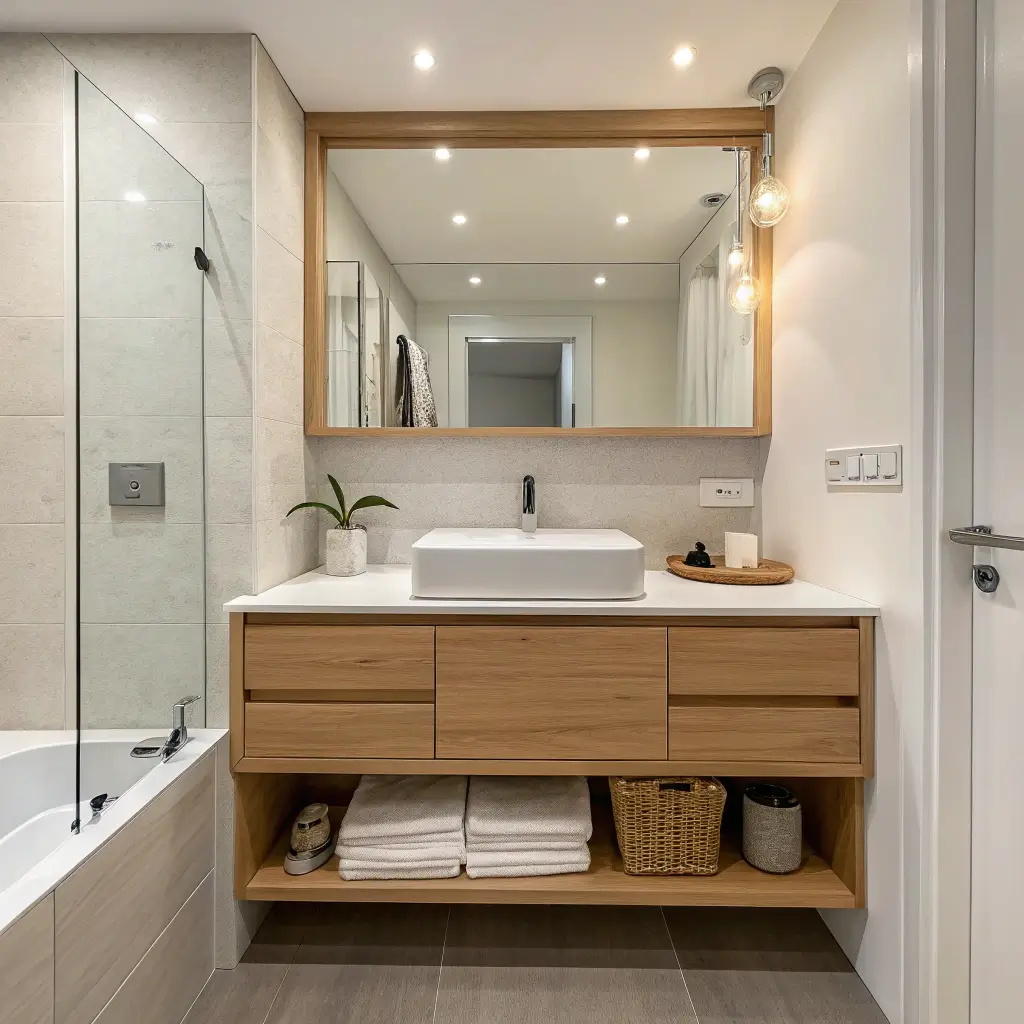
Okay, if you haven’t considered a floating vanity yet, we need to have a serious conversation about your life choices. I’m kidding—sort of.
Floating vanities are absolute game-changers for small bathrooms. By mounting your vanity to the wall instead of planting it on the floor, you create visible floor space that tricks your brain into thinking the room is bigger than it actually is. It’s basically an optical illusion, but a really useful one.
The Practical Benefits
Beyond looking sleek and modern, floating vanities offer some seriously practical perks:
- Easier floor cleaning because you can actually reach underneath
- Additional storage options with baskets or bins placed below
- Adjustable height installation to fit your specific needs
- Modern aesthetic that works with various design styles
- Makes small tiles appear to extend further creating visual continuity
When I helped my sister renovate her half bath, we installed a 24-inch floating vanity, and she gained enough floor space to add a small plant stand. Now the room feels like a cozy retreat instead of a utility closet.
Pro tip: make sure your wall can support the weight. Floating vanities need to anchor into studs or use heavy-duty wall supports. Nobody wants their sink crashing down at 2 AM—talk about a rude awakening.
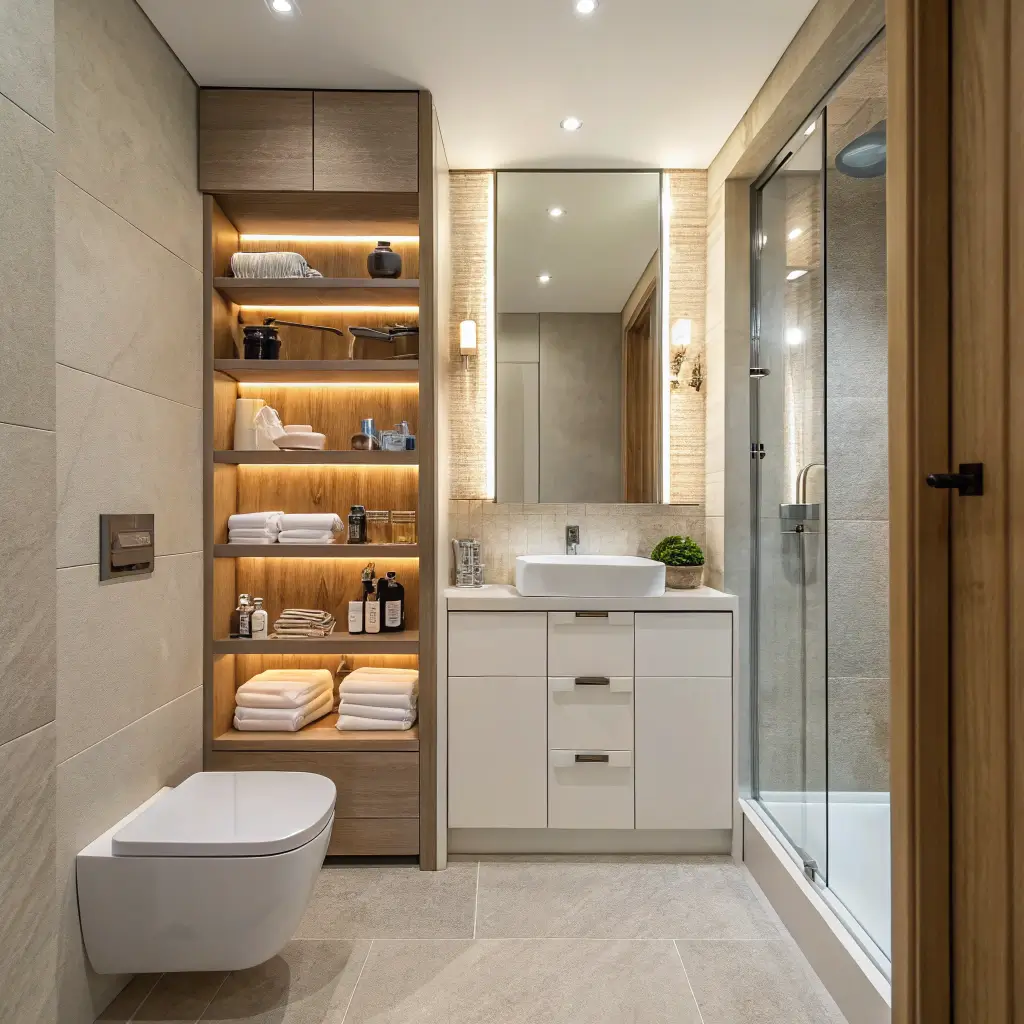
3. Wall-Mounted Toilet Layout
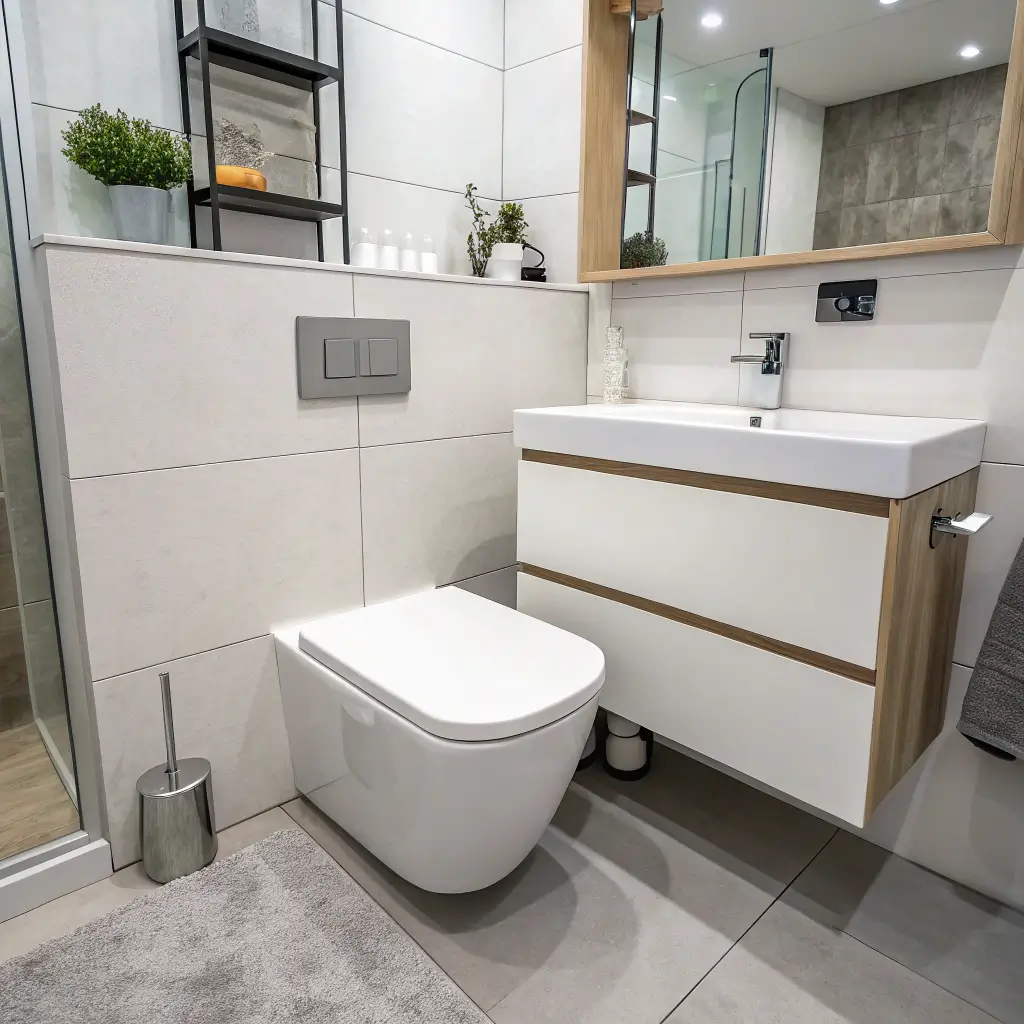
Speaking of wall-mounted fixtures, let’s talk about the wall-hung toilet. Yes, it costs more than a standard floor-mounted toilet. Yes, the installation is more complex. And yes, it’s absolutely worth considering for a small bathroom.
Wall-mounted toilets save approximately 10-12 inches of floor space compared to traditional models. That might not sound like much, but in a bathroom where every inch matters, it’s basically striking gold.
Why This Layout Works
The magic of wall-mounted toilets goes beyond just floor space:
- Hidden tank in the wall creates a streamlined look
- Adjustable seat height during installation for personalized comfort
- Significantly easier to clean around and underneath
- Contemporary appearance that elevates the entire room
- Can be paired with in-wall storage for toilet paper and supplies
I’ll be honest—the installation cost made me hesitate when I first considered this option. But after seeing one in a friend’s European-style bathroom, I understood the appeal. The clean lines and extra breathing room make the splurge worthwhile for serious small-space dwellers.
4. Pocket Door Bathroom Layout
Ever calculated how much space a traditional swinging door steals from your bathroom? Let me save you the math: it’s a lot. Like, a LOT lot.
A standard 28-inch bathroom door requires about 9 square feet of clearance to swing open. In a small bathroom, that’s practically criminal. Enter the pocket door—a sliding solution that disappears into the wall and gives you back every precious inch.
Making Pocket Doors Work
Here’s what you need to know about incorporating a pocket door:
- Requires wall cavity space without electrical or plumbing running through
- Standard widths range from 24 to 36 inches for most residential applications
- Soft-close mechanisms prevent that annoying slamming sound
- Can be lockable just like traditional doors
- Works with various door styles from modern to traditional
FYI, installing a pocket door in an existing wall is definitely more complex than a new construction situation. You’ll likely need to relocate some wiring or add a new header. But the payoff? Your bathroom suddenly feels twice as big because you’re not dodging a door every time you move.
5. Walk-In Shower Only Plan
Here’s a somewhat controversial opinion: if you have a small bathroom and you’re not using your bathtub, get rid of it. I know, I know—resale value and all that. But hear me out.
A walk-in shower without a tub can transform a cramped bathroom into a spacious, modern retreat. Unless you’re a dedicated bath-taker or have young kids who need the tub, that bulky bathtub is probably just collecting dust and taking up precious real estate.
Design Considerations
When going tub-free, keep these points in mind:
- Curbless entries make the space feel even larger and improve accessibility
- Linear drains allow for larger format tiles and cleaner aesthetics
- Glass panels or partial walls maintain openness while controlling splash
- Built-in niches eliminate the need for shower caddies cluttering your space
- Rainfall showerheads add luxury without requiring extra floor space
I converted my master bath from a tub-shower combo to a walk-in shower two years ago. Best decision ever. The room went from feeling like a 1990s builder-grade afterthought to a genuine spa experience. Plus, cleaning is so much faster now. 🙂
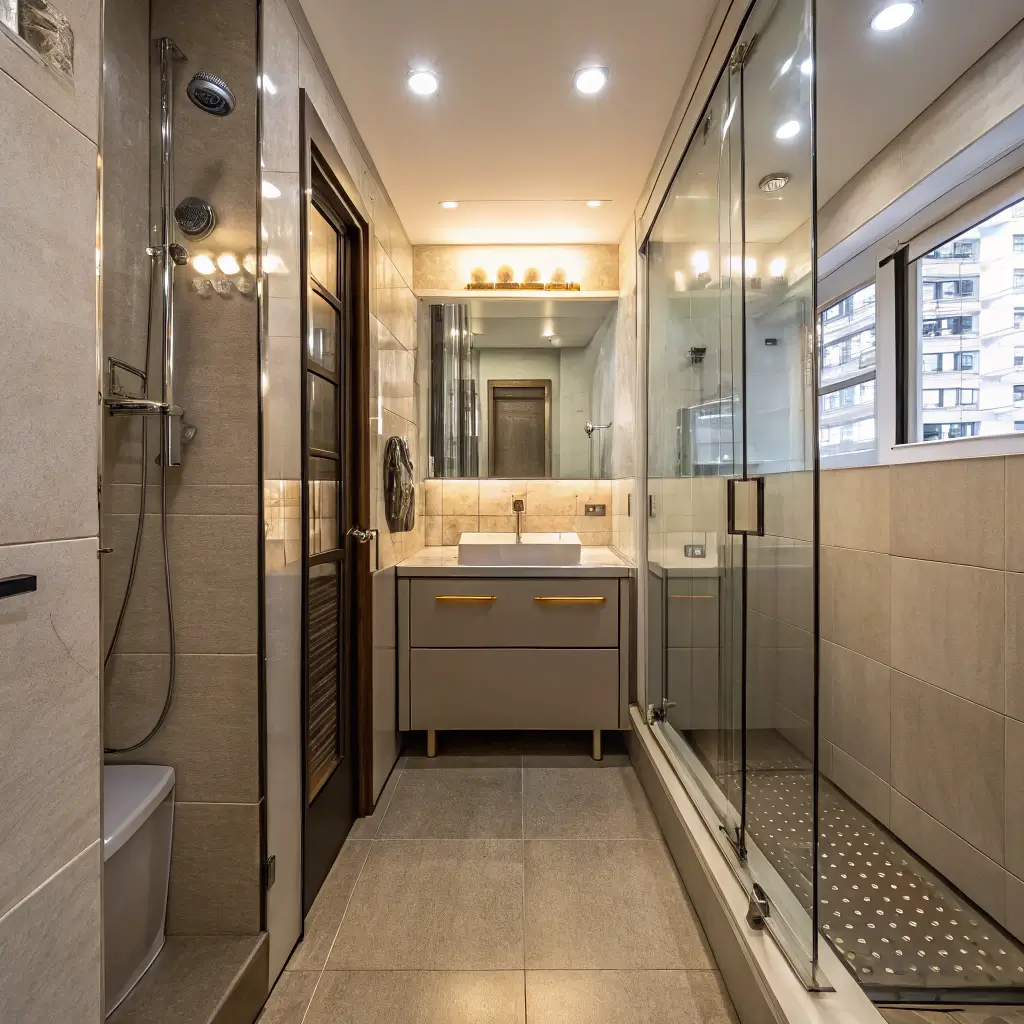
6. Single-Wall Bathroom Layout
Sometimes the simplest solution is the smartest one. The single-wall bathroom layout arranges all your fixtures along one wall, leaving the opposite wall completely free.
This layout maximizes floor space by concentrating plumbing and creating a clear path through the room. It’s particularly brilliant for narrow bathrooms or converted closet spaces where traditional layouts simply don’t fit.
How to Execute This Layout
The single-wall approach requires thoughtful fixture selection:
- Position the toilet between the vanity and shower for balanced proportions
- Choose compact fixtures designed specifically for small spaces
- Install wall-mounted faucets to allow for narrower vanity depths
- Use a continuous countertop over the toilet tank for additional surface space
- Add shelving or cabinets on the opposite wall for storage
This layout works especially well when you’ve got plumbing access from behind, like a hallway or closet space. You can run all your water lines and drains in one concentrated area, which also makes future repairs way easier. And honestly, who wants to deal with complicated plumbing problems in a tiny bathroom?
Also Read: 15 Beautiful Small Space Bathroom Design Ideas for Tiny Spaces
7. Narrow Rectangular Bathroom Plan
Got a bathroom that resembles a bowling alley? Welcome to the club. Narrow rectangular bathrooms are incredibly common, especially in older homes and apartments where builders squeezed bathrooms into whatever leftover space existed.
The key to narrow bathroom success lies in strategic fixture placement and creating visual width wherever possible. You’re essentially working against the room’s natural tendency to feel like a tunnel.
Layout Strategies for Narrow Spaces
Here’s how to make a narrow bathroom work:
- Place the shower or tub at the far end to create a focal point
- Position the vanity and toilet along one long wall keeping the opposite wall minimal
- Use large-scale floor tiles laid horizontally to create width illusion
- Install a long horizontal mirror spanning most of the vanity wall
- Choose a pedestal sink or narrow vanity to maintain walking space
I’ve seen people try to fight their narrow bathroom’s natural shape, and it never ends well. Instead, embrace the layout and work with it. A well-designed narrow bathroom can actually feel intentional and even a bit luxurious—like a private corridor leading to your own personal oasis.
8. Wet Room Minimal Layout

Let’s get European for a minute. Wet rooms have been popular overseas for decades, and they’re finally catching on here for good reason.
A wet room eliminates the shower enclosure entirely, waterproofing the entire floor and walls so the shower simply shares space with the rest of the bathroom. It’s minimalism taken to its logical conclusion, and in small spaces, it’s absolutely brilliant.
Creating a Functional Wet Room
Wet rooms require some specific considerations:
- Proper waterproofing is non-negotiable—every surface needs membrane protection
- Floor pitch toward the drain must be precise to prevent standing water
- Heated floors prevent that cold, damp feeling after showering
- Glass partition panels can contain splash while maintaining openness
- Quality ventilation becomes even more important to manage moisture
IMO, wet rooms represent the future of small bathroom design. When you eliminate the shower curb and enclosure, you remove visual barriers that make spaces feel smaller. The whole room becomes your shower, which sounds weird until you experience how liberating it actually feels.
Fair warning though: wet rooms require professional installation. This isn’t a weekend DIY project unless you really know what you’re doing with waterproofing. Trust me, water damage repairs cost way more than hiring someone to do it right the first time.
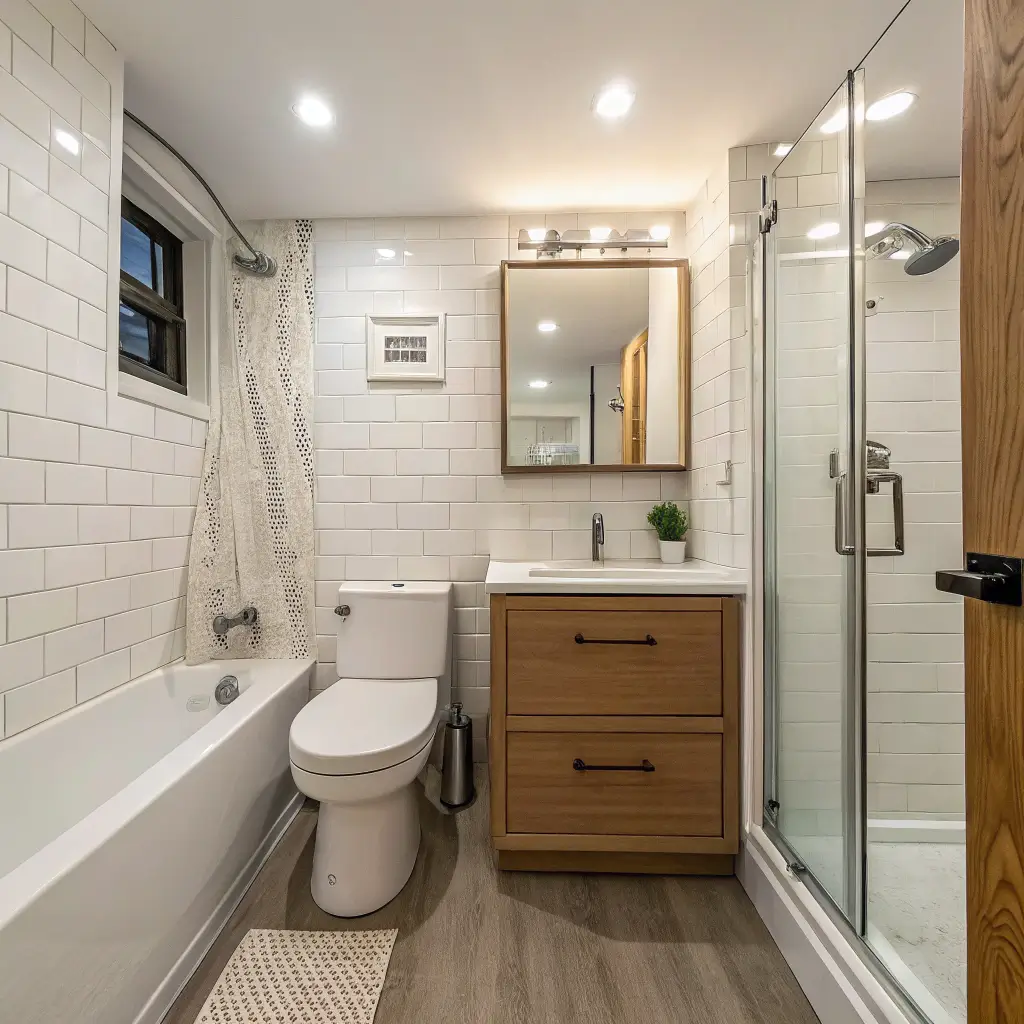
9. Compact Tub-Shower Combo

Alright, I know I earlier suggested ditching the tub, but I understand that’s not realistic for everyone. If you need both a tub and shower in a small bathroom, the combo unit is your best friend.
Modern tub-shower combos pack both functions into approximately 30 square feet, making them incredibly space-efficient while still meeting all your bathing needs. They’ve come a long way from those ugly fiberglass units your parents had in the 80s.
Maximizing Your Combo Space
Here’s how to make the most of a tub-shower combo layout:
- Choose a 60-inch standard tub which fits most alcoves perfectly
- Install curved shower rods for extra elbow room while showering
- Use frameless glass doors instead of curtains for a more open feel
- Add built-in corner shelves during installation for storage
- Consider a deeper soaking tub if relaxation is a priority
The trick with combo units is making them look intentional rather than like a compromise. High-quality tile surrounds, glass doors instead of plastic curtains, and thoughtful fixture selection can elevate a basic combo into something genuinely appealing.
Also Read: 15 Creative Small Full Bathroom Ideas for Tiny Layouts
10. Open Vanity Small Bathroom Layout

Remember when I mentioned floating vanities? Open vanities take that concept even further by eliminating cabinet doors and sometimes even the cabinet box entirely.
Open vanity layouts use console-style sinks or wall-mounted basins that expose the area underneath, creating visual depth and making the room feel significantly larger. It’s that see-through effect again—your brain registers more space when it can see more floor.
Making Open Vanities Practical
Here’s the reality of living with an open vanity:
- Storage requires attractive baskets or bins since everything’s visible
- Plumbing fixtures become design elements so invest in quality
- Towel storage can go underneath on open shelves or bars
- Counter space may be limited so wall-mounted accessories help
- Cleaning underneath is effortless which is honestly amazing
I’ll admit, open vanities require a bit more organizational discipline. You can’t just shove random toiletries under the sink and close the door. But this forced organization actually helped me declutter my bathroom significantly. Turns out I didn’t need seventeen half-empty shampoo bottles anyway.
11. Galley-Style Bathroom Layout
Named after ship galleys (those narrow kitchen corridors), galley bathrooms place fixtures on opposite walls with a walkway down the center.
This layout efficiently uses both walls while maintaining a clear traffic path. It works particularly well in bathrooms that are wider than they are deep, or when you’re working with an oddly shaped space.
Executing the Galley Layout
Here’s how to make a galley bathroom successful:
- Place the vanity and toilet on opposite walls to balance visual weight
- Position the shower at one end as a natural terminus
- Ensure at least 30 inches of clearance between facing fixtures
- Use matching materials on both sides for visual cohesion
- Install lighting centrally to illuminate both sides equally
Ever wonder why professional designers love galley layouts? They create natural flow and make small spaces feel organized rather than chaotic. When fixtures face each other across a clear path, the bathroom suddenly makes sense spatially.
12. Diagonal Fixture Placement Layout
Here’s where things get interesting. Diagonal placement rotates fixtures at 45-degree angles, creating surprising space efficiencies that traditional perpendicular layouts miss.
Angling fixtures diagonally opens up floor space in unexpected ways and creates visual interest that standard layouts simply can’t match. It’s a bit unconventional, but that’s exactly why it works.
When Diagonal Works Best
Consider diagonal placement in these situations:
- Corner toilets tuck into unused corner space brilliantly
- Angled vanities create more walking room while maintaining functionality
- Diamond-pattern tile reinforces the diagonal theme visually
- Corner sinks work great in tiny powder rooms
- Doorway clearance improves when fixtures angle away from entries
This layout requires some careful planning and possibly custom fixtures, but the results can be stunning. I’ve seen diagonal layouts transform bathrooms that seemed impossible into genuinely functional, beautiful spaces.
Also Read: 15 Clever Small Bathroom Interior Ideas to Save Space
13. Hidden Storage Wall Layout
Storage is the eternal small bathroom struggle. Where do you put towels, toiletries, cleaning supplies, and that random collection of products you swear you’ll use someday?
The hidden storage wall layout incorporates floor-to-ceiling built-ins that look like regular walls but secretly contain all your bathroom necessities. It’s basically a magic trick for organization nerds.
Creating Your Hidden Storage
Here’s how to implement this clever solution:
- Recessed medicine cabinets disappear into wall cavities
- Full-height cabinet towers can flank the vanity or toilet
- Push-to-open mechanisms eliminate visible hardware
- Mirrored fronts reflect light and hide storage simultaneously
- Built-in hamper compartments keep dirty towels out of sight
The beauty of hidden storage is that your bathroom can look minimalist and spa-like while actually containing everything you need. Guests will wonder how you keep things so tidy. Little do they know about the secret cabinet empire hiding behind those clean walls.
14. Minimalist European Bathroom Layout

European bathrooms have always done more with less. Space constraints in older European buildings forced designers to get creative centuries ago, and we can learn a lot from their solutions.
The European approach emphasizes clean lines, quality materials, and ruthless efficiency. Every element earns its place through function or beauty—preferably both.
European Design Principles
Incorporate these European-inspired elements:
- Wall-hung everything—toilets, vanities, and even bidets
- Concealed cisterns and plumbing hidden behind wall systems
- Radiant floor heating instead of bulky radiators
- Frameless glass shower enclosures with minimal hardware
- Integrated toilet and bidet functions in a single fixture
What I love about European bathroom design is the commitment to intentionality. Nothing exists without purpose. That philosophy forces you to question every element: do I really need this, or am I just used to having it? Often, the answer leads to a simpler, more beautiful space.
15. Mirror-Expanded Small Bathroom Layout

Let’s end with the oldest trick in the interior design book—and one of the most effective. Strategic mirror placement can visually double your bathroom’s perceived size without changing a single fixture.
Mirror Placement Strategies
Here’s how to maximize the mirror effect:
- Full wall mirrors behind the vanity create the most dramatic expansion
- Mirrored cabinet doors serve double duty as storage and reflection
- Mirrors opposite windows bounce natural light throughout the space
- Floor-to-ceiling mirror panels on narrow walls add serious depth
- Mirrored tile accents create sparkle and dimension
I’ll be honest—when I first heard about using large mirrors in small bathrooms, I thought it sounded a bit dated. Like something from an 80s design magazine. But when done well, with frameless mirrors or modern framed options, the effect is genuinely transformative. My current bathroom has a floor-to-ceiling mirror behind the vanity, and visitors consistently overestimate the room’s actual size.
The key is committing to it. A small mirror above the vanity helps with grooming but doesn’t do much for spatial perception. Go big or stay home, as they say.
Bringing It All Together
So there you have it—15 practical layout ideas that can transform even the most challenging small bathroom into a functional, beautiful space. And honestly? You don’t have to pick just one approach. The best small bathroom designs often combine multiple strategies: maybe a floating vanity with hidden storage, or a corner shower with European-style wall-mounted fixtures.
The secret to small bathroom success isn’t finding more space—it’s using the space you have more intelligently. Every inch matters, every fixture choice impacts the whole room, and every design decision should serve both form and function.
My biggest piece of advice? Start by measuring your space obsessively, then play with different arrangements on paper (or in a design app) before committing to anything permanent. What looks good in a magazine might not work in your specific bathroom’s dimensions.
And remember—small bathrooms have one huge advantage: they’re relatively affordable to renovate. Unlike a full kitchen remodel that could cost a small fortune, bathroom updates are manageable projects that deliver major impact. Whether you tackle it yourself or hire professionals, transforming that cramped bathroom into something special is absolutely achievable.
Now go grab that measuring tape. Your perfect small bathroom layout is waiting to be discovered. 🙂