15 Inspiring Simple Outdoor Kitchen Ideas and Functional Layouts
You know that feeling when you’re grilling burgers and running back and forth between your indoor kitchen and the backyard like you’re training for a marathon? Yeah, I’ve been there.
After spilling my third margarita on that trek last summer (tragic, I know), I finally decided to create my own outdoor cooking space. And guess what? You don’t need to sell a kidney to make it happen.
Let me walk you through 15 brilliantly simple outdoor kitchen ideas that won’t require a second mortgage or a degree in architecture. These layouts prove that functional doesn’t have to mean fancy, and sometimes the simplest solutions work best. Trust me, I’ve tried the complicated route, and it’s overrated.
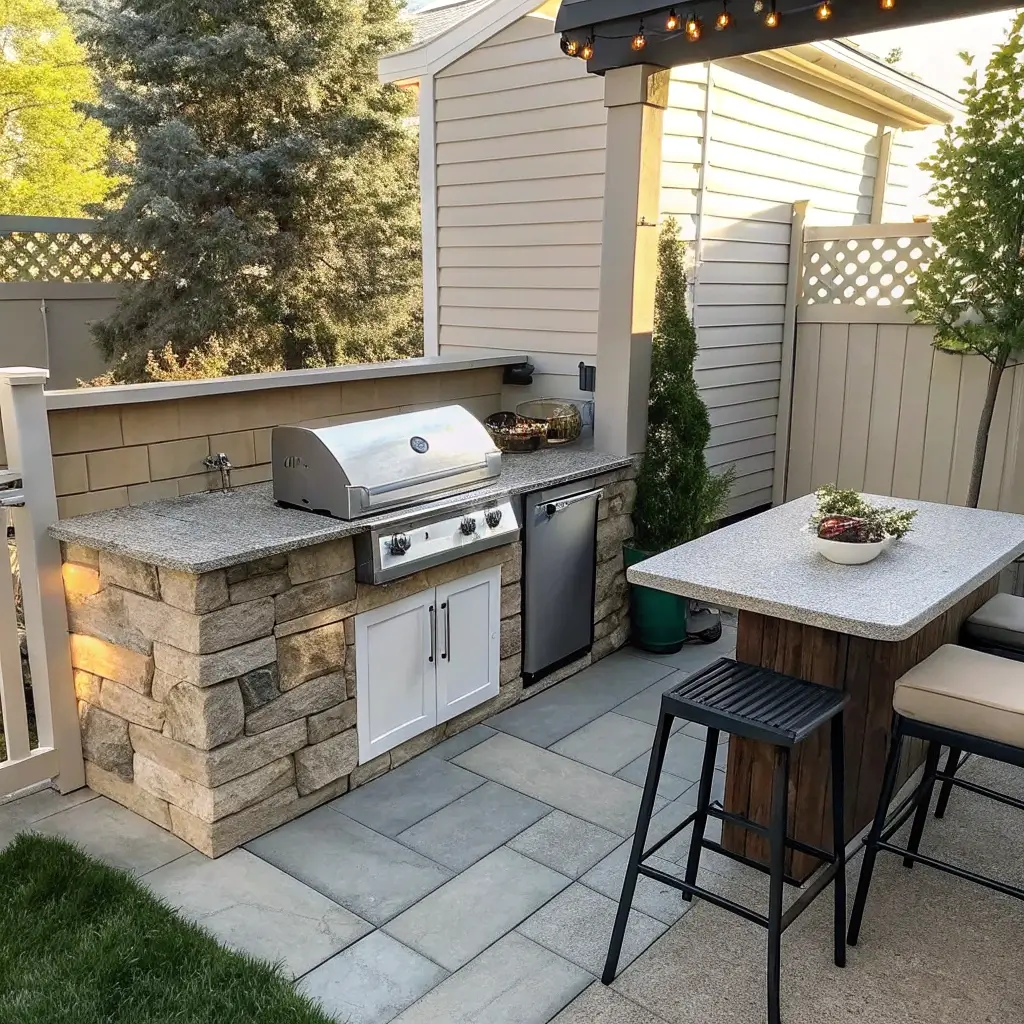
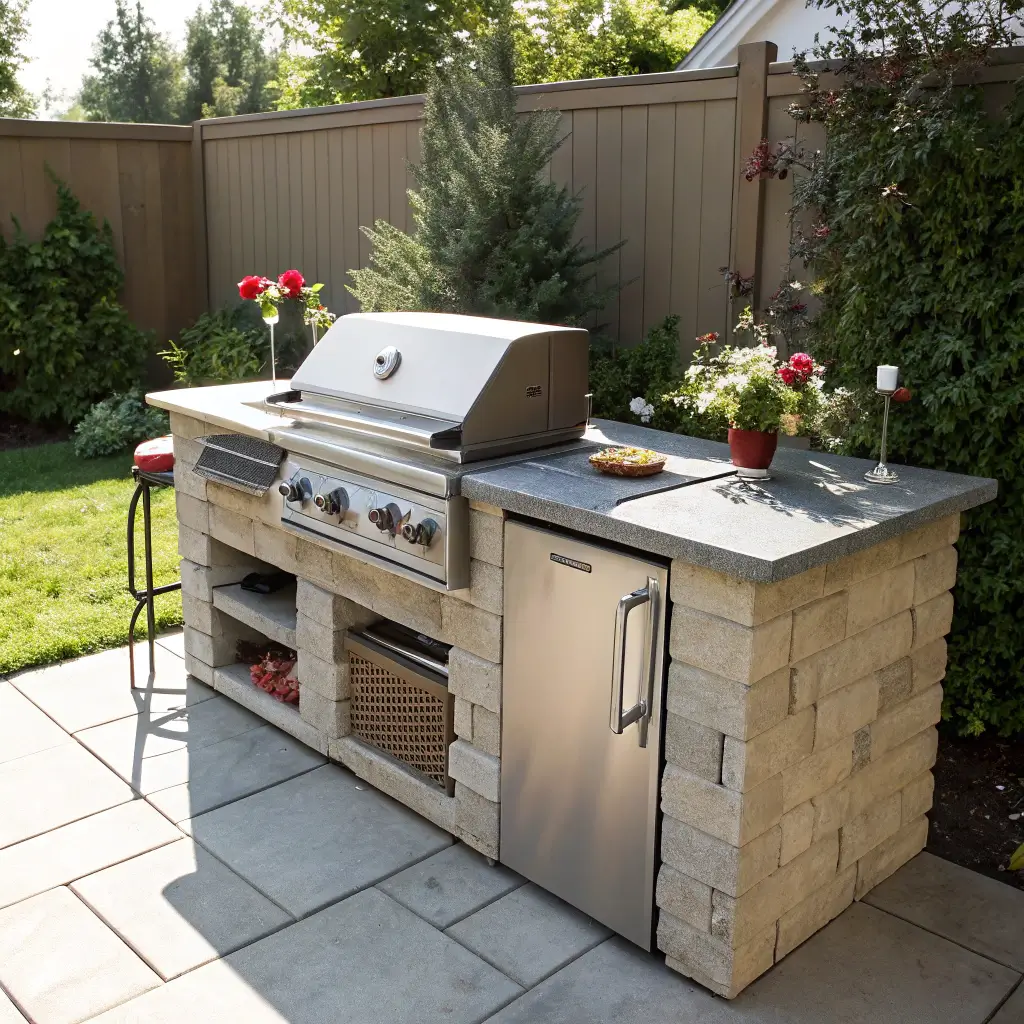
Compact Grill Island Setup
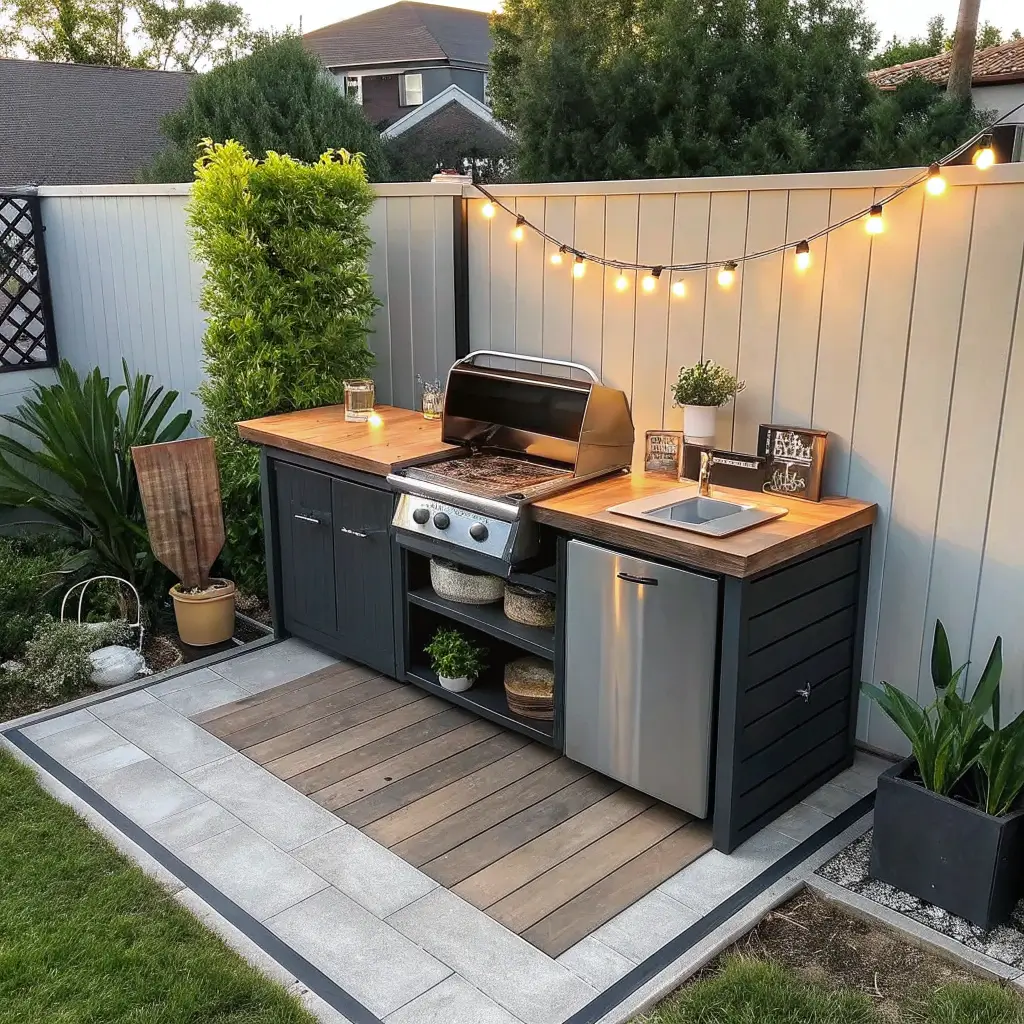
Picture this: a small island that packs all your grilling essentials into one neat package. I’m talking about a 36 to 48-inch wide setup that combines your grill with just enough counter space to hold your plates and prep work.
The beauty of a compact grill island? It fits practically anywhere. Mine sits perfectly on my 10×10 patio, leaving plenty of room for chairs and my potted herbs. You want to position this baby where the smoke won’t blow directly into your house – learned that one the hard way during my first cookout.
Here’s what makes this layout work so well:
- Built-in storage underneath for propane tanks and tools
- Counter space on both sides of the grill (even 12 inches makes a difference)
- Optional bar-height extension for guests to gather around
- Wheels on the bottom if you want mobility
The key here is choosing a grill that fits your actual needs, not your BBQ fantasies. Do you really cook for 20 people every weekend? Probably not. A 3-burner grill handles most family meals perfectly while leaving room for those essential counter areas.
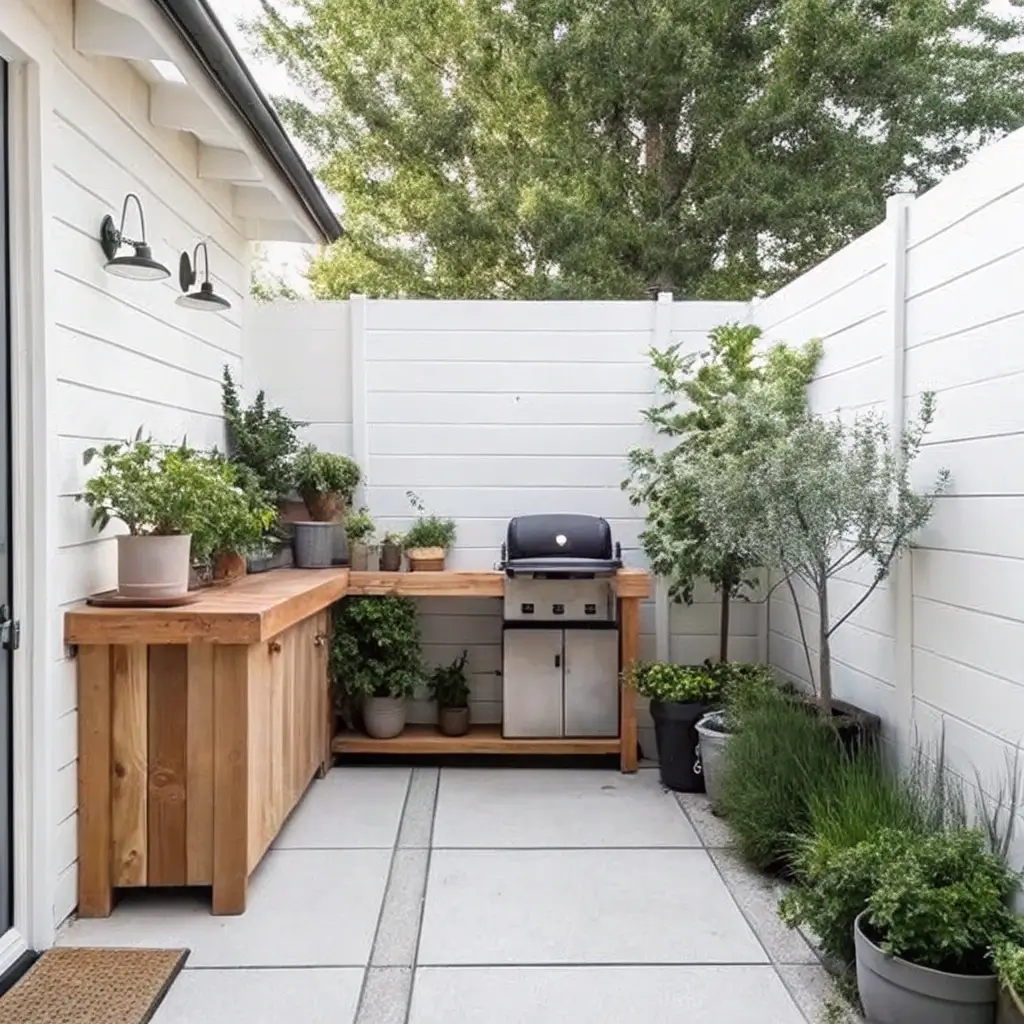
Minimalist Wooden Counter Station
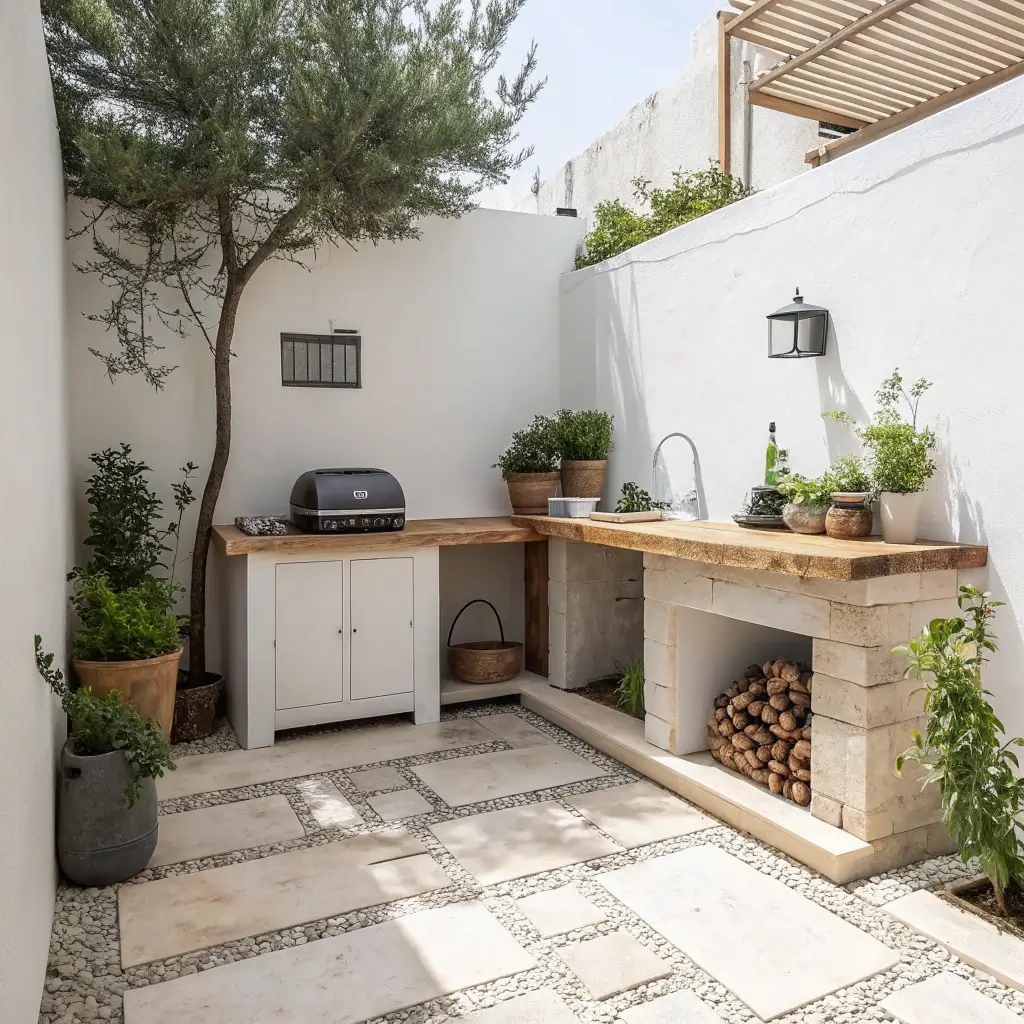
Sometimes less really is more. This setup features a simple wooden counter that runs along your patio wall or fence, creating a clean, modern workspace without the bulk.
I built mine from cedar (naturally weather-resistant and smells amazing BTW), and it only took a weekend. The counter stands at standard kitchen height – 36 inches – which saves your back during long prep sessions. You can customize the length based on your space, but I find 6 to 8 feet gives you plenty of room without overwhelming smaller patios.
What makes this minimalist approach brilliant:
- No permanent installation required for the grill
- Easy to clean and maintain
- Costs under $300 if you DIY
- Looks intentional, not like an afterthought
Pro tip: Add a few hooks underneath for your grilling tools and maybe a magnetic knife strip on the backsplash. These small touches make a huge difference in functionality.
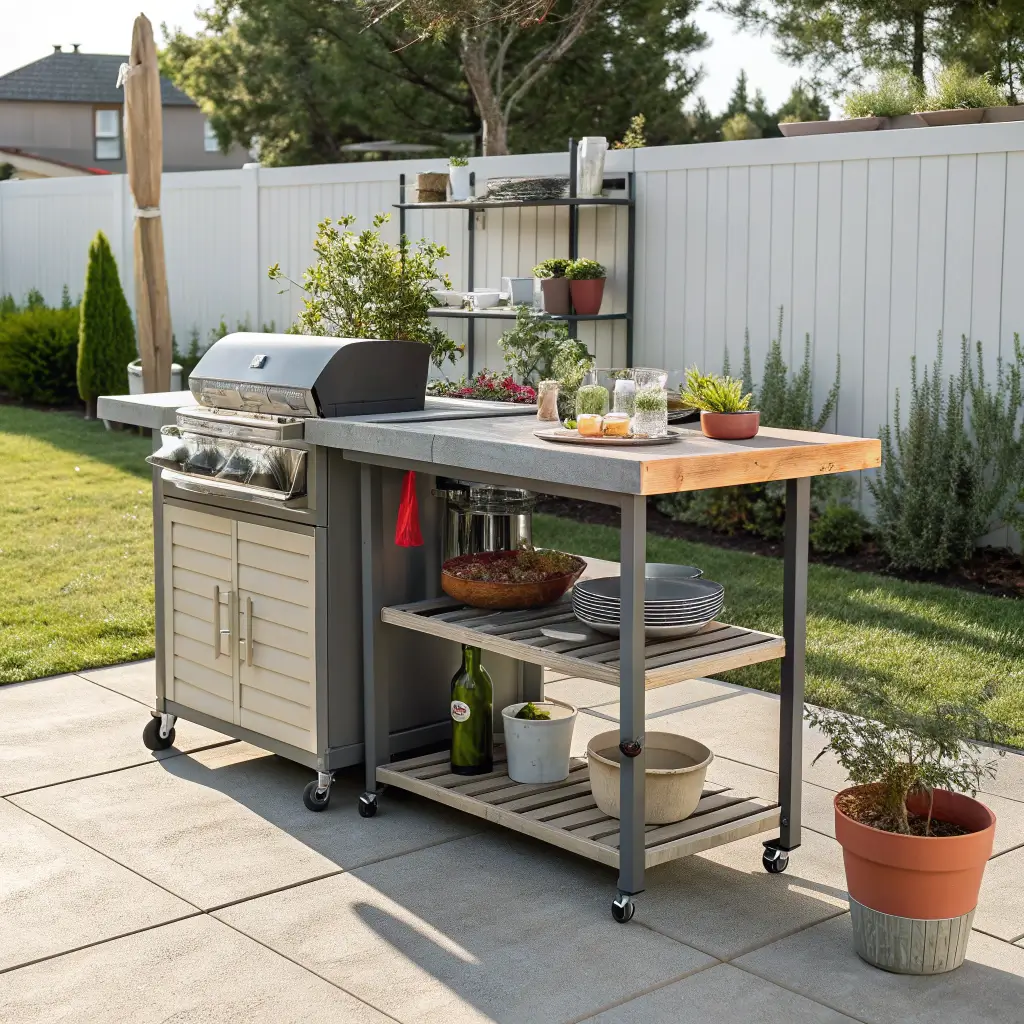
Portable Cart Outdoor Kitchen
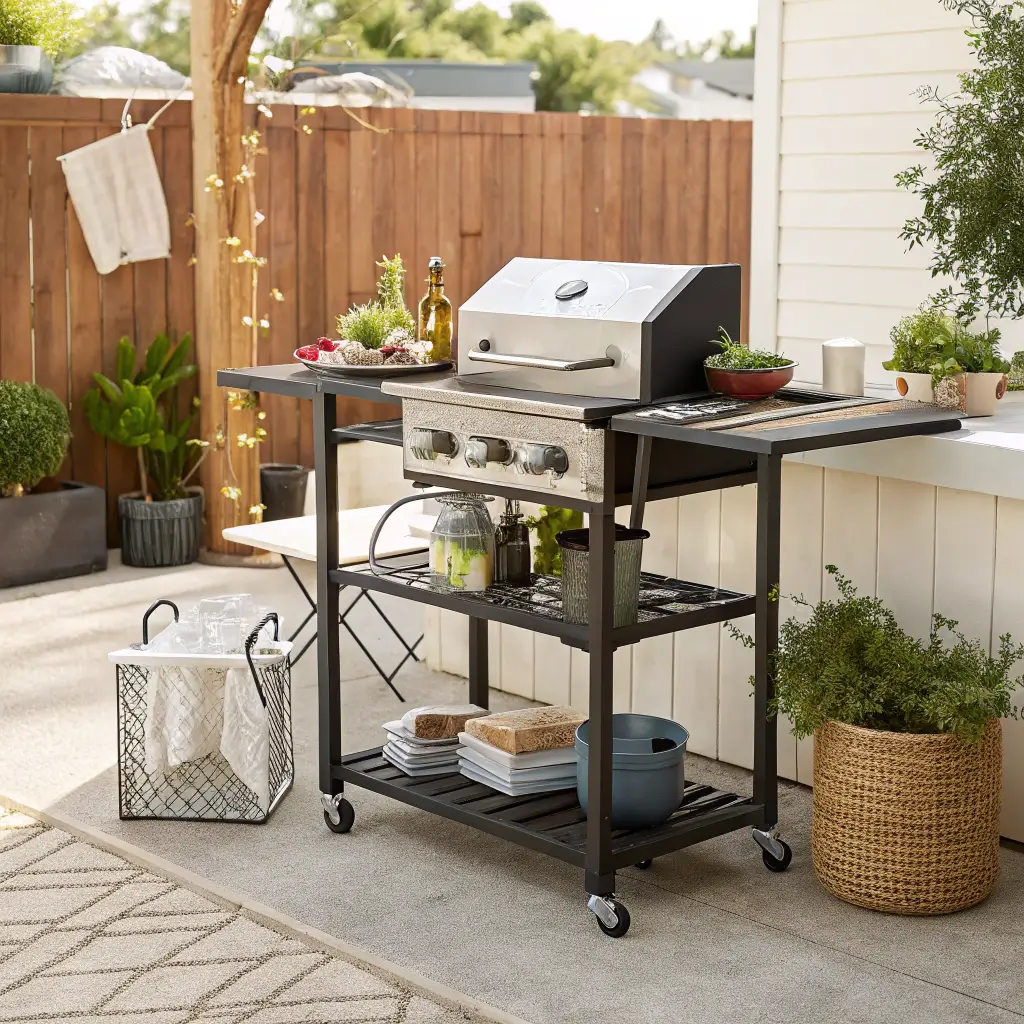
Who says your outdoor kitchen needs to stay put? A portable cart setup gives you ultimate flexibility – grill on the patio today, by the pool tomorrow.
Look for a cart with at least two shelves and side tables that fold out. Mine has saved countless parties when I needed to relocate due to wind or sun. The best part? When winter comes (or hurricane season if you’re in my neck of the woods), you wheel everything into the garage. No weatherproofing drama required.
Essential features for your portable setup:
- Heavy-duty locking wheels (trust me on this)
- Stainless steel or weather-treated wood construction
- Fold-out extensions for extra prep space
- Built-in paper towel holder and trash bag hook
Stone Paver Grill Corner
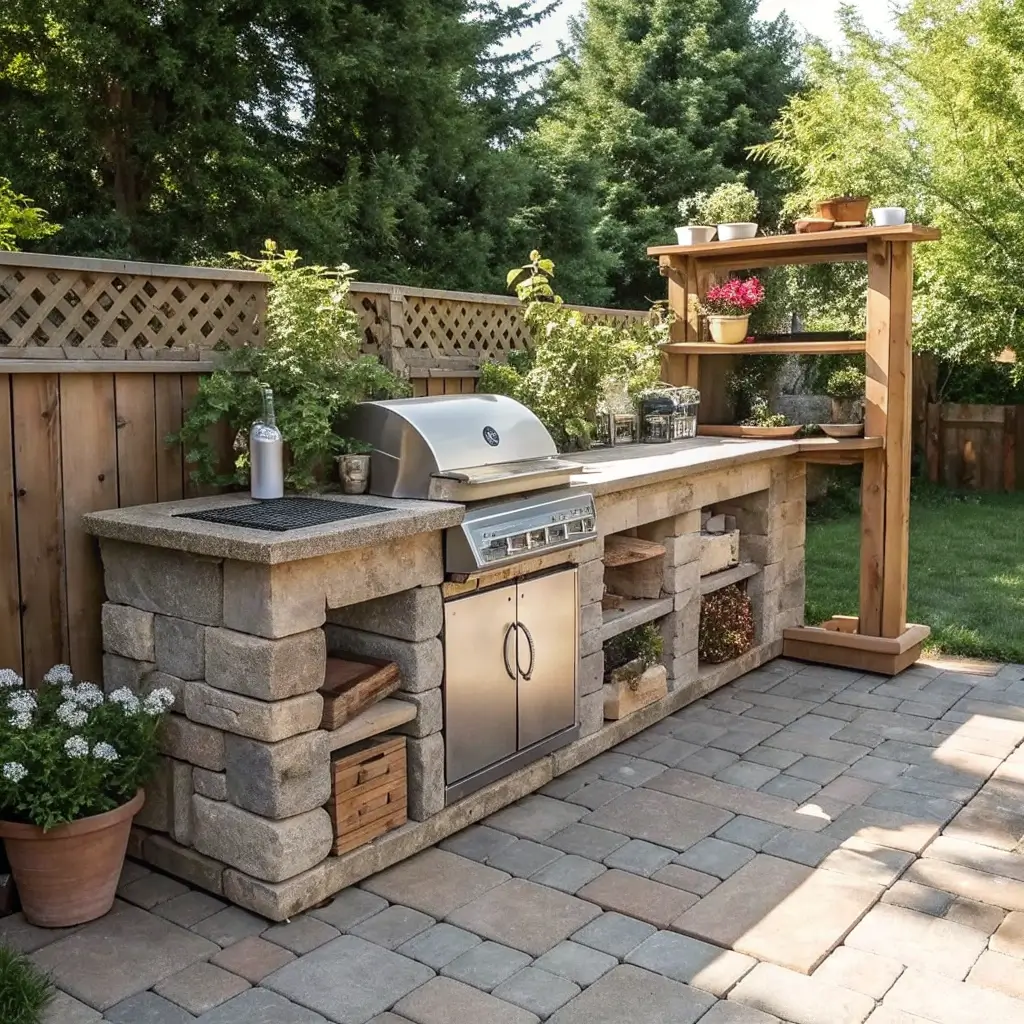
Ever notice how a dedicated corner just feels more official? Creating a stone paver platform for your grill corner transforms a random spot into a legitimate outdoor kitchen zone.
I used 16×16 inch pavers to create a 6×6 foot pad – large enough for my grill plus a small prep table. The raised platform (even just 4 inches) defines the space and prevents grass from growing around your grill. Plus, it looks way more expensive than the $200 I spent on materials.
Making Your Stone Corner Work
The trick is proper ground preparation. You need:
- Level ground (obviously)
- Crushed gravel base for drainage
- Sand layer for leveling
- Pavers arranged in your chosen pattern
Add some solar lights along the edges, and suddenly your simple grill corner looks like something from a magazine. Not bad for a weekend project, right?
Small L-Shaped Patio Kitchen
The L-shape might be the smartest layout ever invented for small spaces. It maximizes corner areas while creating natural work zones – one side for grilling, the other for prep.
My L-shaped setup measures just 6 feet on each side but feels twice as large because of the efficient layout. The corner becomes prime real estate for either your grill or a small sink (if you’re feeling fancy). This design naturally creates a social barrier too, keeping guests out of your cooking zone while still letting you chat.
Key benefits of going L-shaped:
- Defines separate cooking zones without walls
- Creates natural traffic flow
- Maximizes corner spaces that often go unused
- Provides counter space from multiple angles
Simple Pallet BBQ Counter
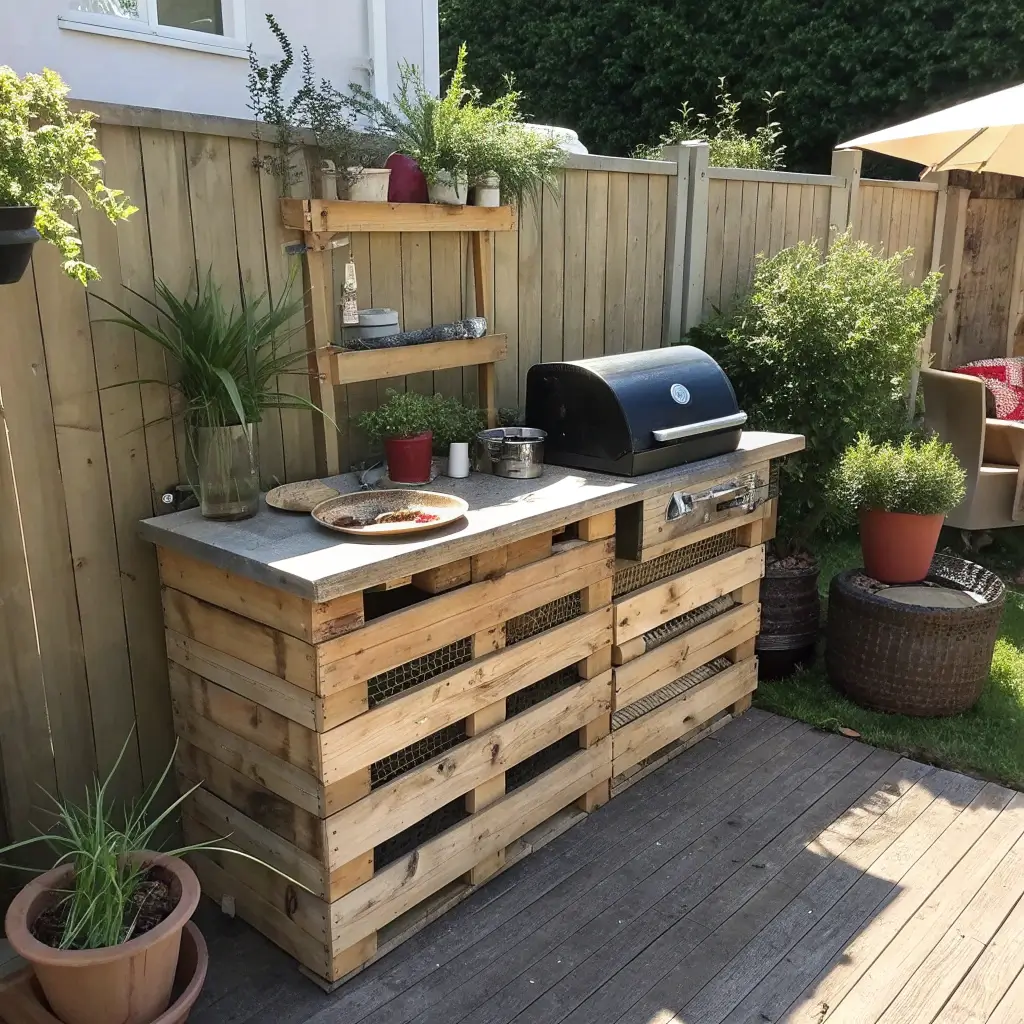
Okay, hear me out on this one. Pallets might seem too DIY-Pinterest for some folks, but they create surprisingly sturdy outdoor counters. And the price? Usually free 🙂
I snagged four pallets from a local warehouse, sanded them down (splinters are not your friend), and stacked them to create a rustic counter setup. Add a piece of butcher block or tile on top, and you’ve got a legitimate prep surface that cost less than a nice dinner out.
Pallet Kitchen Essentials
Here’s what makes pallet counters actually work:
- Heat-treated pallets only (look for the HT stamp)
- Weather sealant to prevent rot
- Proper securing with screws, not just stacking
- Level base (concrete blocks work great)
The industrial look fits perfectly with modern farmhouse vibes, and you can paint or stain them any color you want.
Also Read: 10 Simple Outdoor Kitchen DIY on a Budget Ideas to Try
Basic Concrete Block Kitchen
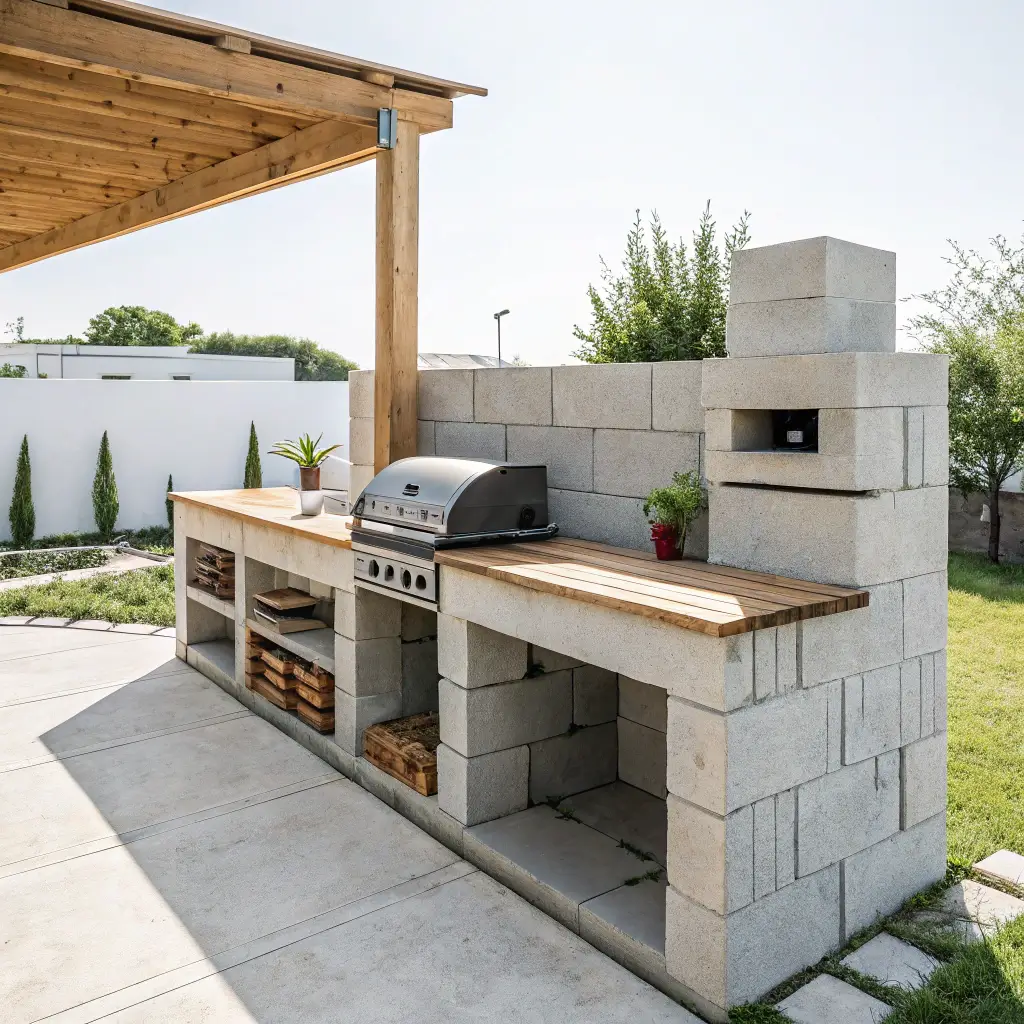
Concrete blocks might not win beauty contests, but they win at durability and affordability. Stack them, add a countertop, and boom – instant outdoor kitchen that’ll outlast your mortgage.
I’ve seen these setups survive hurricanes (seriously). The blocks cost about $2 each, and you can create any configuration you want. My neighbor built his entire setup for under $500, including a granite remnant countertop he scored from a local fabricator.
Why concrete blocks rock:
- No special skills required to build
- Naturally heat and weather resistant
- Can be reconfigured anytime
- Paint them for instant style upgrade
Rustic Farmhouse Outdoor Prep Table
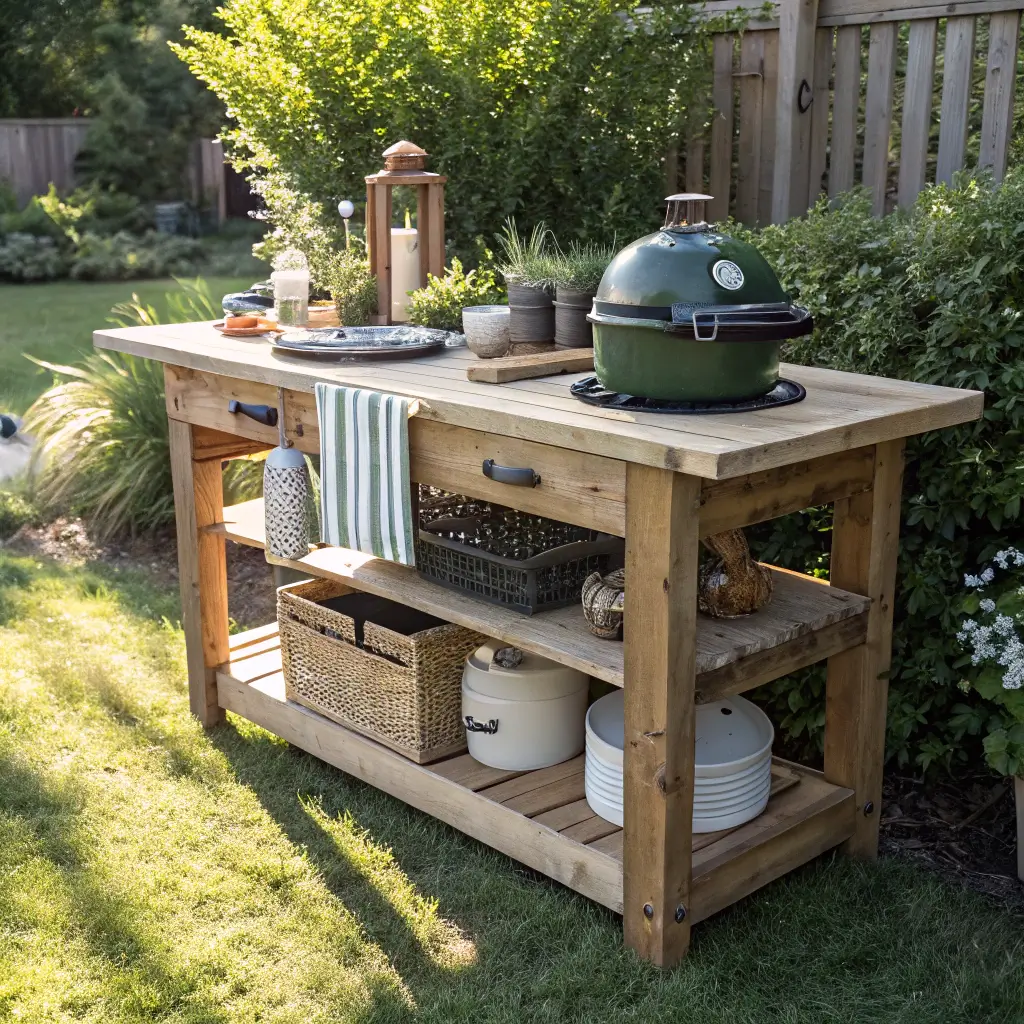
Sometimes you just need a solid prep table, and the farmhouse style nails both form and function. Think chunky wood, simple lines, and enough surface area to actually work on.
I repurposed an old potting bench (garage sale find for $30) and added a few modifications. A lower shelf holds plates and serving dishes, while hooks on the side keep tools within reach. The weathered wood look means you don’t stress about every little stain or scratch – they add character.
Must-have features:
- Minimum 2×4 foot surface area
- Lower shelf for storage
- Towel bars or hooks on sides
- Optional: zinc or stainless steel top for easy cleaning
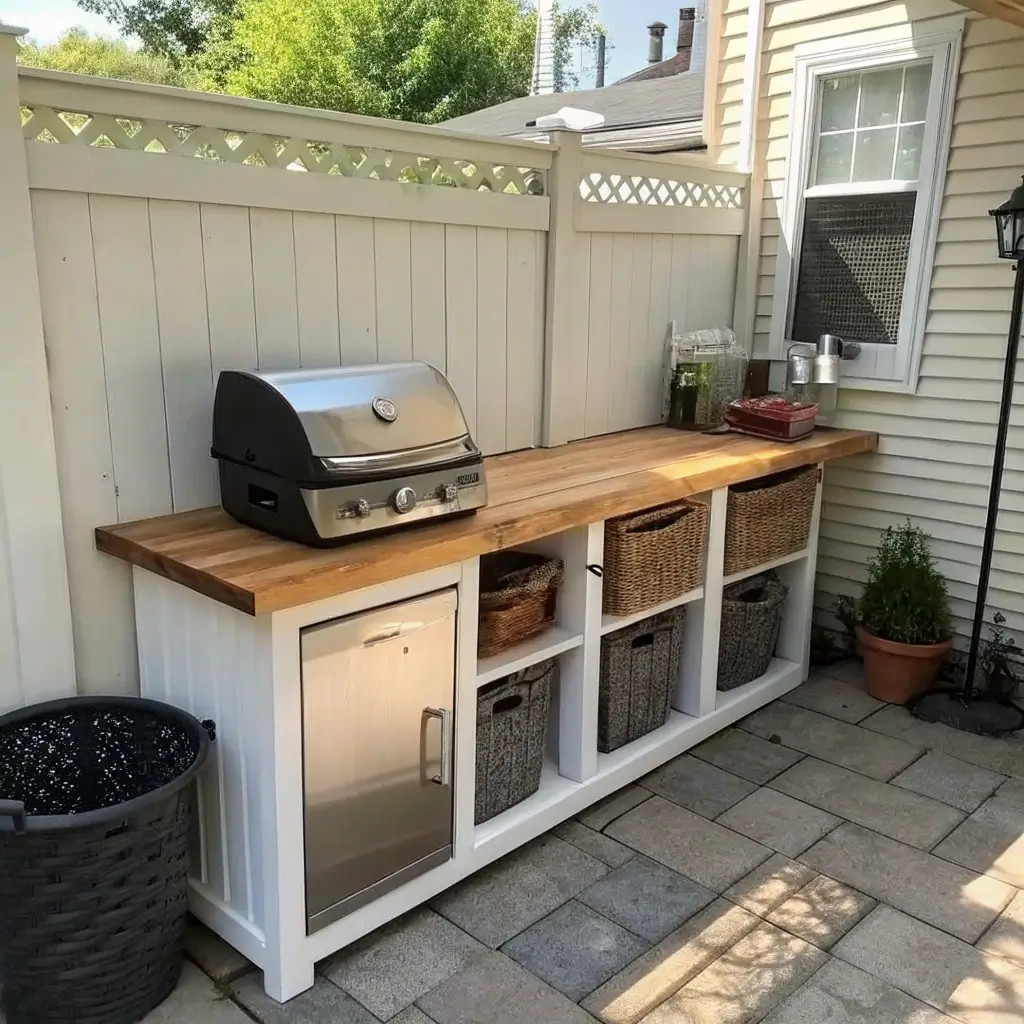
Built-In Grill With Open Shelving
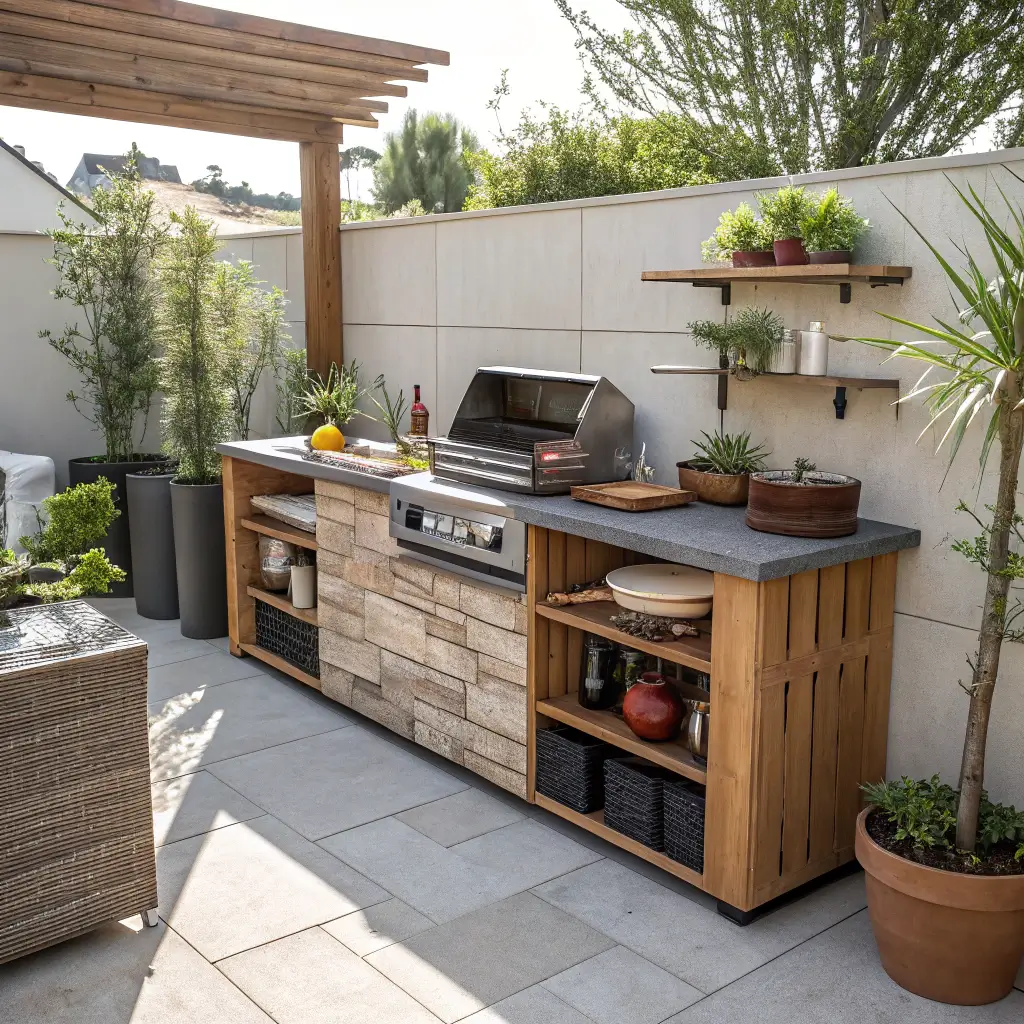
Committing to a built-in grill feels like a big step, but pairing it with open shelving keeps things simple and accessible. No cabinet doors to swing open, no complicated storage systems – just grab and go convenience.
My setup uses three floating shelves on each side of the grill. Cedar boards cost me about $100 total, and installation took one afternoon. The open design means everything dries quickly after rain, and you can see exactly what you need at a glance.
Shelf Organization Tips
Make your open shelving work harder:
- Top shelf: decorative items and plants
- Middle shelf: frequently used plates and tools
- Bottom shelf: heavier items like cast iron
Add some S-hooks for hanging tools, and maybe a few baskets for smaller items. The key is keeping it organized but not obsessively neat – this is outdoor cooking, not a museum display.
Also Read: 15 Amazing Outdoor Kitchen DIY Ideas for Small Spaces
Outdoor Kitchen Under a Pergola
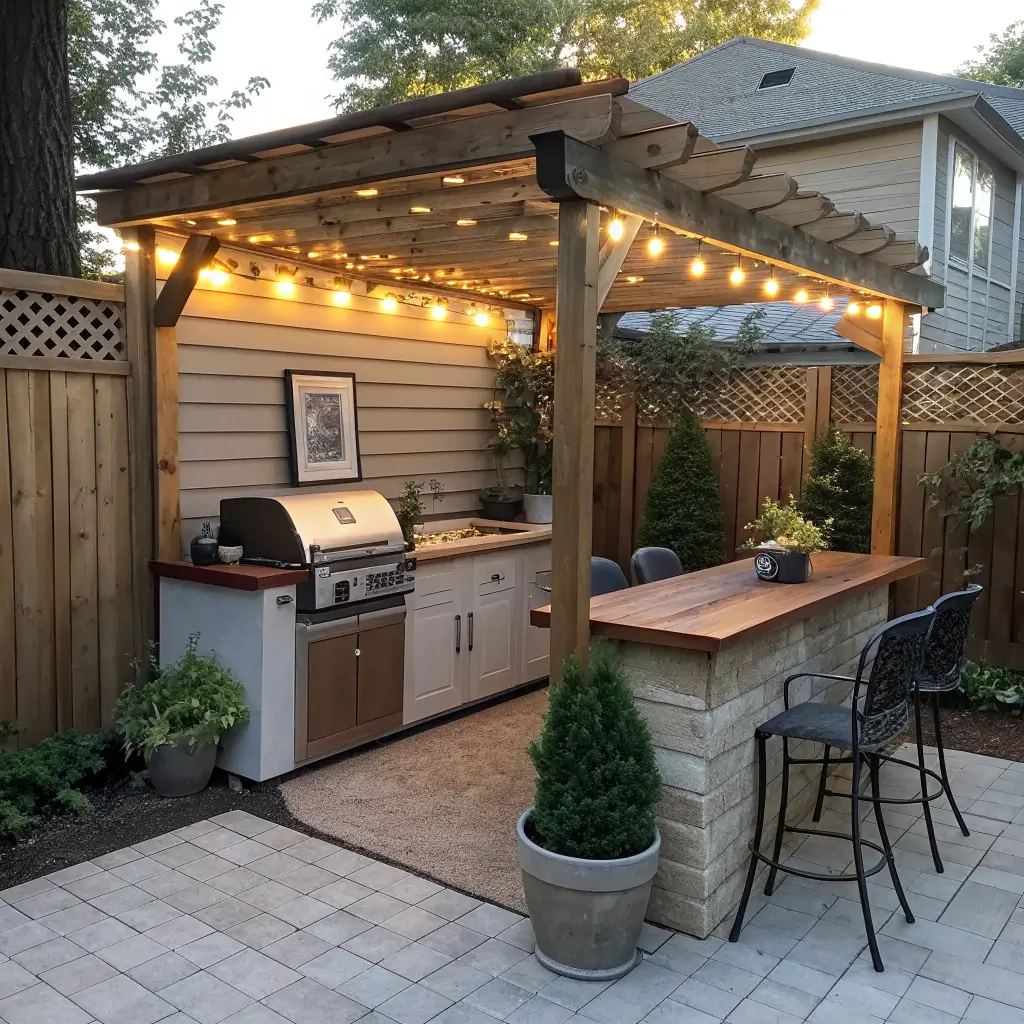
Adding a pergola over your cooking area is like giving your outdoor kitchen a room of its own. You get shade, defined space, and somewhere to hang lights – total game changer.
Building a basic pergola costs less than you’d think (mine ran about $800 for a 10×10 structure). The posts define your kitchen boundaries while the overhead beams provide mounting points for everything from fans to herb gardens. String some Edison bulbs across the top, and suddenly you’re cooking in the most Instagram-worthy spot in the neighborhood.
Why pergolas make sense:
- Protection from sun without blocking airflow
- Creates intimate cooking atmosphere
- Provides structure for climbing plants
- Natural spot for outdoor curtains if you want privacy
FYI, you can buy pergola kits that go up in a day if DIY construction isn’t your thing.
Tiny Balcony Cooking Nook
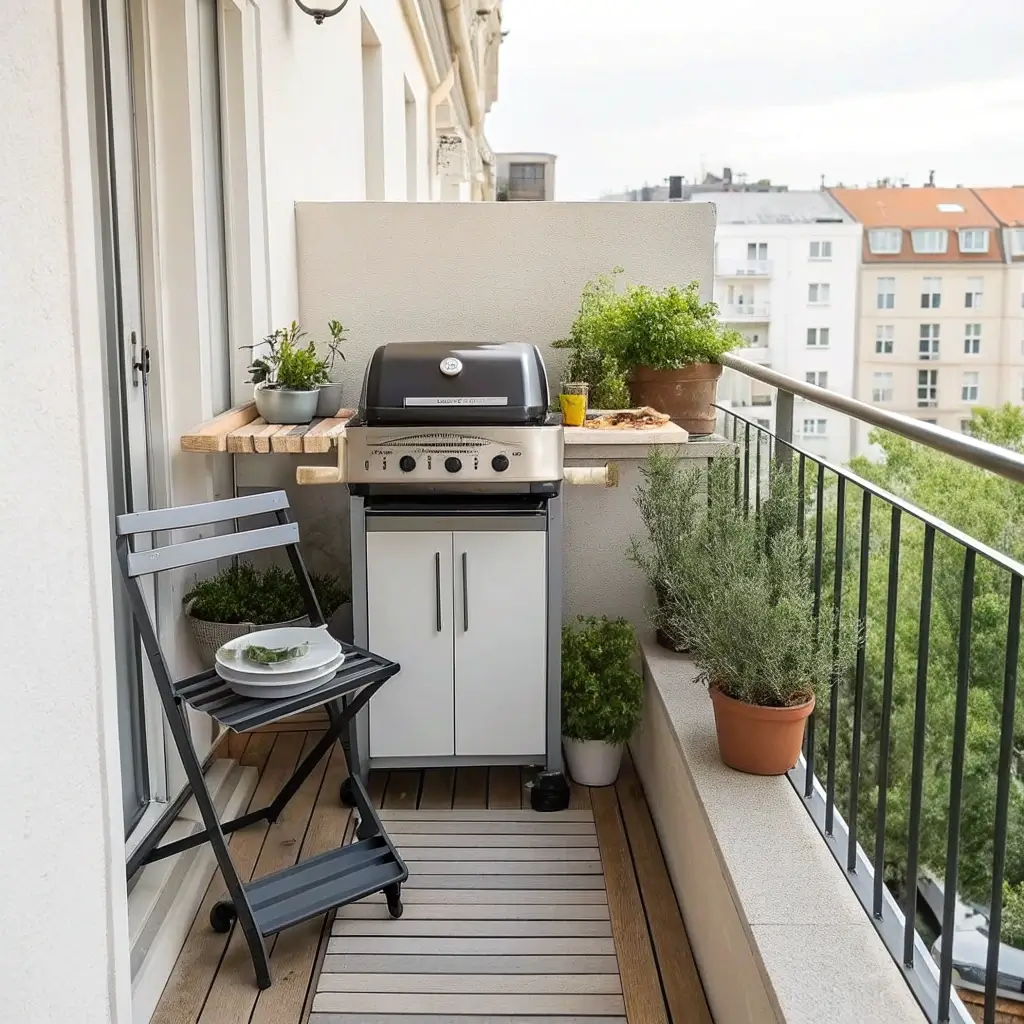
Living in an apartment doesn’t mean giving up on outdoor cooking dreams. Even a 4×6 foot balcony can become a functional cooking space with smart planning.
My friend transformed her tiny balcony with a compact electric grill, a folding wall-mounted table, and vertical storage. The whole setup disappears when not in use, leaving room for her morning coffee setup. Check your lease first though – some places have restrictions on grills (learned that one the expensive way).
Balcony kitchen essentials:
- Electric or small gas grill (check regulations)
- Fold-down or removable surfaces
- Vertical storage solutions
- Rail-mounted planters for herbs
Rolling Kitchen Bar Station
Think of this as a mobile command center for outdoor entertaining. A rolling bar cart adapted for cooking duty brings flexibility that fixed setups can’t match.
I converted a industrial bar cart ($150 on sale) into my outdoor prep station. The top holds my cutting board and frequently used items, middle shelf stores plates and napkins, bottom holds beverages. Best part? It rolls wherever the party moves, from poolside to patio to driveway tailgates.
Smart Cart Modifications
Upgrade your rolling station with:
- Butcher block top for actual food prep
- Magnetic strips for knives
- Hanging racks for tools
- Built-in cooler space (genius, right?)
Also Read: 15 Functional Outdoor Kitchen Ideas for Ultimate Entertaining
Simple Sink-Free Prep Area
Not everyone needs or wants plumbing outdoors. A sink-free prep area keeps things simple while still being totally functional.
Instead of a sink, I use a large bus tub for dirty dishes and a water dispenser for hand washing. This setup saved me thousands in plumbing costs and honestly, I don’t miss having a permanent sink. The money saved went toward a really nice grill and better countertops – way better trade-off IMO.
Making sink-free work:
- Portable water containers with spigots
- Bus tubs for dish collection
- Paper towel dispensers at key spots
- Hand sanitizer stations (post-2020 necessity)
Straight-Line BBQ Layout
Sometimes the simplest layout is the best layout. A straight-line configuration puts everything within arm’s reach along one wall or fence line.
My straight-line setup runs 12 feet along my back fence: storage, prep counter, grill, serving counter. No walking in circles, no complicated traffic patterns – just efficient, linear cooking. This layout works especially well for narrow side yards or along garage walls where space is limited.
Why straight-line rocks:
- Maximum efficiency in narrow spaces
- Easy to add or remove components
- Natural assembly-line workflow
- Simple to cover or protect from weather
Compact Outdoor Kitchen With Storage Bins
Who needs built-in cabinets when weatherproof storage bins do the job perfectly? This approach gives you tons of storage without any construction.
I use three large deck boxes that double as seating when needed. One holds charcoal and wood chips, another stores dishes and linens, the third keeps tools and cleaning supplies. The bins slide under my prep counter when not in use, keeping everything neat and accessible.
Storage bin advantages:
- Completely weatherproof protection
- Mobile when needed
- Can match any color scheme
- Double as extra seating for parties
The beauty of this system? You can start small and add bins as your outdoor cooking collection grows.
Wrapping It Up
Creating your perfect outdoor kitchen doesn’t require a massive budget or complicated construction. These 15 ideas prove that simple, functional layouts often work better than elaborate setups that look great but frustrate you every time you cook.
Start with what makes sense for your space, cooking style, and budget. Maybe it’s a portable cart this year and a stone paver corner next summer. The point is getting outside and cooking, not impressing the neighbors (though that’s a nice bonus).
Remember, the best outdoor kitchen is the one you actually use. Mine might not grace any magazine covers, but it’s hosted countless memorable meals and saved my indoor kitchen from smelling like grilled fish. And really, isn’t that what matters?
Whether you go with a minimalist wooden counter or a full pergola setup, the key is starting somewhere. Your outdoor cooking journey doesn’t need to be perfect – it just needs to begin. Trust me, that first burger you grill in your own outdoor kitchen space? It’ll taste like victory, even if your “kitchen” is just a cart and a dream.
So grab those pallets, stack those concrete blocks, or wheel out that cart. Summer’s calling, and your outdoor kitchen adventure awaits. Who knows? By next season, you might be the one giving advice on the perfect simple outdoor kitchen setup. Now wouldn’t that be something?