10 Simple Outdoor Kitchen DIY on a Budget Ideas to Try
So you want an outdoor kitchen but your wallet’s giving you the stink eye? Yeah, I’ve been there. Nothing kills the backyard BBQ dream faster than seeing those $20,000 contractor quotes. But here’s the thing – you don’t need to sell a kidney to get that sweet outdoor cooking setup you’ve been dreaming about.
I spent last summer building my own outdoor kitchen for less than what most people spend on a fancy grill. The total damage? About $800. And honestly? It works better than my neighbor’s professionally installed setup that cost him five figures. Want to know the secret? Getting creative with materials and doing the work yourself.
Let me walk you through 10 budget-friendly outdoor kitchen ideas that actually work. These aren’t those Pinterest-perfect setups that secretly cost thousands – these are real, doable projects that regular folks like us can tackle over a weekend or two.
1. Pallet-Frame Outdoor Kitchen Station
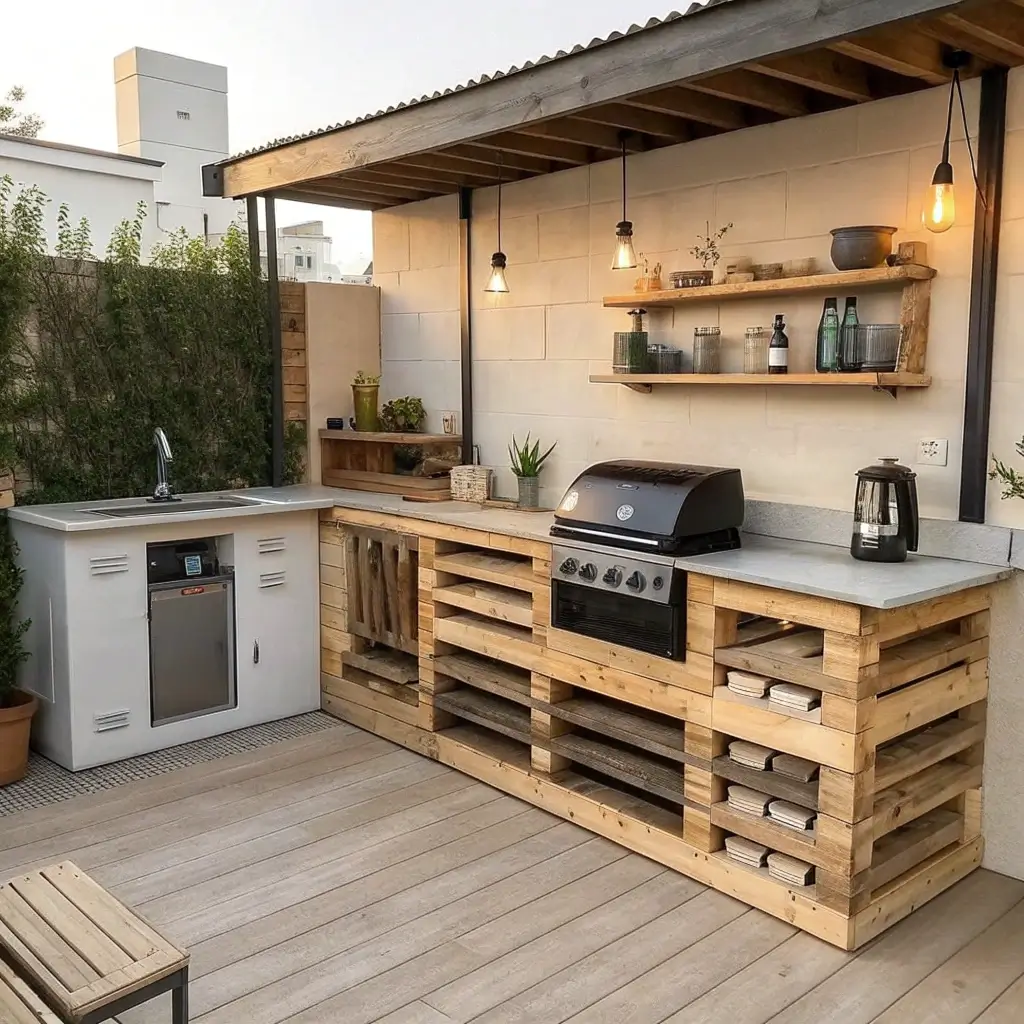
Remember when everyone was going crazy over pallet furniture? Well, turns out those wooden shipping pallets make an incredible foundation for an outdoor kitchen. I built mine using six pallets I scored for free from a local warehouse (they literally thanked me for taking them).
The beauty of pallets? They’re already structured perfectly for shelving and storage. Stack two vertically for your back wall, use two more for side supports, and boom – you’ve got yourself a frame. I added a plywood top, sealed it with outdoor polyurethane, and suddenly had a legit prep station.
Here’s what makes this setup work so well:
- Cost: Usually free or under $50 for materials
- Build time: One weekend max
- Customization: Paint it, stain it, add hooks wherever you want
- Storage: Those pallet gaps work perfectly for storing grilling tools
The only tricky part? Making sure you sand those pallets smooth. Trust me, splinters and food prep don’t mix. I learned that one the hard way.
2. Cinder Block Grill and Prep Counter
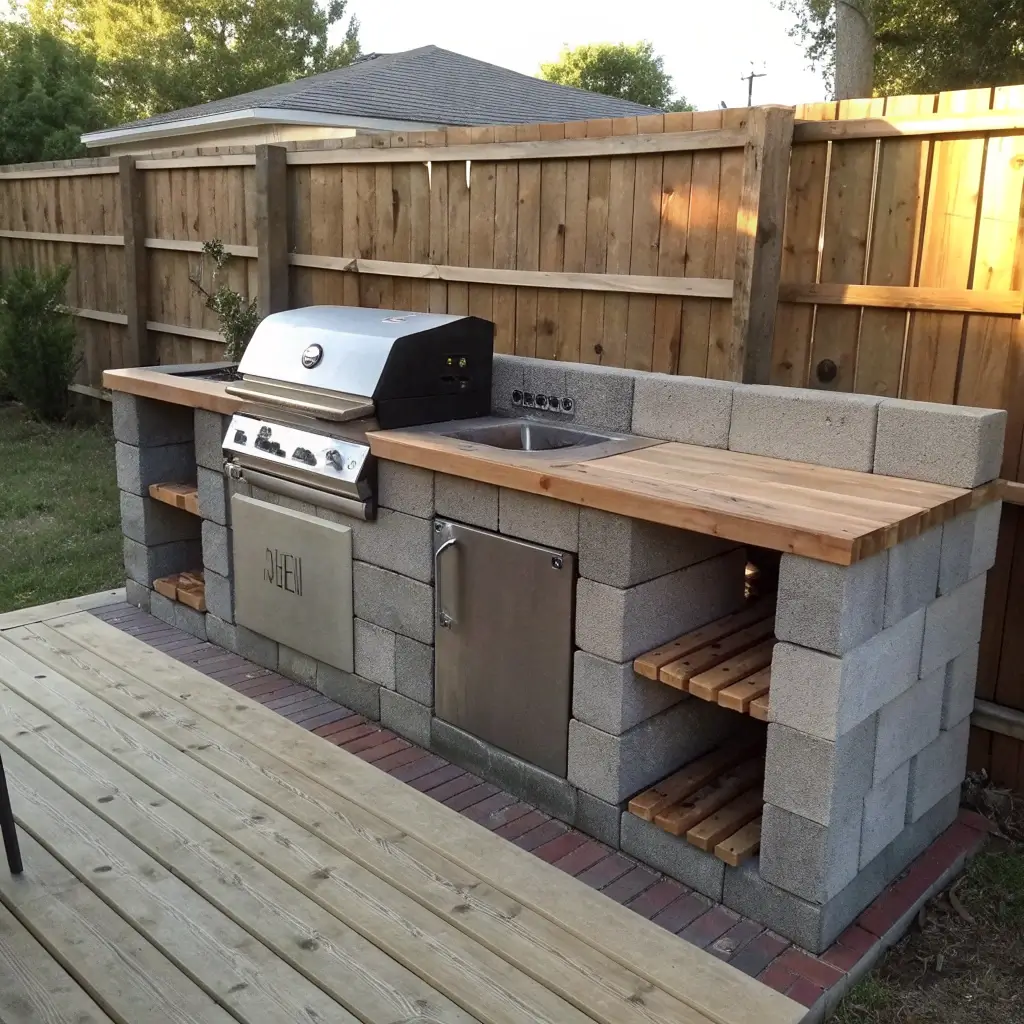
Who said cinder blocks are just for college dorm room bookshelves? These bad boys can create the most solid outdoor kitchen foundation you’ll ever need. Plus, at about $2 per block, we’re talking serious budget-friendly territory here.
I helped my buddy build one of these last month, and the whole thing took us maybe four hours. We stacked blocks three high, created a U-shape, and topped it with a granite remnant we found at a countertop shop for $75. The grill sits perfectly in the middle, with prep space on both sides.
Why Cinder Blocks Rock:
- No mortar needed (just stack ’em)
- Heat-resistant naturally
- Creates instant storage cubbies
- Weighs enough that it’s not going anywhere
Want to fancy it up? Stucco or paint the blocks. My friend went with a terracotta paint, and honestly, you’d never know it was made from $2 blocks.
3. Budget-Friendly Portable Bar Cart Kitchen

Ever thought about turning a bar cart into an outdoor kitchen? Sounds weird, but hear me out. A sturdy bar cart gives you mobility that built-in kitchens can’t touch. Weather looking sketchy? Roll it into the garage. Having a pool party? Wheel it poolside.
I found a metal cart at a garage sale for $30, gave it a fresh coat of rust-resistant spray paint, and added some butcher block on top for prep space. The bottom shelf holds my portable burner, middle shelf is for supplies, and the top becomes my workspace.
The setup includes:
- Portable induction cooktop (safer than gas for a cart)
- Cutting board that fits perfectly on top
- Hanging baskets on the sides for utensils
- Small cooler that slides underneath
Is it as impressive as a built-in kitchen? Nope. Does it get the job done for under $150? Absolutely.
Also Read: 15 Amazing Outdoor Kitchen DIY Ideas for Small Spaces
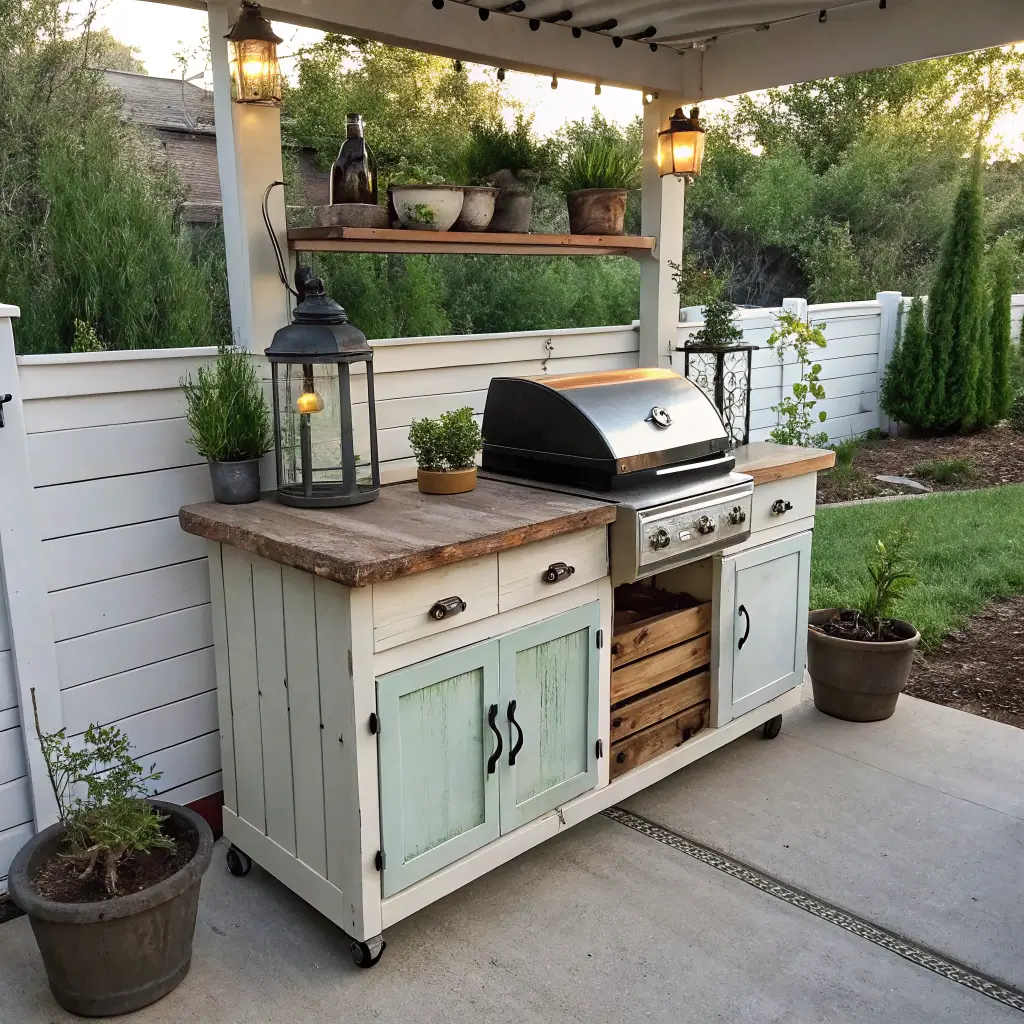
4. Reclaimed Wood Backyard Cooking Nook
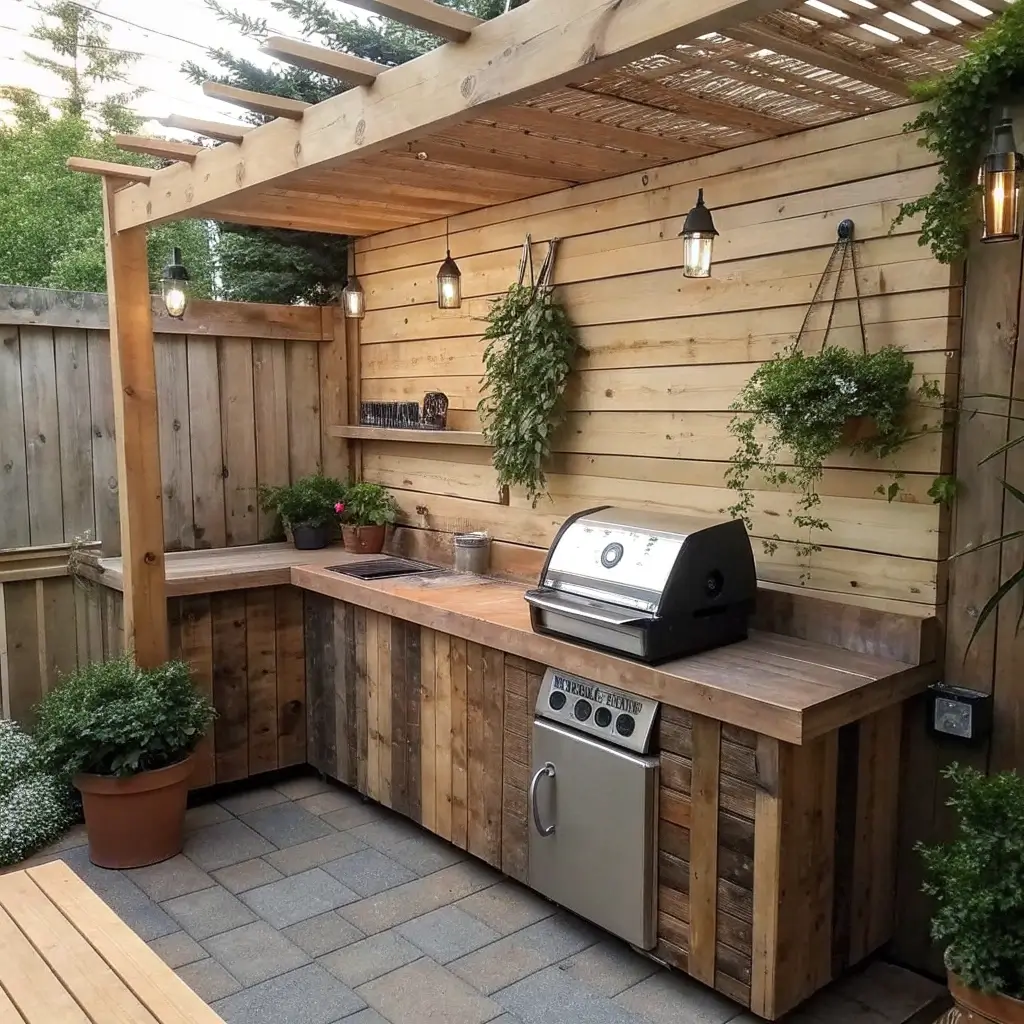
Old fence boards, barn wood, or even that pile of lumber in your garage – reclaimed wood creates character that new materials just can’t match. My neighbor built her entire outdoor kitchen using wood from a demolished deck, and it looks like something from a magazine.
Start with a simple frame (2x4s work great), then clad it with your reclaimed wood. Add a concrete countertop (way easier to DIY than you’d think), and you’ve got yourself a rustic masterpiece. The weathered wood actually handles outdoor conditions better than new lumber in many cases.
Pro Tips for Reclaimed Wood:
- Check for nails thoroughly (metal detector FTW)
- Sand lightly to preserve character
- Seal with outdoor-grade polyurethane
- Mix wood tones for visual interest
The best part? People always assume this style costs thousands. Little do they know 🙂
5. Folding Wall-Mounted Outdoor Kitchen
Living in a tiny space? This one’s for you. A fold-down wall-mounted kitchen disappears when you’re not using it. Think Murphy bed, but for cooking outdoors.
Mount a sturdy folding bracket system to your exterior wall (make sure you hit studs), attach a butcher block or sealed plywood surface, and you’ve got instant counter space that folds flat against the wall when done. I added a pegboard backing for hanging tools, and the whole thing takes up literally zero floor space when closed.
What you’ll need:
- Heavy-duty folding brackets (about $40)
- Wall-mounted surface material
- Weather-resistant finish
- Optional: magnetic strips for knives
My apartment-dwelling sister uses hers constantly, and her landlord doesn’t even know it exists when it’s folded up.
6. Compact L-Shaped DIY Patio Kitchen

The L-shape design maximizes corner spaces like nothing else. Got that awkward corner of your patio doing nothing? Perfect spot for an L-shaped outdoor kitchen that gives you tons of workspace without eating up your entire yard.
I built mine using pressure-treated 2x4s for framing, covered with cement board, and finished with outdoor tiles I found on clearance. The L-shape naturally creates zones – one side for the grill, the other for prep and serving.
Layout Benefits:
- Efficient workflow (everything within arm’s reach)
- Natural wind protection for your grill
- Corner becomes useful space
- Creates intimate cooking area
IMO, this design gives you the most bang for your buck in terms of functionality.
Also Read: 15 Functional Outdoor Kitchen Ideas for Ultimate Entertaining
7. Rustic Brick-and-Wood Grill Island

Found some old bricks lying around? Combined with some basic lumber, you can create a grill island that looks professionally built. The contrast between warm wood and classic brick never goes out of style.
Stack bricks (no mortar needed for a temporary structure) to create your base columns, then bridge them with a wood frame and top. The bricks handle heat like champs, while the wood adds warmth to the design. I used leftover bricks from a landscaping project and spent maybe $100 on lumber and hardware.
Key features to include:
- Brick columns at corners for stability
- Wood shelving between columns
- Heat-resistant top near grill area
- Optional: add casters to wood frame for mobility
The rustic vibe makes any wear and tear look intentional. Win-win.
8. Simple Tile-Top Outdoor Cooking Counter
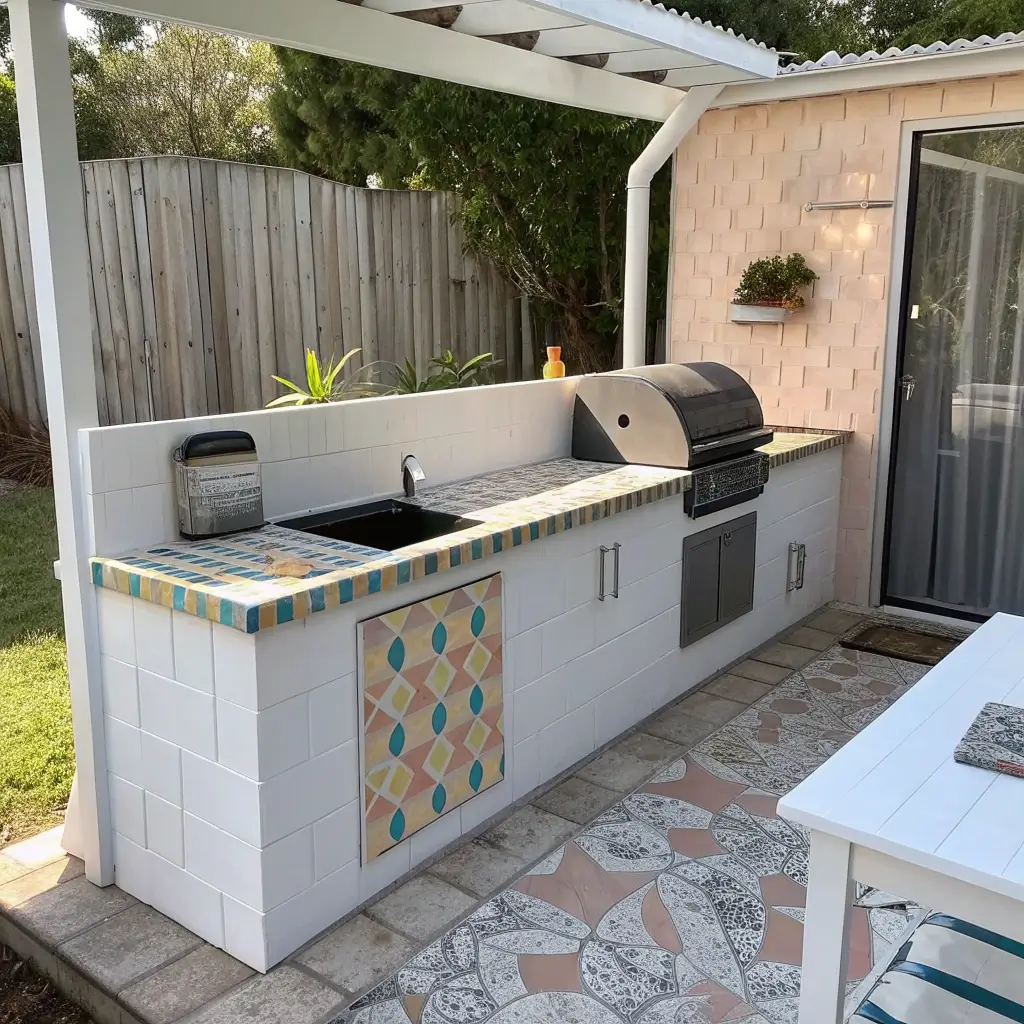
Tiles aren’t just for bathrooms anymore. A tile-topped counter gives you a surface that’s heat-resistant, easy to clean, and looks way more expensive than it actually is. Plus, damaged or leftover tiles often go for pennies at home improvement stores.
Build a basic frame, top it with cement board, and tile away. I used a mix of leftover tiles from various projects to create a mosaic effect. Total cost? Under $200 for a 6-foot counter. The grouting took forever, but man, was it worth it.
Tiling Tips:
- Use outdoor-rated adhesive and grout
- Seal grout lines twice yearly
- Mix patterns for unique look
- Consider larger tiles for easier installation
Pro tip: those sample tiles at home stores? Perfect for creating accent borders.
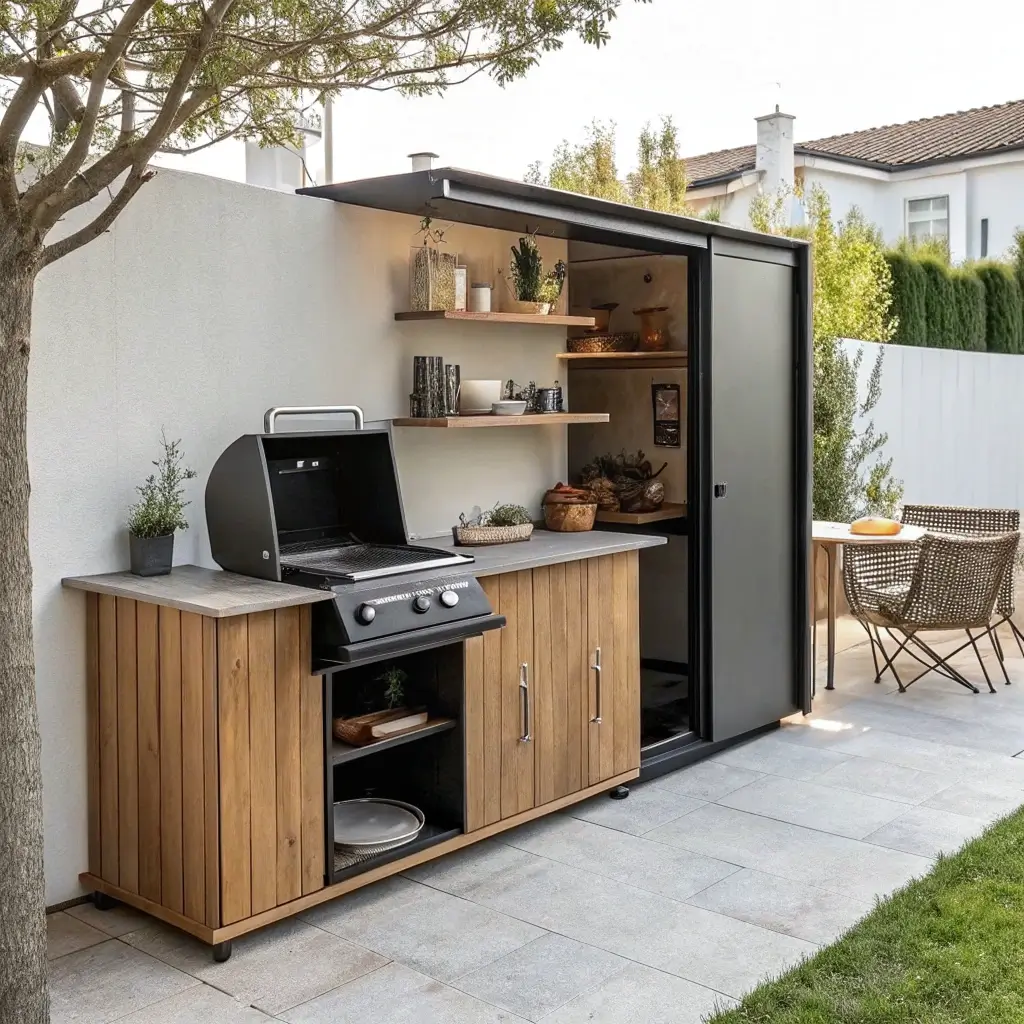
9. Repurposed Cabinet Outdoor Kitchen Setup
Got old kitchen cabinets from a renovation? Before you haul them to the dump, consider this: weather-sealed cabinets make perfect outdoor kitchen storage. I’ve seen people create entire outdoor kitchens using nothing but repurposed indoor cabinets.
Strip them down, apply several coats of exterior paint or sealant, and replace any particle board with marine-grade plywood. Add a weather-resistant countertop, and you’ve basically got a free outdoor kitchen frame.
What to remember:
- Remove particle board backs (replace with plywood)
- Upgrade to exterior-grade hardware
- Raise cabinets on blocks for drainage
- Add ventilation holes to prevent moisture buildup
My cousin did this with her old 1980s oak cabinets. A little paint and new hardware, and they look better outside than they ever did inside.
Also Read: 15 Charming Green and Brown Kitchen Ideas You Must See
10. Minimalist Metal-Shelf BBQ Station
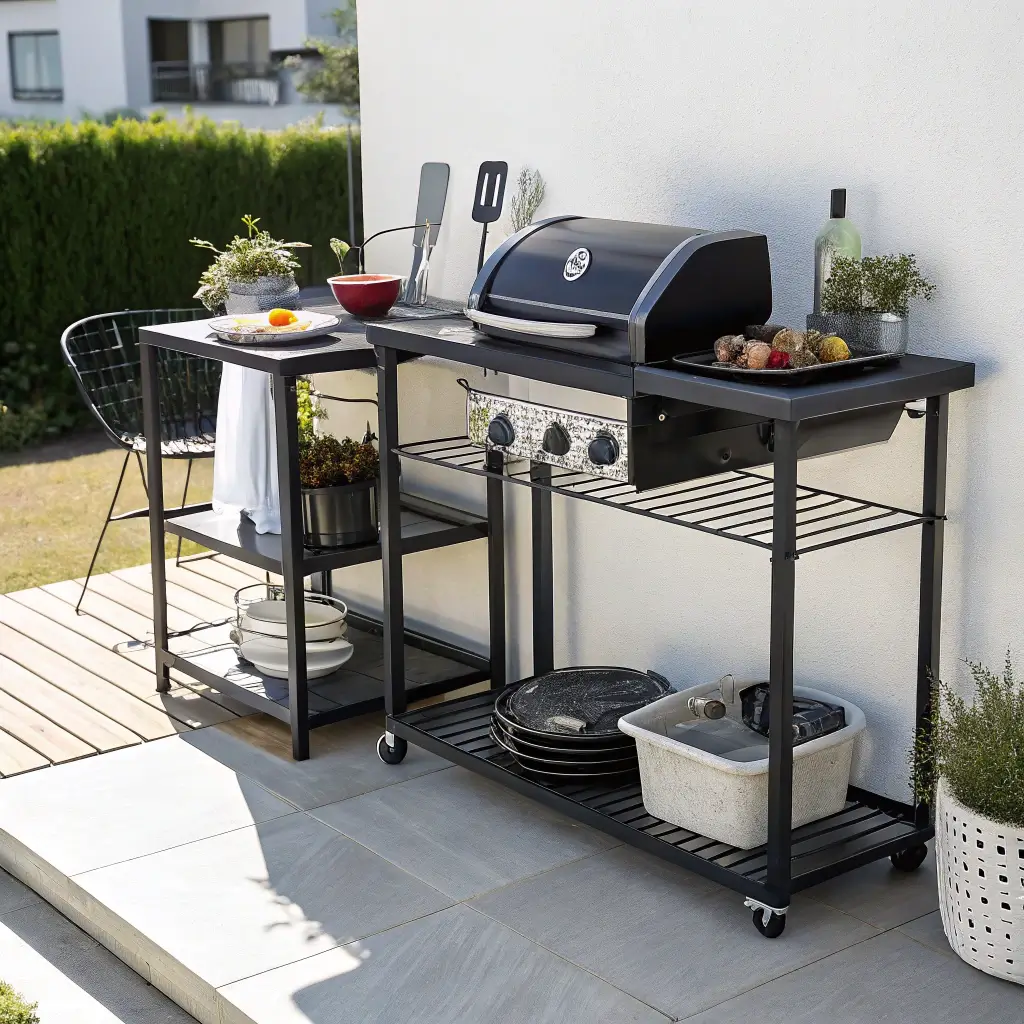
Sometimes less really is more. A simple metal shelving unit can become a surprisingly functional outdoor kitchen. Those wire restaurant-style shelves you see at warehouse stores? Perfect for outdoor use since they’re already designed to handle moisture and weight.
Position your grill in front, use the shelves for storage and prep space, and add a cutting board on top for a work surface. The open design means no water pooling, and cleanup involves literally just hosing it down.
Why Metal Shelving Works:
- Rust-resistant options available
- Adjustable shelf heights
- Incredibly sturdy
- Usually under $100
Add some S-hooks for tools, maybe a magnetic strip for knives, and you’re golden.
Making Your Choice
So which one speaks to you? The beauty of these DIY options is you can mix and match elements from different designs. Maybe you love the pallet frame but want a tile top. Or perhaps the cooler integration would work perfectly with your cinder block base.
Here’s what I’ve learned after building (and rebuilding) outdoor kitchens: start simple and expand. You don’t need everything at once. Pick one project, nail it, then add features as you go. My current setup started as just a folding table and a grill. Now it’s got storage, a sink, and even a pizza oven I added last month.
Remember, the “perfect” outdoor kitchen is the one that fits your space, budget, and cooking style. These fancy magazine setups are nice to look at, but if you’re not using your outdoor kitchen because you’re afraid to mess it up, what’s the point?
Final Thoughts
Building your own outdoor kitchen doesn’t require a contractor, a second mortgage, or even much DIY experience. What it does need is a bit of creativity and the willingness to try something new. Every single one of these projects can be completed in a weekend with basic tools and materials you can find at any home store.
The money you save doing it yourself? That’s more cash for better ingredients, a nicer grill, or hey, maybe just keeping in your pocket. Plus, there’s something deeply satisfying about cooking on something you built with your own hands. Even if it’s just cinder blocks and a piece of plywood, it’s yours.
So grab a cold one, sketch out your plan, and get building. Your backyard (and your wallet) will thank you. Who knows? This time next month, you might be the one hosting the neighborhood BBQ, showing off your “expensive-looking” outdoor kitchen that secretly cost less than a nice dinner out.
Ready to get started? Pick your favorite idea from this list and just go for it. The worst that can happen? You’ll learn something and have a good story. The best? You’ll have an awesome outdoor kitchen that didn’t break the bank. Sounds like a win-win to me.