Kitchen Wall Decor Ideas: 15 Unique Styles to Inspire Your Kitchen
Listen, I get it. You’re staring at those blank kitchen walls thinking they look about as exciting as watching paint dry. Been there, done that, bought the overpriced wall art that didn’t match anything.
But here’s the thing – your kitchen walls have so much potential, and I’m about to show you exactly how to unlock it.
After spending way too many weekends scrolling through Pinterest and actually testing these ideas in my own kitchen (and my sister’s, and my best friend’s…), I’ve narrowed down the 15 best kitchen wall decor ideas that actually work.
Not just pretty pictures that look good on Instagram but fall apart in real life. We’re talking practical, gorgeous solutions that’ll make your kitchen the room everyone wants to hang out in.
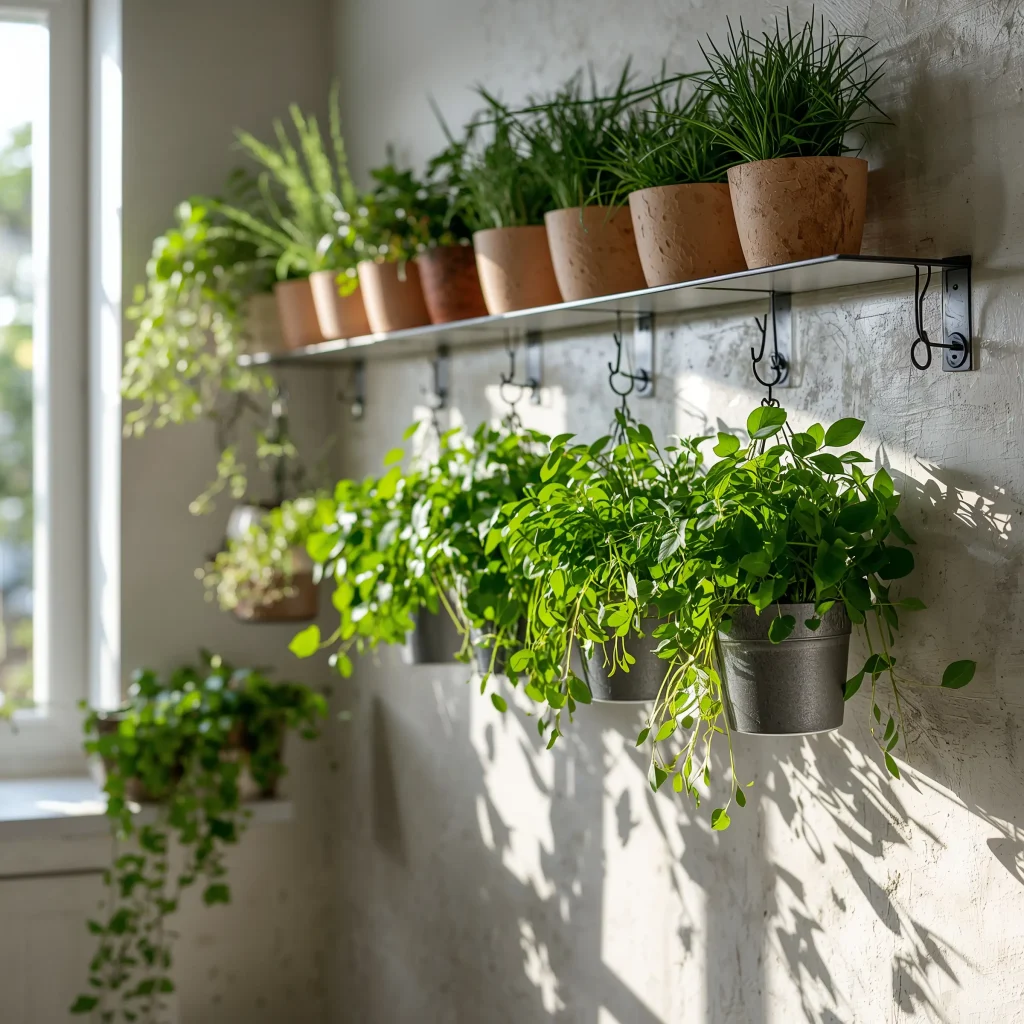
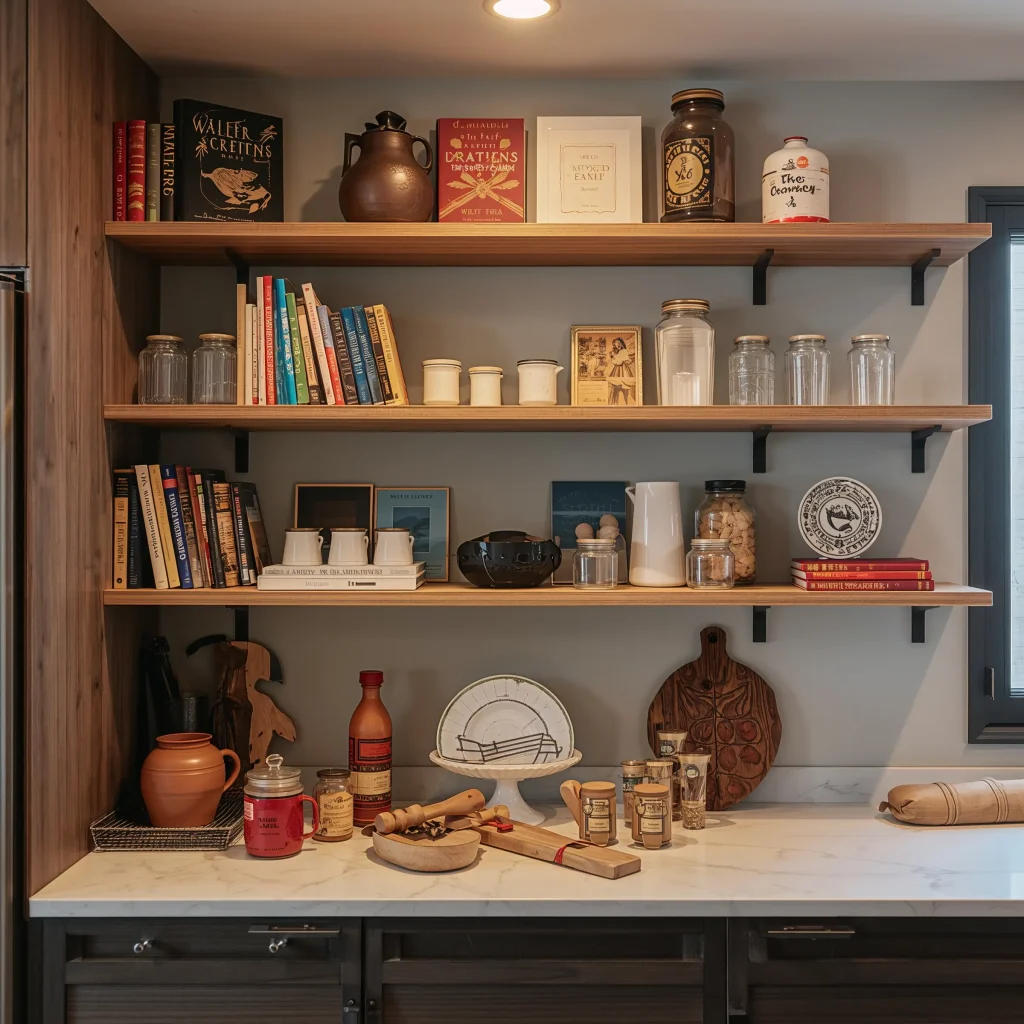
Floating Wooden Shelves with Greenery
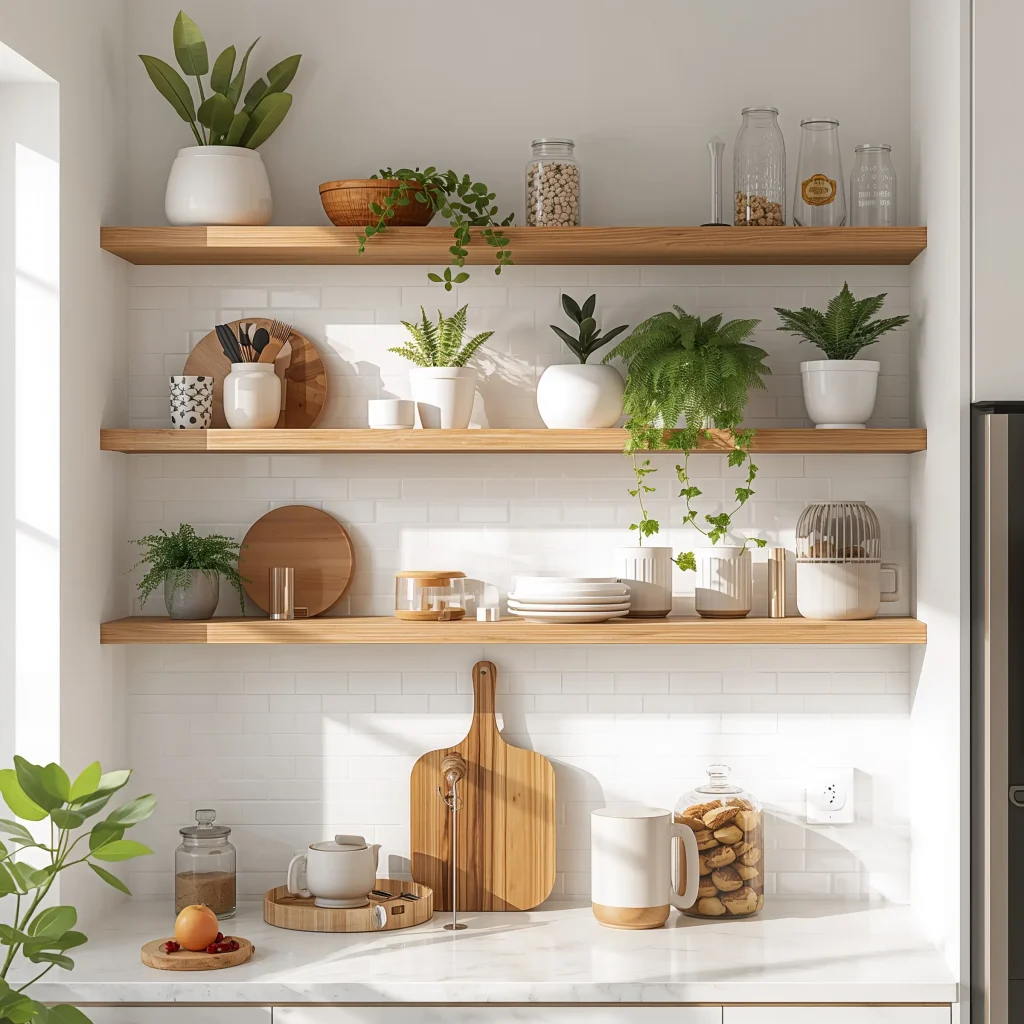
Let me start with my absolute favorite – floating wooden shelves packed with plants. I installed these bad boys three years ago, and they completely changed the game. You know that awkward wall space between your upper cabinets and countertop? That’s prime real estate right there.
Here’s what makes this combo so brilliant. The wood brings warmth to your kitchen (especially if you’ve got all stainless steel appliances like I do), while the greenery literally brings life to the space. I’m talking about pothos trailing down, succulents that refuse to die even when you forget to water them, and maybe a few herbs if you’re feeling fancy.
Getting the Look Right
The trick is choosing the right wood tone. I went with reclaimed barnwood shelves because they matched my dining table, but you might want something sleeker. Walnut looks incredible against white walls, while pine keeps things light and airy.
Mount them at eye level or slightly above – you want to see your plants without straining your neck. Space them about 12-18 inches apart, depending on what you’re planning to display. And here’s a pro tip: mix in some non-plant items like vintage glass bottles or copper mugs to break up all that green.
Chalkboard Menu Wall
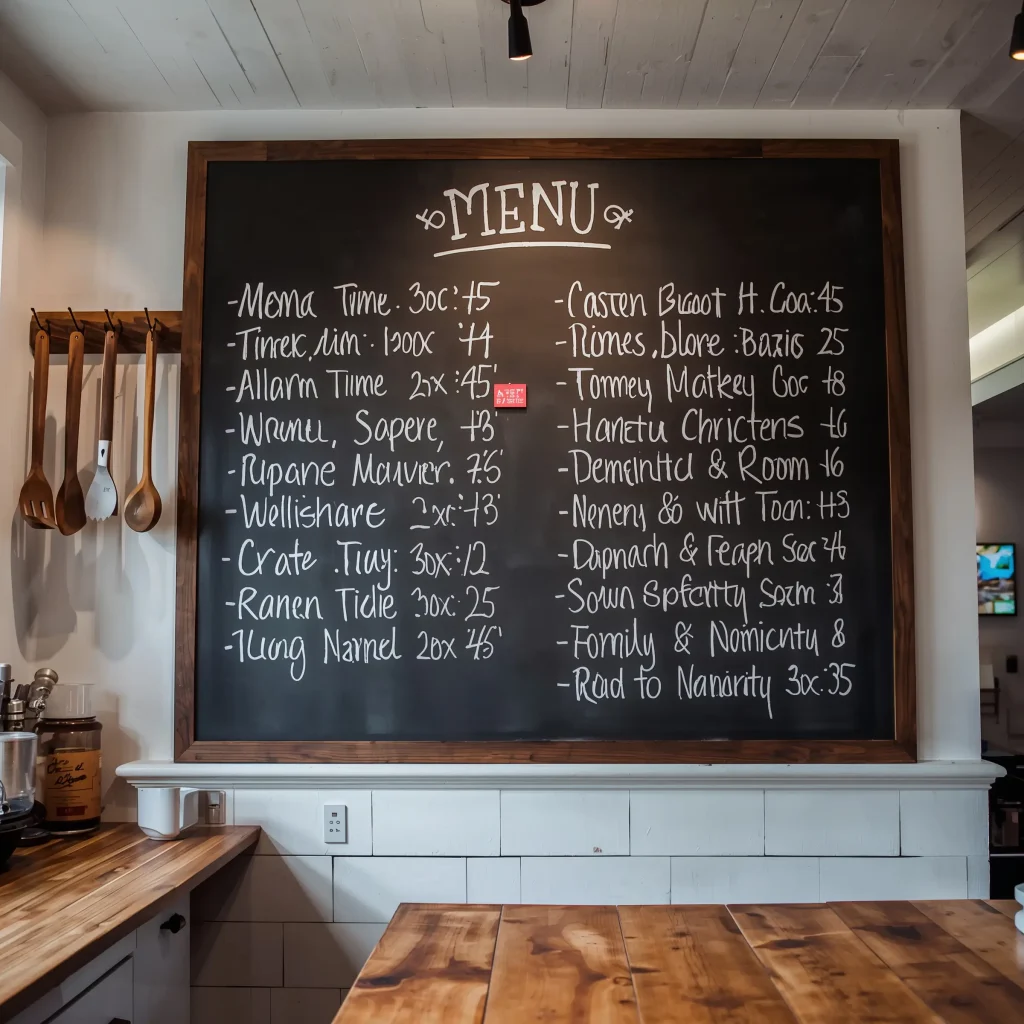
Okay, who else remembers writing the weekly menu on a piece of paper that inevitably got lost? Yeah, me too. That’s why the chalkboard wall became my sanity saver. Paint one section of your kitchen wall with chalkboard paint, and boom – instant command center.
I painted a 4×6 foot section near my breakfast nook, and it’s become the most functional piece of decor I own. Monday’s dinner plans? Right there. Grocery list? Check. Random doodles from my nephew? Unfortunately, also check.
Making It Work for Your Space
You don’t need to commit to an entire wall. Even a small section above your coffee station works beautifully. Frame it with molding if you want that built-in look, or keep it organic with rough edges for a more casual vibe.
The best chalkboard paint I’ve used is the kind that comes pre-mixed in black or green. Skip the DIY mixing tutorials – trust me on this one. Apply three thin coats rather than one thick one, and season your chalkboard properly before first use (rub chalk all over it, then erase).
Rustic Mason Jar Display

Remember when mason jars were having their moment? Well, they never really left my kitchen. Creating a wall-mounted mason jar display combines storage with style in the most satisfying way.
I mounted mine on a piece of reclaimed wood with pipe clamps – sounds complicated but took maybe an hour total. Now I’ve got my wooden spoons, whisks, and spatulas right where I need them. Plus, during summer, I swap in fresh flowers from the farmer’s market. Instant mood boost every Saturday morning.
DIY Installation Tips
Start with wide-mouth mason jars – they’re easier to grab things from. Mount them at different heights for visual interest, but keep them within arm’s reach of your main prep area. I learned that lesson the hard way after mounting one too high and knocking over my coffee trying to reach a spoon. Not my finest moment :/
You can use:
- Pipe clamps for an industrial look
- Leather straps for boho vibes
- Metal hooks for a farmhouse feel
- Wire baskets if you want to swap jars easily
Also Read: 15 Beautiful TV Wall Decor Ideas for a Modern Chic Look
Geometric Tile Accent Wall
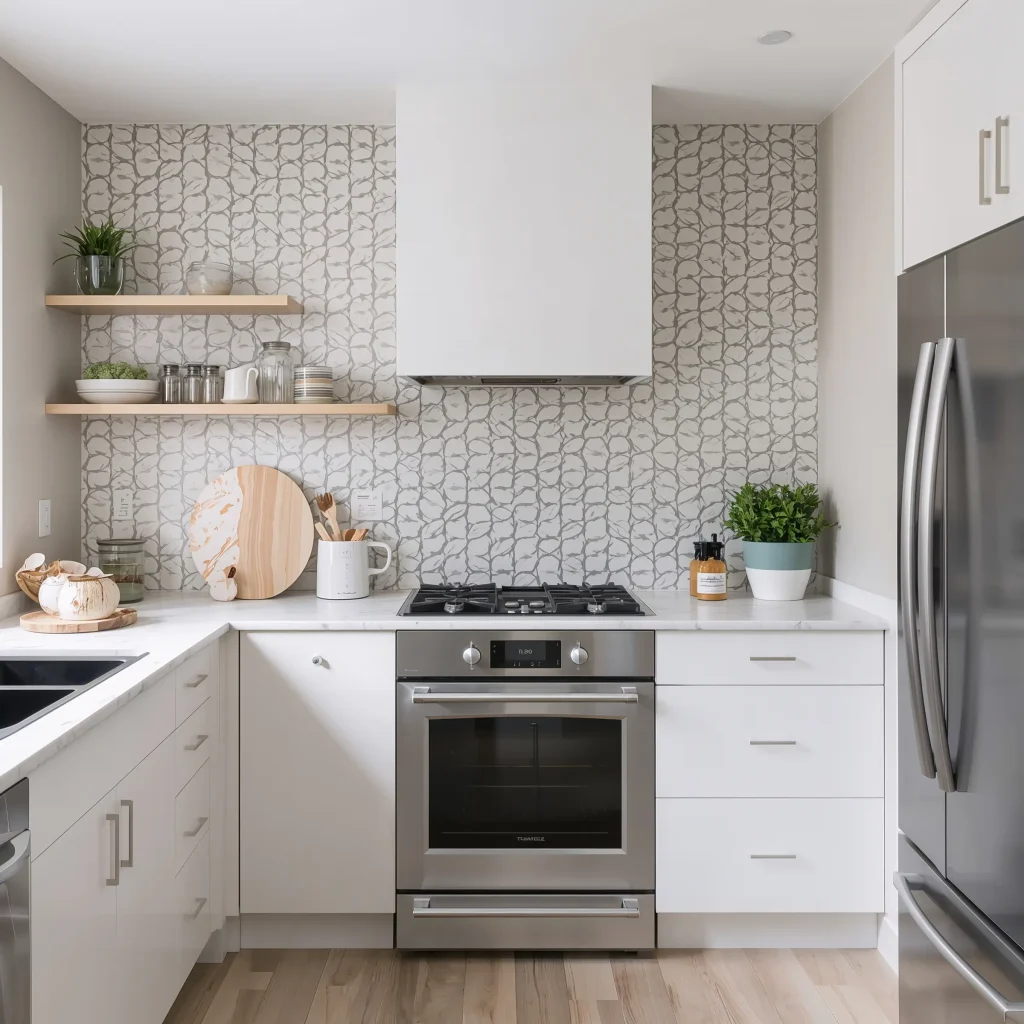
Want to know what gets the most compliments in my kitchen? The geometric tile accent wall behind my stove. It’s like jewelry for your kitchen, except more practical because it also protects your wall from spaghetti sauce explosions.
I chose hexagon tiles in a mix of white, gray, and mint green. Every time someone new comes over, they ask about it. The pattern draws your eye without overwhelming the space, and cleaning it takes literally seconds.
Choosing Your Pattern
Don’t just grab the first pretty tile you see. Consider your kitchen’s overall vibe:
- Hexagons work everywhere (they’re basically the little black dress of tiles)
- Moroccan patterns bring exotic flair
- Subway tiles in herringbone pattern – classic with a twist
- Mixed geometric shapes for the brave souls
FYI, peel-and-stick tiles have come a long way. If you’re renting or commitment-phobic, they’re a solid option. Just make sure your wall is perfectly smooth first, or you’ll see every bump.
Vintage Plate Gallery

This one makes me nostalgic every single time. Creating a gallery wall with vintage plates brings instant character to any kitchen. I started collecting plates from thrift stores and estate sales, and now it’s become a full-blown obsession.
My collection includes everything from my grandmother’s china to a ridiculous plate with a poodle wearing sunglasses (best $2 I ever spent). The mix of patterns, colors, and sizes creates this amazing visual texture that no store-bought art can replicate.
Arranging Your Collection
Start by laying your plates on the floor to plan your arrangement. I learned this after putting seventeen nail holes in my wall because I kept changing my mind. Mix sizes and patterns but keep one element consistent – maybe all blue and white, or all floral patterns.
For hanging, those adhesive disc hangers work great for lighter plates. Heavier ones need proper plate hangers or picture ledges. And here’s something nobody tells you: odd numbers look better. Groups of 3, 5, or 7 plates create more visual interest than even numbers.
Hanging Herb Garden
Let’s talk about the hanging herb garden that changed my cooking game forever. Fresh herbs at arm’s reach? Life-changing. Plus, your kitchen smells like an Italian restaurant 24/7, which I’m definitely not complaining about.
I use a combination of wall-mounted planters and a hanging rod system with S-hooks. Basil, oregano, thyme, and rosemary thrive in my south-facing kitchen window area. Even my notorious plant-killing tendencies haven’t managed to destroy these yet.
Setting Up Your Herb Wall
Location matters big time here. Herbs need light – at least 4-6 hours of direct sunlight or a grow light. Mount your system near a window or invest in some LED grow strips (they’re not as ugly as they used to be).
Choose containers with drainage holes unless you enjoy root rot. I use:
- Metal buckets with drilled holes
- Ceramic planters on floating shelves
- Repurposed tin cans for that rustic look
- Hanging glass globes for trailing herbs
Water them when the soil feels dry about an inch down. Overwatering kills more herbs than neglect – learned that one the hard way.
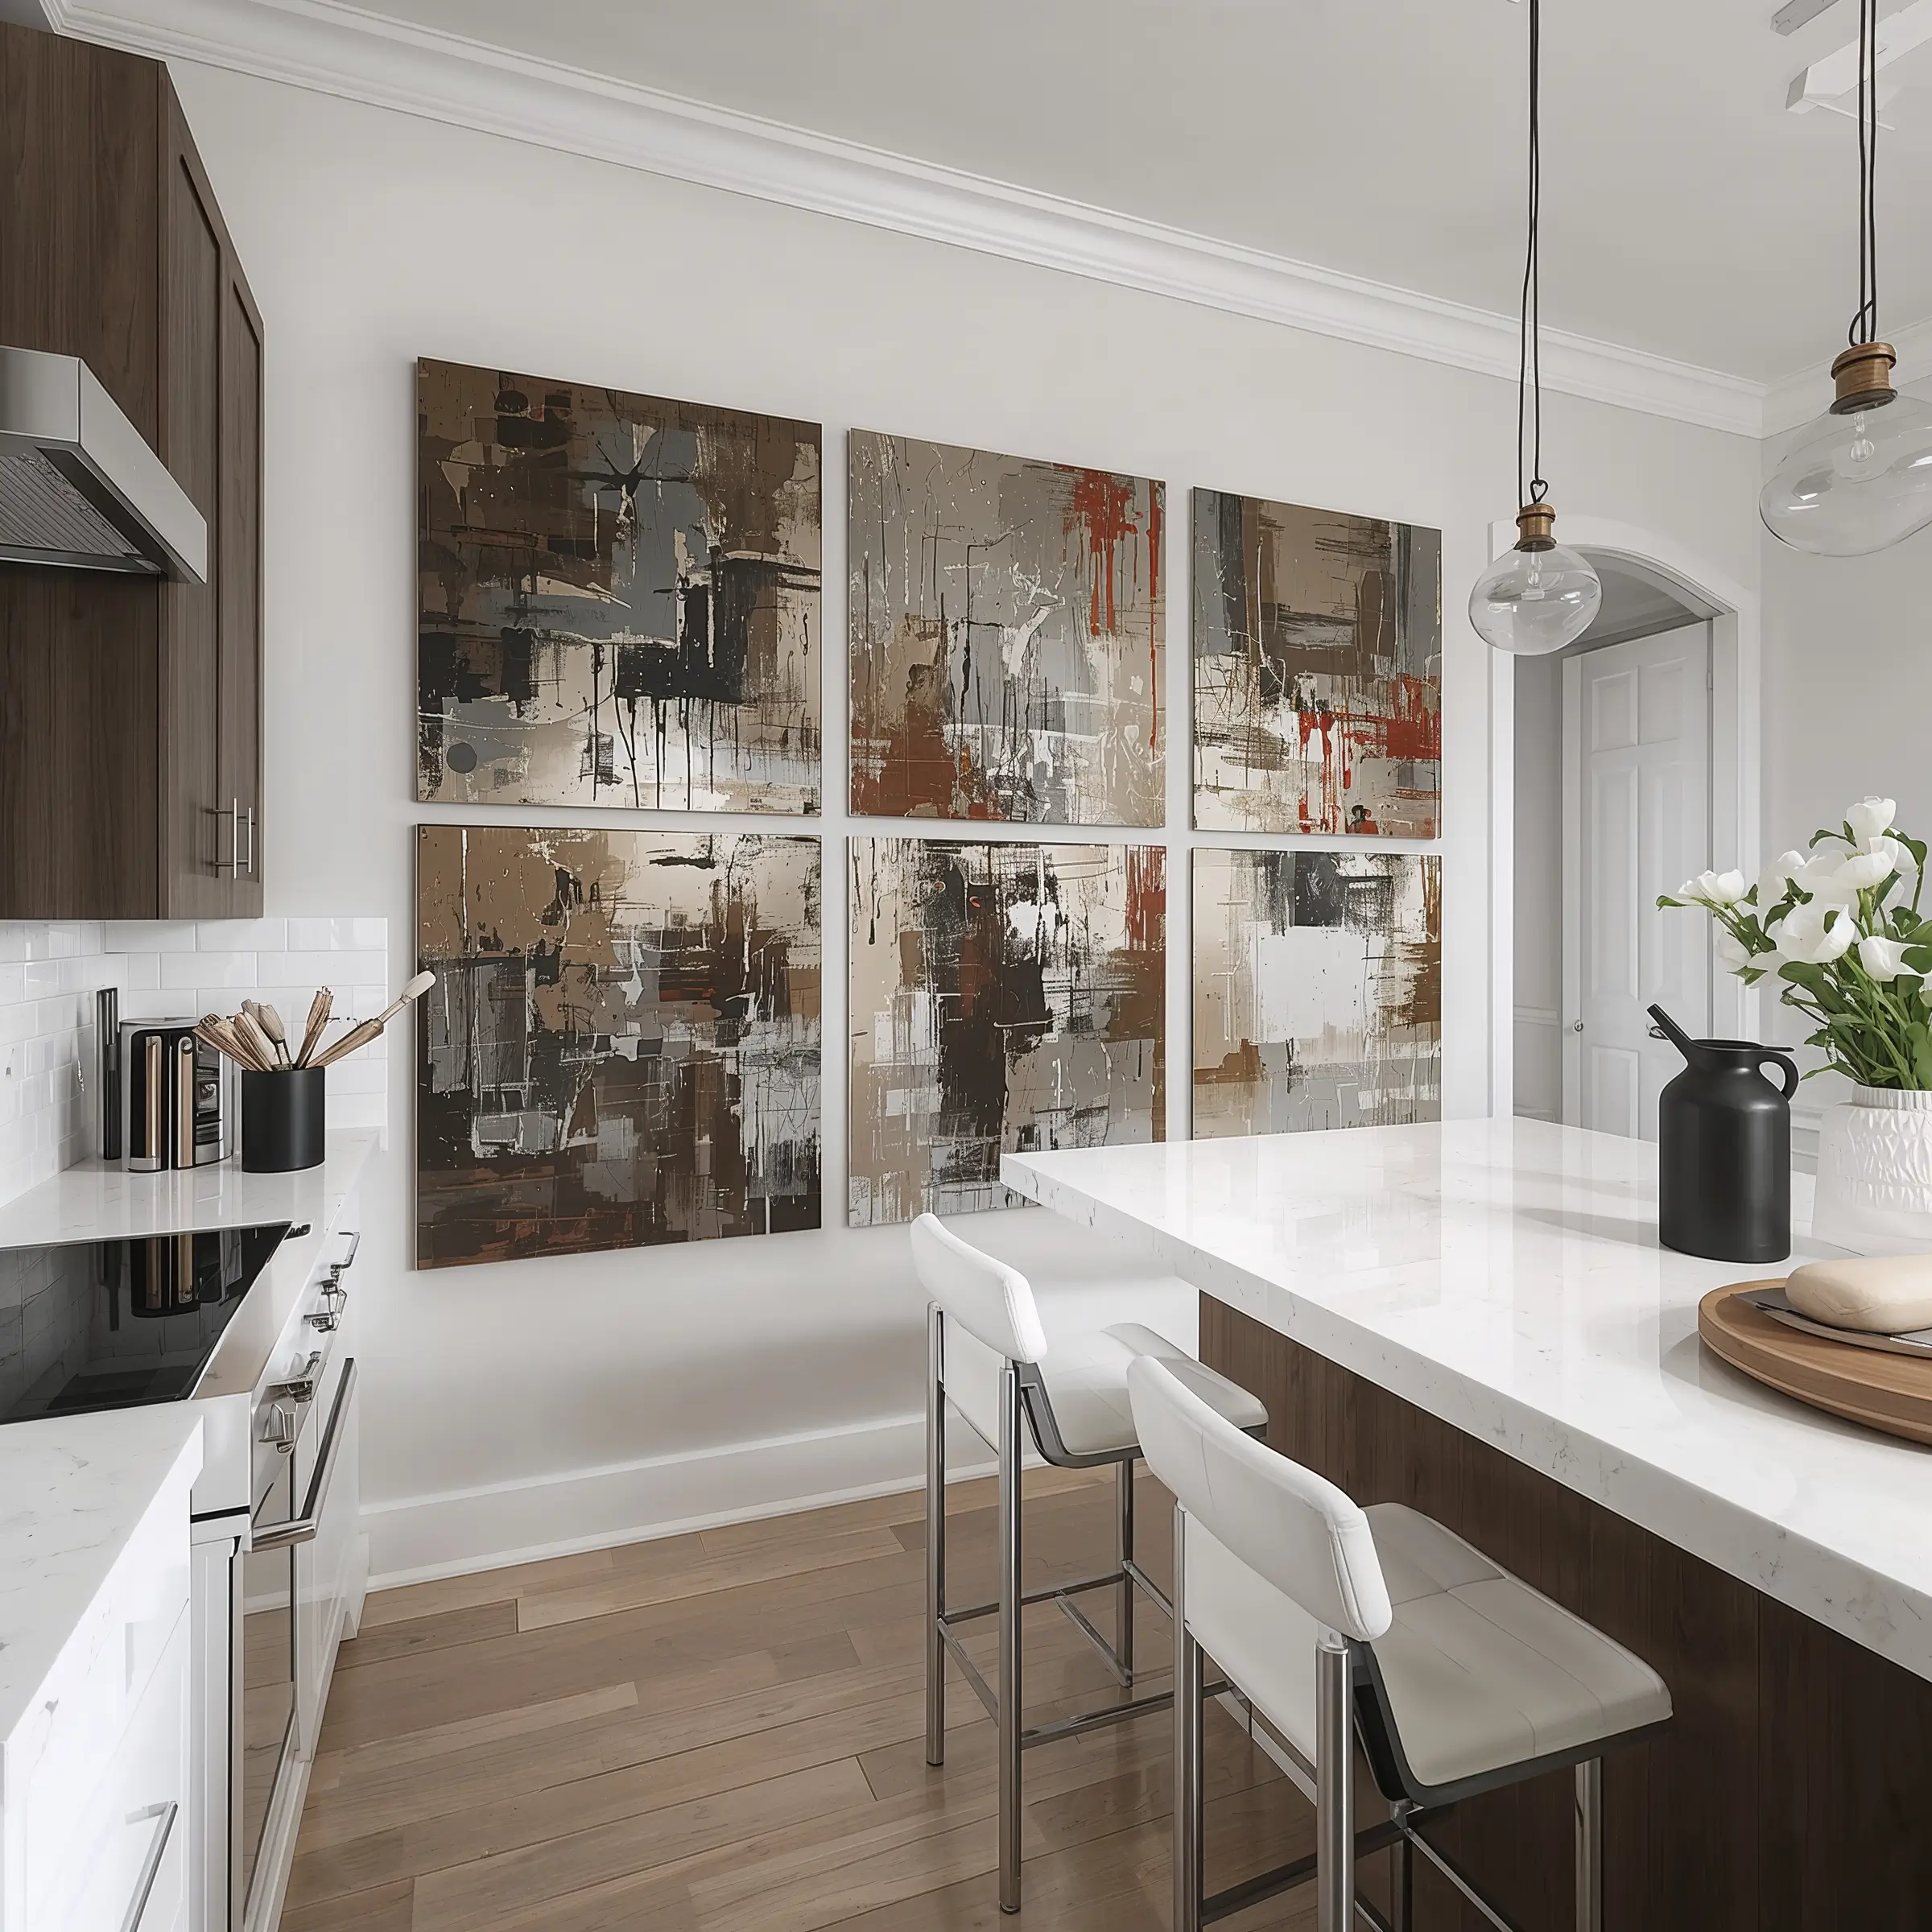
Minimalist Framed Prints

Sometimes less really is more. After years of cluttered walls, I discovered the power of carefully chosen minimalist prints. Three black and white botanical prints above my dining area completely transformed the space from chaotic to calm.
The key is choosing prints that speak to you but don’t scream for attention. I found mine on Etsy for like $15 total (digital downloads FTW), printed them at home, and framed them in simple black frames from the dollar store. Total cost? Under $30. Impact? Priceless.
Selecting and Styling Prints
Stick to a cohesive color palette. Black and white is foolproof, but muted pastels or earth tones work beautifully too. Consider:
- Kitchen-themed illustrations (vintage utensils, herbs, coffee)
- Abstract line art for modern kitchens
- Typography prints with food quotes or recipes
- Botanical drawings for that timeless look
Frame them identically for a gallery feel, or mix frame styles for an eclectic vibe. Just keep the mat width consistent – it’s the secret to making cheap prints look expensive.
Industrial Pipe Rack with Hooks
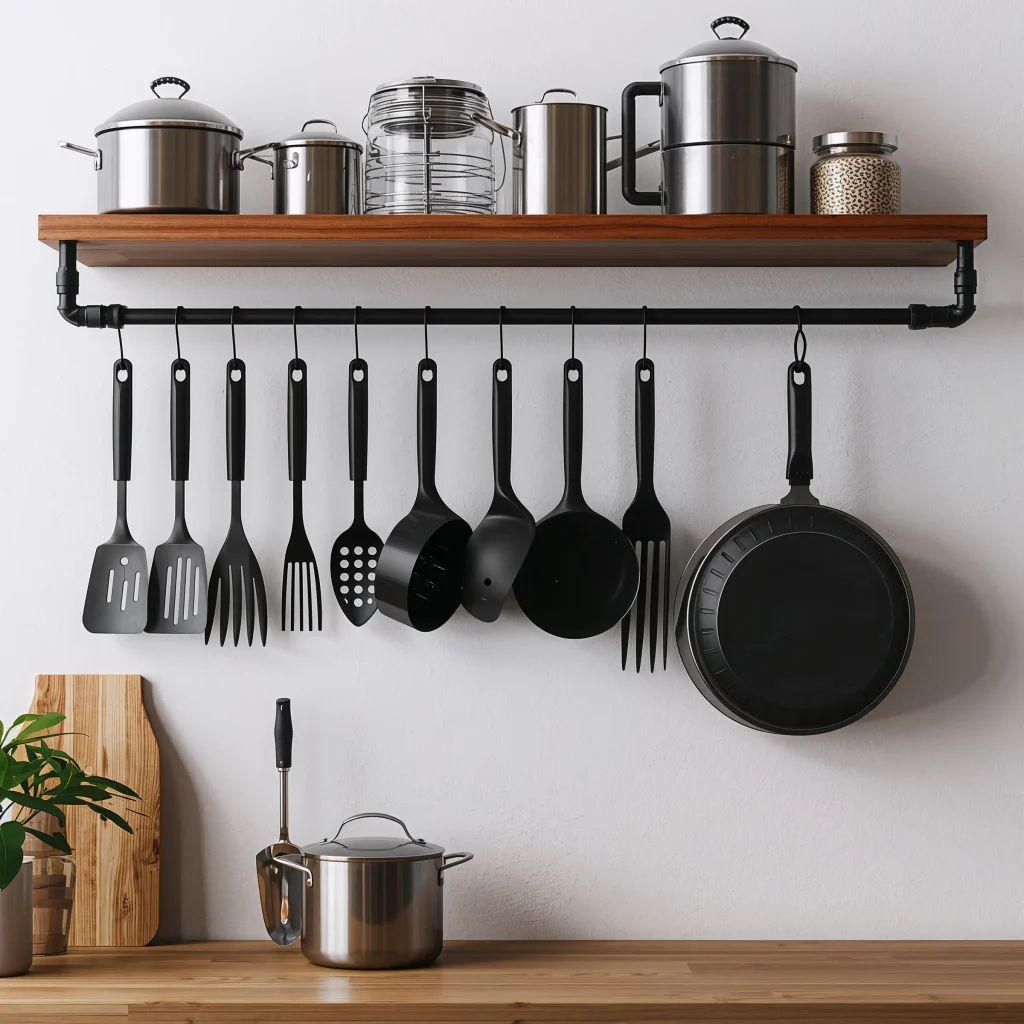
Who says storage can’t be stylish? My industrial pipe rack serves double duty as both decor and the most-used organizational tool in my kitchen. It holds everything from copper pots to my collection of mismatched mugs.
Building one yourself takes maybe two hours and costs way less than those overpriced versions at home decor stores. Plus, you can customize the size exactly to your wall space. Mine spans the entire wall above my coffee station, and I regret nothing.
Building Your Own Pipe Rack
Head to your local hardware store and grab:
- Black iron pipes (½ or ¾ inch diameter)
- Flanges for mounting to the wall
- Elbows and tees for corners and connections
- S-hooks in various sizes
Make sure you hit the wall studs when mounting – this thing needs to hold weight. I once tried to use just drywall anchors. Let’s just say replacing broken dishes taught me that lesson real quick.
Arrange your items by frequency of use. Daily coffee mugs at eye level, fancy serving pieces up high. And here’s a styling tip: group similar items together but vary the heights for visual interest.
Pegboard Organizer Wall
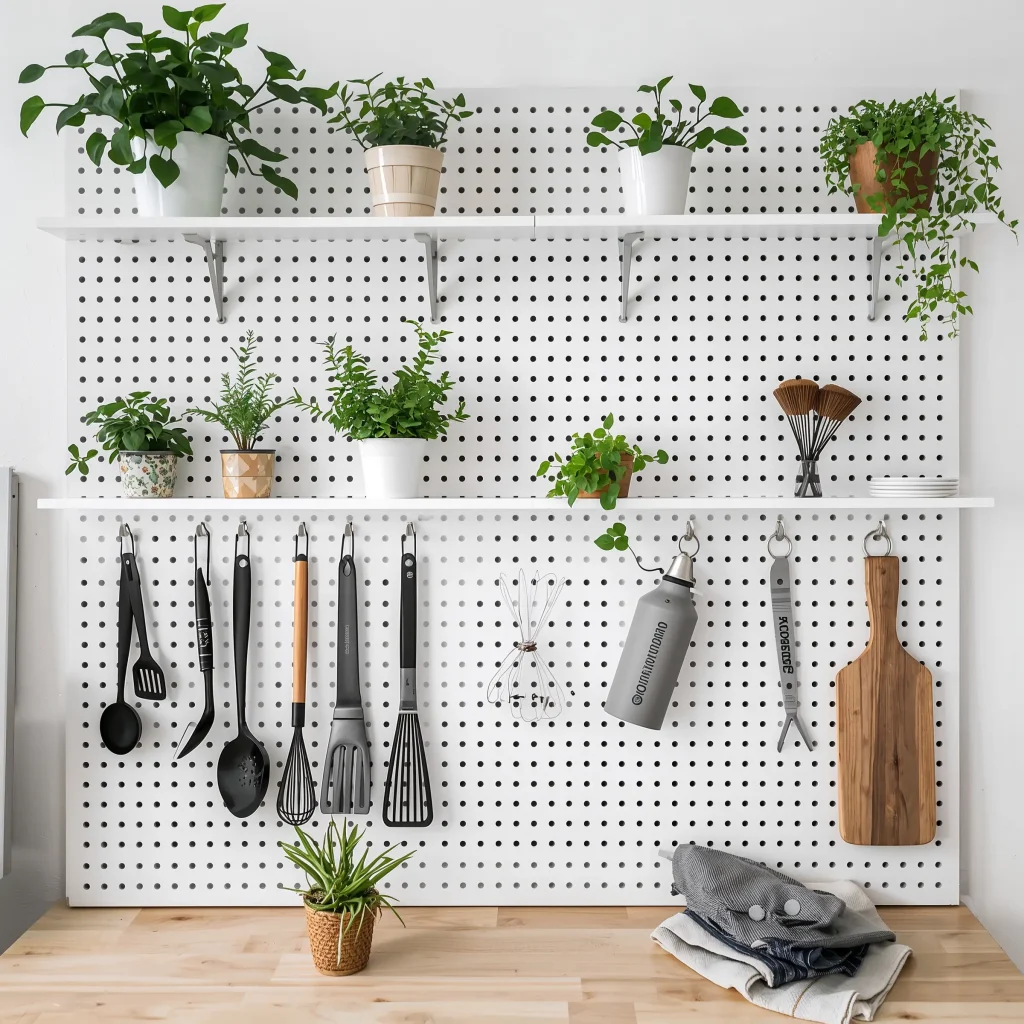
The pegboard wall might be the most underrated kitchen hack ever. It’s like having a customizable command center that changes with your needs. Need more space for pots? Add hooks. Want to display cutting boards? Install some pegs. It’s basically the Swiss Army knife of wall decor.
I painted mine matte black to match my appliances, but I’ve seen gorgeous ones in mint green, blush pink, and even gold. The color completely changes the vibe from utilitarian to uber-chic.
Maximizing Your Pegboard
Start with a thick pegboard (at least ¼ inch) that can handle weight. Mount it with spacers behind it so your pegs can actually go through the holes – rookie mistake I made the first time.
Organize zones on your board:
- Cooking tools near the stove
- Measuring cups and spoons by your prep area
- Dish towels and oven mitts within easy reach
- Small baskets for odds and ends
The best part? You can rearrange everything whenever you want. Had a dinner party and need more space for serving spoons? Just move things around. IMO, it’s the most flexible storage solution out there 🙂
Also Read: 15 Stunning Mid Century Modern Dining Room Ideas for Inspiration
Colorful Ceramic Tile Mural
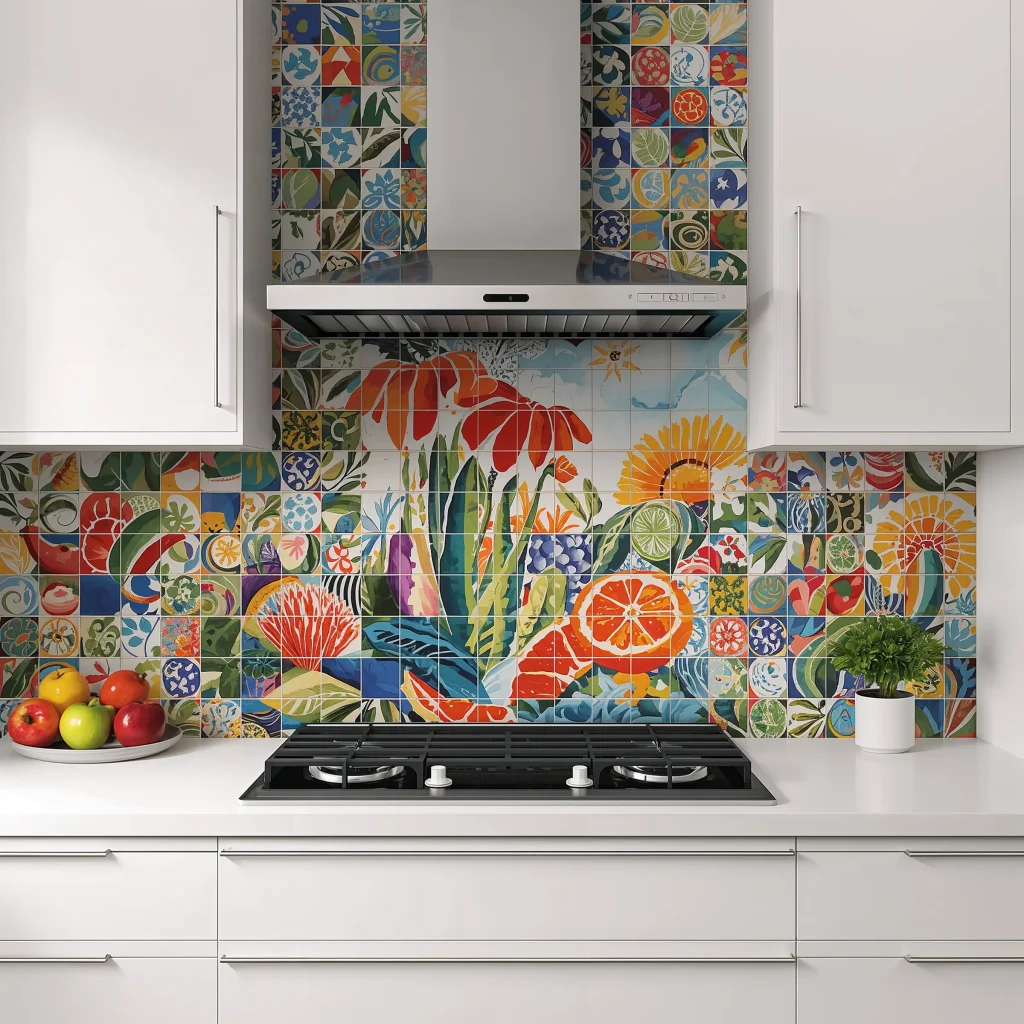
Want to make a serious statement? A ceramic tile mural turns your kitchen wall into actual art. I’m talking about those gorgeous hand-painted tiles that tell a story or create a scene. Mine depicts a Tuscan vineyard, and honestly, it makes doing dishes feel slightly less terrible.
You don’t need to tile an entire wall. Even a small section – maybe 2×3 feet – creates an incredible focal point. Position it behind your stove, above your sink, or as a surprise element on an otherwise empty wall.
Installing Your Tile Mural
This isn’t your average weekend project. Hire a pro if you’re not confident with tile work – trust me, crooked tiles will haunt you forever. But if you’re going DIY:
- Layout your design completely before applying any adhesive
- Number the backs of tiles if they create a specific image
- Use white thinset for light-colored tiles
- Take your time with spacing – consistency is everything
Seal your tiles properly, especially if they’re near water or cooking areas. Natural stone needs sealing every year, while ceramic and porcelain are basically maintenance-free.
Open Shelf with Cookbooks
Here’s where I get a bit sentimental. That collection of cookbooks gathering dust in your cabinet? Time to show them off. Creating an open cookbook display adds color, personality, and actually encourages you to cook more. Win-win-win.
I installed two long shelves and arranged my books by color (yes, I’m that person). The rainbow effect makes me stupidly happy every morning. Plus, having them visible means I actually use them instead of just Googling recipes on my phone.
Styling Your Cookbook Shelves
Mix vertical and horizontal stacks to create visual rhythm. Lay some books flat and stack others on top – it breaks up the monotony and creates little display areas for small plants or decorative objects.
Don’t just limit yourself to cookbooks:
- Add vintage kitchen scales or measuring cups
- Include small potted herbs between book sections
- Display pretty oil bottles or specialty vinegars
- Prop up cutting boards as bookends
Keep your most-used books at eye level. That pristine Julia Child collection might look great up high, but your sauce-splattered everyday cookbook belongs where you can grab it easily.
Farmhouse Signage and Quotes
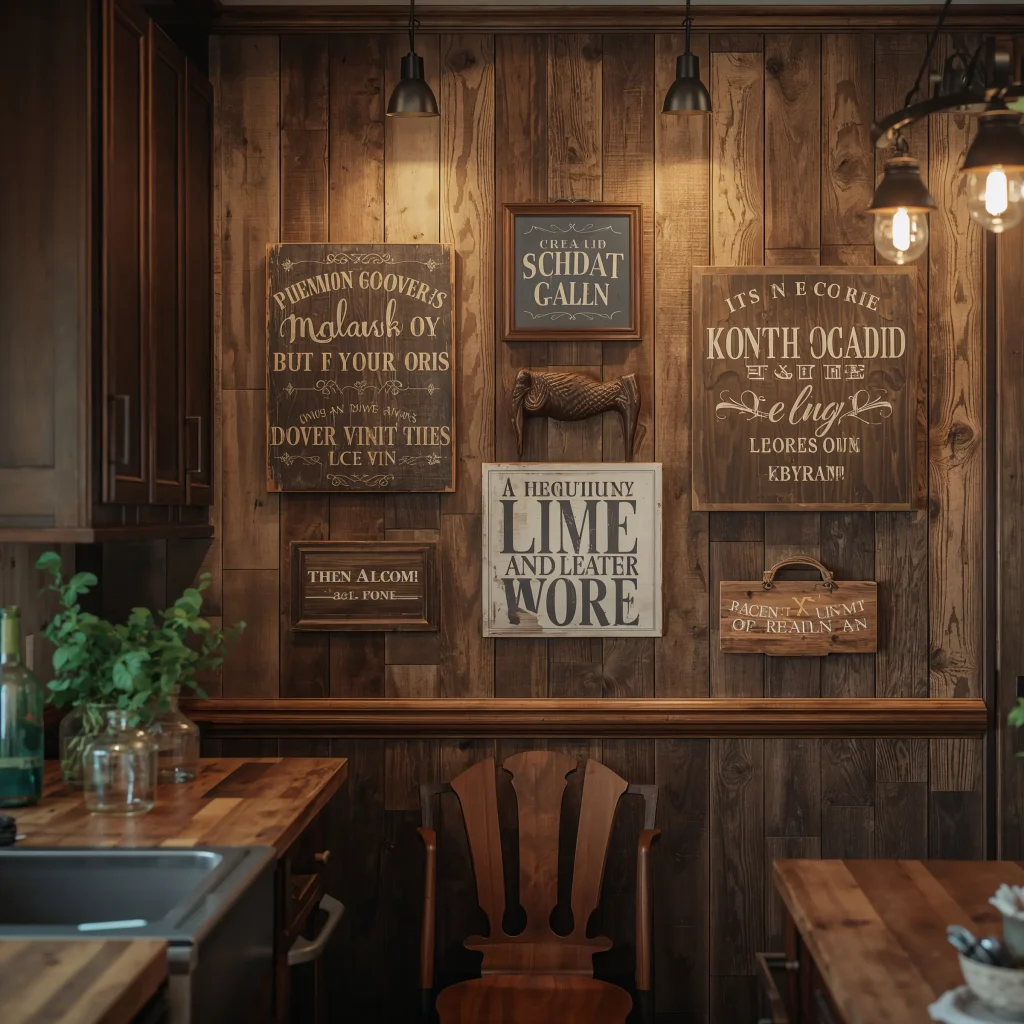
Look, I know farmhouse style got a bit overdone, but well-chosen kitchen signs still have their place. The trick is avoiding those generic “Live, Laugh, Love” situations and finding something with actual personality.
My favorite is a vintage-looking sign that says “I followed my heart and it led me to the fridge.” It’s above my refrigerator, and it makes me smile every single time. That’s the kind of energy we want – personal, slightly irreverent, and genuinely fun.
Choosing Signs That Don’t Suck
Skip the mass-produced stuff at big box stores. Instead, look for:
- Hand-painted wooden signs from local artists
- Vintage metal signs from antique shops
- Custom quotes that mean something to you
- Funny sayings that match your humor
Mount them strategically. Above doorways, over windows, or creating a gallery with other elements. Just don’t overdo it – one or two statement pieces beat ten mediocre ones every time.
Metal Wall Art Panels

Metal wall art brings an unexpected element to kitchen decor. I’m not talking about those cliché wine-themed pieces (unless that’s your jam). I mean striking geometric designs, abstract patterns, or even functional art like decorative trivets that double as wall hangings.
I found an incredible copper piece at a local art fair that looks like flowing water. It catches the light differently throughout the day, creating this living artwork effect that never gets old.
Incorporating Metal Art
Consider your kitchen’s existing metals. Got stainless steel appliances? Warm brass or copper art creates beautiful contrast. All-white kitchen? Go bold with black iron pieces for drama.
Placement tips:
- Large pieces work best on empty walls away from busy areas
- Smaller pieces can fill awkward spaces above doors or windows
- Multiple pieces should share a common element (color, style, or theme)
- Keep them away from high-moisture areas unless they’re properly sealed
Magnetic Knife Strip Wall
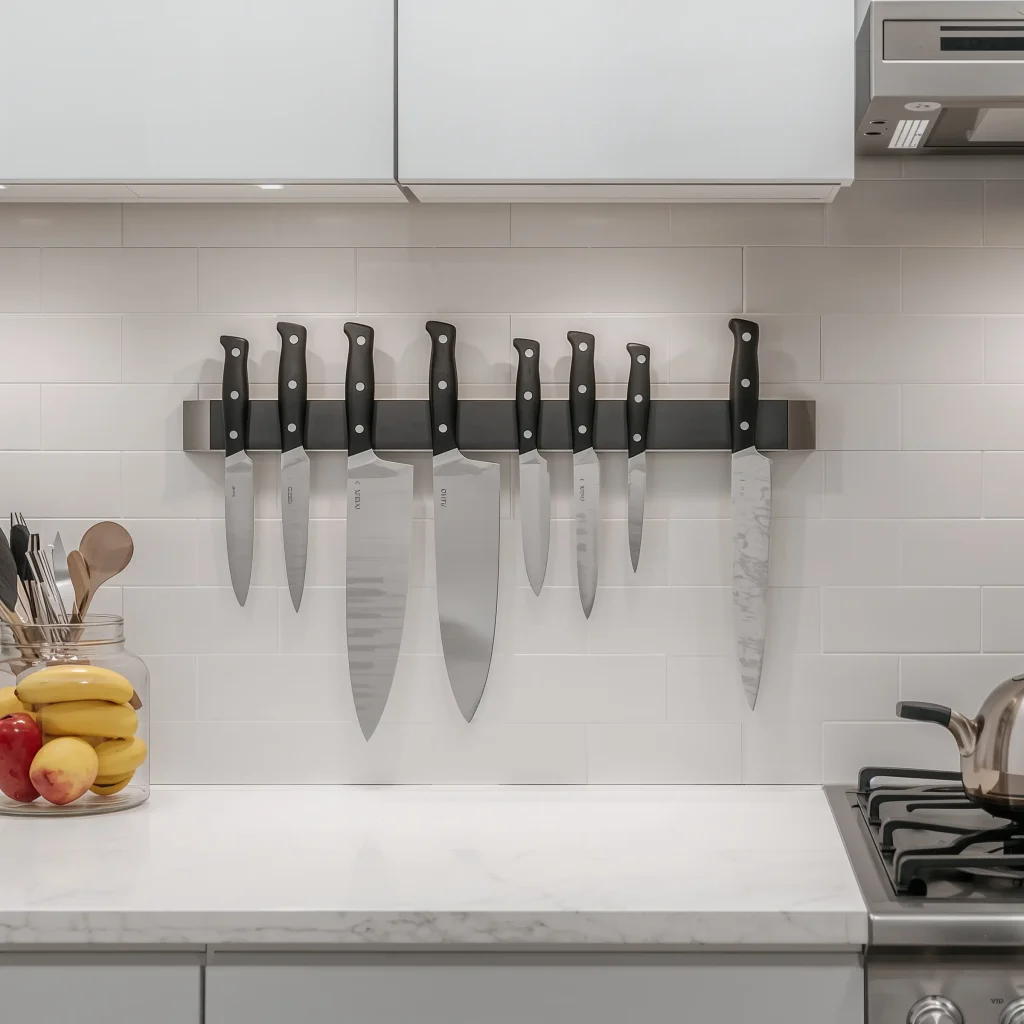
Forget that bulky knife block eating up counter space. A magnetic knife strip mounted on your wall looks sleek, saves space, and actually keeps your knives sharper since they’re not banging around in a drawer.
I installed mine on the tile backsplash next to my stove, and it’s become both functional and sculptural. Those beautiful Damascus steel blades I splurged on? Now they’re art when I’m not using them.
Installing and Organizing Your Strip
Mount it at a comfortable reaching height – usually about 18 inches above your counter. Make sure it’s near your main prep area but away from high-traffic zones where someone might bump into it.
Organization matters:
- Arrange knives by size (largest to smallest looks clean)
- Or by frequency of use (most-used in the middle)
- Leave space between blades for easy grabbing
- Include kitchen shears and even measuring spoons if they’re magnetic
Choose a strip that’s strong enough for your heaviest knife but not so strong you need two hands to remove them. And obviously, keep it high enough that kids can’t reach – learned that one from my friend’s near-disaster.
DIY Macrame Wall Hanging
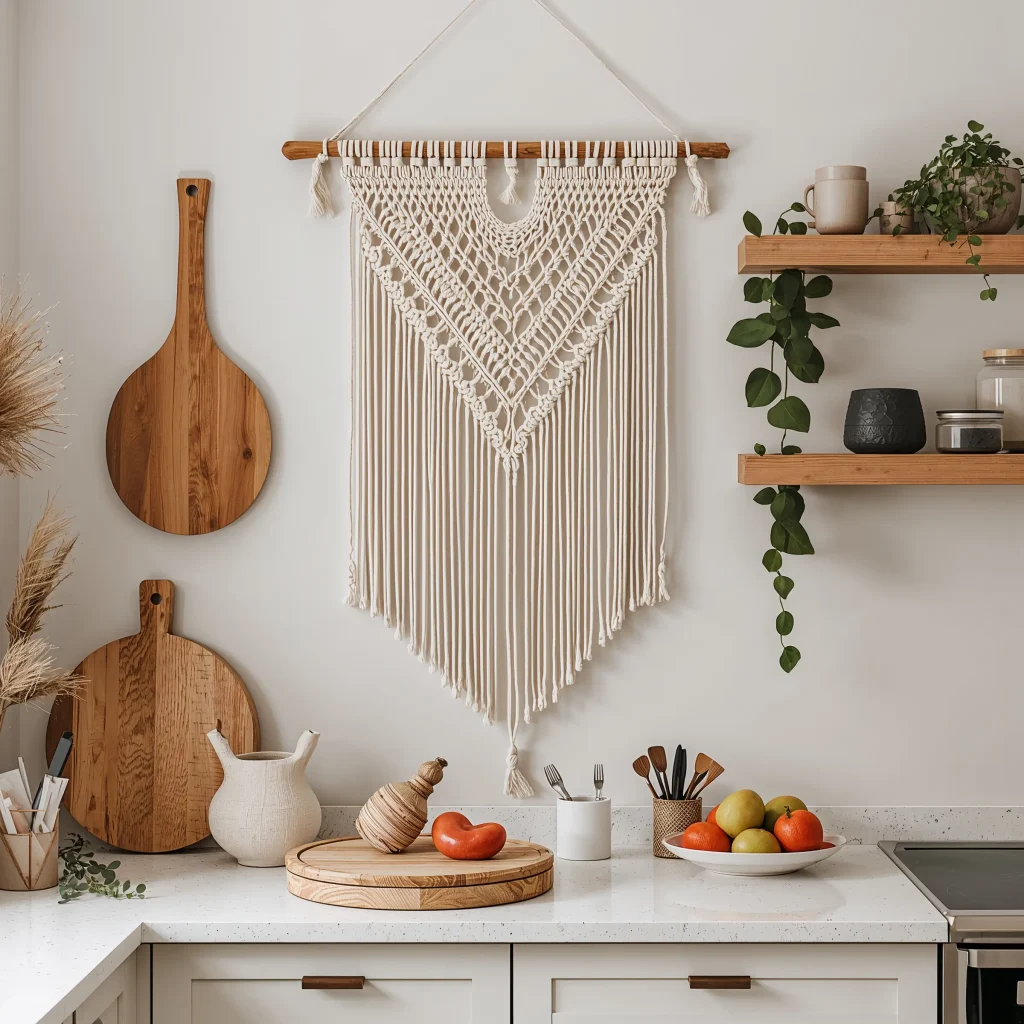
Macrame is having a moment, and honestly, I’m here for it. A large macrame wall hanging adds texture and warmth that hard surfaces can’t match. Plus, making your own is surprisingly therapeutic (and way cheaper than buying one).
I spent one rainy weekend learning basic knots from YouTube and created a piece that now hangs above my breakfast nook. It softens all the hard edges and adds this boho vibe that makes morning coffee feel like a ritual instead of a necessity.
Creating Your Own Macrame
You don’t need to be crafty. Seriously, if I can do it, anyone can. Start with:
- Cotton cord (5mm thickness is beginner-friendly)
- A wooden dowel or branch for hanging
- Scissors and patience
Learn three basic knots and you can make dozens of patterns. The square knot and half hitch will get you surprisingly far. Keep your first piece simple – a basic diamond pattern or straight fringe looks gorgeous and won’t frustrate you into quitting.
Hang it where it won’t get splattered with food. Above a dining area, on an empty wall away from the stove, or even in that awkward corner that nothing else fits in. The natural cream color goes with everything, but you can dye yours for a pop of color.
Pulling It All Together
So there you have it – fifteen ways to transform those boring kitchen walls into something worth looking at. The beauty of these ideas? You don’t have to pick just one. My kitchen combines floating shelves, a small chalkboard section, and some minimalist prints, and they all play nicely together.
Start with one project that really speaks to you. Maybe it’s the herb garden because you’re tired of buying $4 basil that dies immediately. Or perhaps the pegboard because you’re sick of digging through drawers for that one specific spatula. Whatever you choose, make it yours.
Remember, the best kitchen decor is functional AND beautiful. Every one of these ideas serves a purpose beyond just looking pretty. They organize your space, inspire you to cook more, or simply make you smile when you walk into the room. That’s what good design does – it improves your daily life in small but meaningful ways.
Don’t stress about getting everything perfect right away. Kitchens evolve as we do. That gallery wall might start with three plates and grow to thirteen. Your herb garden might begin with just basil and expand into a full botanical wonderland. The point is to start somewhere and enjoy the process.
What’s stopping you from tackling that blank wall right now? Grab some painters tape, mark out your space, and get planning. Your kitchen is about to become everyone’s favorite room in the house – and trust me, once you start, you’ll wonder why you waited so long.
Happy decorating, friends. May your walls be interesting and your coffee always be strong.