DIY Wall Decor Ideas: 15 Fun and Affordable Ideas for Every Space
Remember that awkward moment when someone walks into your place and their eyes land on that massive blank wall? Yeah, me too. Nothing screams “I adulted too hard and forgot about personality” quite like a bare wall staring back at you.
The good news? You don’t need to drop a fortune at fancy home decor stores or hire an interior designer to fix this problem.
I’ve spent the last few years experimenting with different wall decor ideas (some turned out amazing, others… well, let’s just say my husband still reminds me about the “paint incident of 2021”).
Through all that trial and error, I’ve discovered that DIY wall decor isn’t just budget-friendly – it’s actually way more fun and personal than anything you’ll find pre-made.
Want to know the best part? You probably already have half the materials lying around your house. So grab your glue gun, dust off that Pinterest board, and let’s turn those sad walls into something worth double-tapping on Instagram.
Boho Macrame Wall Hanging

Ever walk into someone’s place and immediately think “wow, they’ve got their life together”? That’s the power of a good macrame wall hanging. This boho-chic trend has stuck around for a reason – it adds instant texture and warmth to any space without looking like you’re trying too hard.
Starting a macrame project might seem intimidating if you’ve never worked with rope before. Trust me, I get it. My first attempt looked more like a tangled fishing net than home decor. But here’s the secret: you only need to learn three basic knots to create something gorgeous. The square knot, half hitch, and gathering knot will become your new best friends.
You’ll need some macrame cord (I prefer 3mm cotton rope), a wooden dowel or branch, and about two hours of your time. YouTube tutorials will save your sanity here – watching someone’s hands work through the knots beats reading written instructions any day. Pro tip: choose a neutral cream or beige cord for your first project. It’s forgiving and matches literally everything.
Materials You’ll Need:
- 100-150 feet of macrame cord
- Wooden dowel (12-24 inches wide)
- Scissors
- Measuring tape
- Optional: wooden beads or feathers for decoration
The beauty of macrame? Even if you mess up, it still looks intentionally bohemian. Nobody’s going to inspect your knots with a magnifying glass. Plus, once you hang that baby up and add some plants nearby, you’ve basically created an entire vibe.
DIY Floating Wood Shelves

Floating shelves hit different when you make them yourself. Sure, you could buy those particle board ones from IKEA, but where’s the character in that? Building your own floating shelves lets you customize every single detail – from the wood type to the exact dimensions that fit your weird corner perfectly.
I learned this the hard way after buying three different shelf sets that were either too long, too short, or just looked cheap. Making my own changed everything. You control the thickness, the finish, and most importantly, the placement of those hidden brackets that make them appear to float magically.
Start with a solid piece of wood – reclaimed barn wood works amazingly if you can find it. Sand it down (but not too much – you want some character), stain it to match your style, and install hidden shelf brackets. The brackets are the real MVPs here. They slide into grooves you’ll drill into the back of your shelf, creating that clean, floating look everyone loves.
Installation Tips:
- Use a stud finder (seriously, don’t skip this)
- Level everything twice before drilling
- Weight capacity matters – don’t cheap out on brackets
- Consider the spacing between multiple shelves
What really sells these shelves? The styling. Mix books, small plants, and a few decorative objects. Keep it minimal though – the wood itself should be part of the display.
Minimalist Canvas Line Art

Who says you need to be Picasso to create wall art? Minimalist line art has become my go-to recommendation for friends who claim they “can’t draw.” Spoiler alert: if you can hold a paintbrush and draw a wobbly line, you’re qualified.
The concept is stupidly simple. Grab a blank canvas, some black paint or a thick marker, and create abstract line drawings. Think faces drawn with a single continuous line, abstract body forms, or even just geometric shapes that somehow look expensive and gallery-worthy. The key is confidence – draw those lines like you meant every curve and angle.
I discovered this technique during lockdown when I was desperately trying to fill wall space without spending money. My first attempt was supposed to be a woman’s face but ended up looking more like a potato with hair. You know what? I hung it anyway, and people constantly ask where I bought it. That’s the beauty of abstract art – everything looks intentional if you frame it right.
Quick Start Guide:
- Use quality canvases (cheap ones warp)
- Black on white is foolproof
- Draw in pencil first if you’re nervous
- Embrace imperfections – they add character
FYI, this style works incredibly well in sets of three. Create a mini gallery wall with different but related designs. Your guests will think you dropped serious cash at West Elm.
Also Read: 15 Beautiful TV Wall Decor Ideas for a Modern Chic Look
Rustic Wooden Frame Collage

Picture frames don’t have to match – and honestly, they shouldn’t. Creating a rustic wooden frame collage brings way more personality to your walls than those generic matching sets everyone else has. Mix different sizes, finishes, and styles for that collected-over-time look that actually tells a story.
Start hitting up thrift stores and yard sales. You’re looking for wooden frames with character – scratches, worn edges, different wood tones. These imperfections are exactly what you want. I’ve built entire gallery walls for under $20 just by being patient and creative with secondhand finds.
The trick to making mismatched frames look intentional? Unified content. Use all black and white photos, or all colorful artwork, or even all pressed flowers. The consistency in what’s inside the frames creates cohesion while the varied frames add interest.
Don’t overthink the arrangement. Lay everything out on the floor first, snap a photo for reference, then start hanging. The slightly imperfect spacing actually looks better than measuring everything precisely. Trust me on this one – I’ve tried both ways, and the organic approach wins every time.
Paper Flower Wall Art
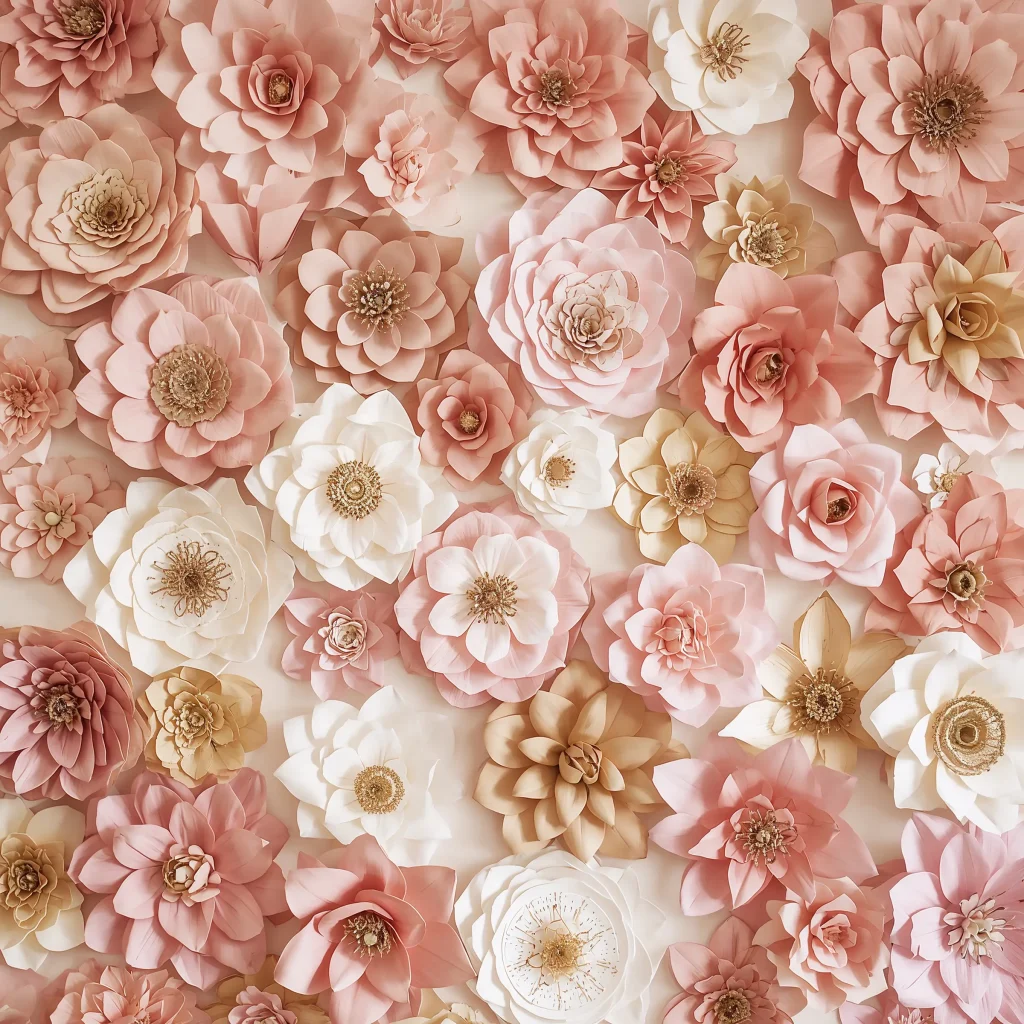
Remember making paper flowers in elementary school? Turns out that skill translates perfectly to sophisticated wall decor. Paper flower walls have exploded in popularity, and once you see how easy they are to make, you’ll understand why everyone’s obsessed.
The materials cost practically nothing – tissue paper, crepe paper, or even coffee filters work beautifully. You can create an entire flower wall for less than the price of a single real bouquet. Plus, these babies last forever and never need watering (perfect for those of us who somehow kill succulents).
I started small with a cluster of five giant peonies above my bed. Now I’ve got an entire wall in my daughter’s room covered in an ombre gradient of paper roses. The compliments never stop coming, and honestly? Making them has become weirdly therapeutic. There’s something meditative about folding and shaping petals while binge-watching Netflix.
Flower-Making Basics:
- Tissue paper creates the softest, most realistic petals
- Wire stems aren’t necessary for wall displays
- Hot glue guns are your friend
- Layer different sizes for depth
Want to really impress? Create an ombre effect by gradually transitioning colors across your wall. Start with deep burgundy and fade to pale pink, or go from navy to sky blue. The gradient effect looks incredibly expensive but costs maybe $15 in materials.
Hanging Plant Wall Grid

Plants make everything better – that’s just science. But what if you’re running out of surface space? Enter the hanging plant wall grid, aka the solution to your plant addiction that your partner can’t complain about because technically it’s “wall decor.”
You can create a grid using metal mesh panels from the hardware store, or go the DIY route with wooden slats and some basic woodworking skills. I prefer the metal grid because it’s sturdy enough to hold multiple plants and looks industrial-chic without trying too hard. Mount it to your wall with appropriate anchors (please don’t just use basic nails – learn from my mistakes).
The magic happens when you start adding plants. Mix trailing pothos with compact succulents, add some air plants for texture, maybe throw in a small fern. Use S-hooks and macrame hangers at different heights to create visual interest. The result? A living wall that actually improves your air quality while looking like something from a trendy coffee shop.
Plant Selection Tips:
- Choose plants with similar light requirements
- Pothos and philodendrons are practically indestructible
- Include at least one trailing plant for drama
- Consider weight when selecting pots
Fabric Wall Tapestry DIY
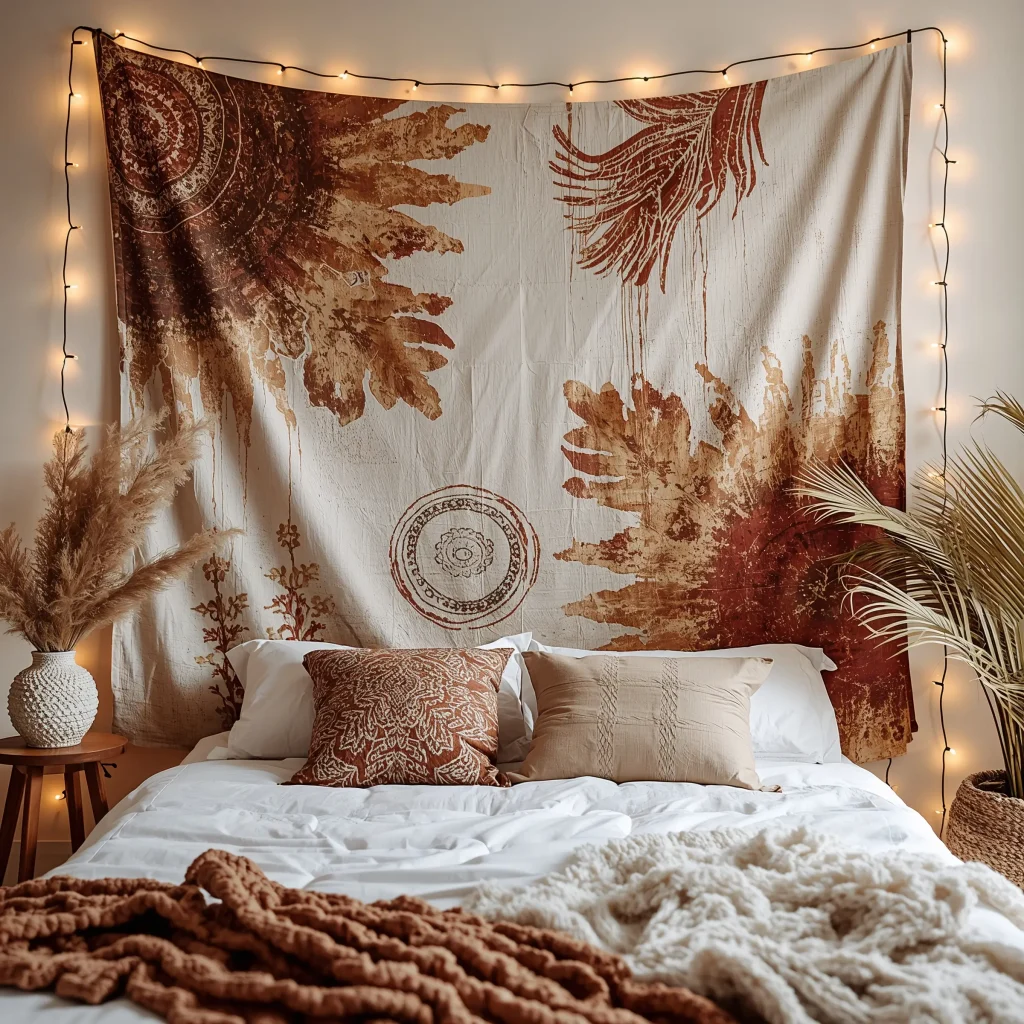
Forget expensive wallpaper – a DIY fabric tapestry gives you the same impact for a fraction of the cost and zero commitment. Found a gorgeous fabric at the thrift store? Boom, that’s wall art now. Inherited your grandma’s vintage scarves? Gallery wall material right there.
The process couldn’t be simpler. Find fabric you love, create a hanging system (wooden dowels work great), and you’re done. I’ve used everything from vintage saris to canvas drop cloths, and each one completely transforms the room’s energy. The best part? When you get bored, switching it out takes literally two minutes.
My current obsession involves using lightweight curtain rods hidden behind the fabric for an ultra-clean look. The fabric appears to float on the wall, and you can easily swap designs seasonally. Summer calls for light linens, winter gets cozy woven textures – you get the idea.
Don’t limit yourself to rectangular pieces either. Cut fabric into triangular banners, create geometric shapes, or layer multiple pieces for depth. One of my favorite tricks? Using fabric with bold patterns in small doses – like a stripe of African mud cloth running vertically between two windows.
Painted Geometric Accent Wall

Why stop at hanging things ON your wall when you can make the wall itself the art? A geometric accent wall sounds complicated but honestly requires nothing more than painter’s tape, patience, and the ability to convince yourself that “close enough” is perfectly fine.
Pick your pattern – triangles, hexagons, or go wild with an abstract design. Map it out with painter’s tape (the good stuff, not the cheap kind that bleeds). Choose your colors wisely; I learned that five colors might sound fun but looks chaotic. Stick to two or three colors maximum, including your base wall color.
The satisfaction of peeling off that tape to reveal clean lines? Chef’s kiss. Sure, some lines might not be perfect, but that’s what gives it character. My dining room wall has a mountain range design in three shades of blue, and despite a few wobbly peaks, it’s the first thing everyone compliments.
Painting Pro Tips:
- Seal tape edges with clear paint first to prevent bleeding
- Work in sections to avoid overwhelming yourself
- Step back frequently to check your progress
- Embrace imperfections – they prove it’s handmade
Upcycled Mirror Frame Decor
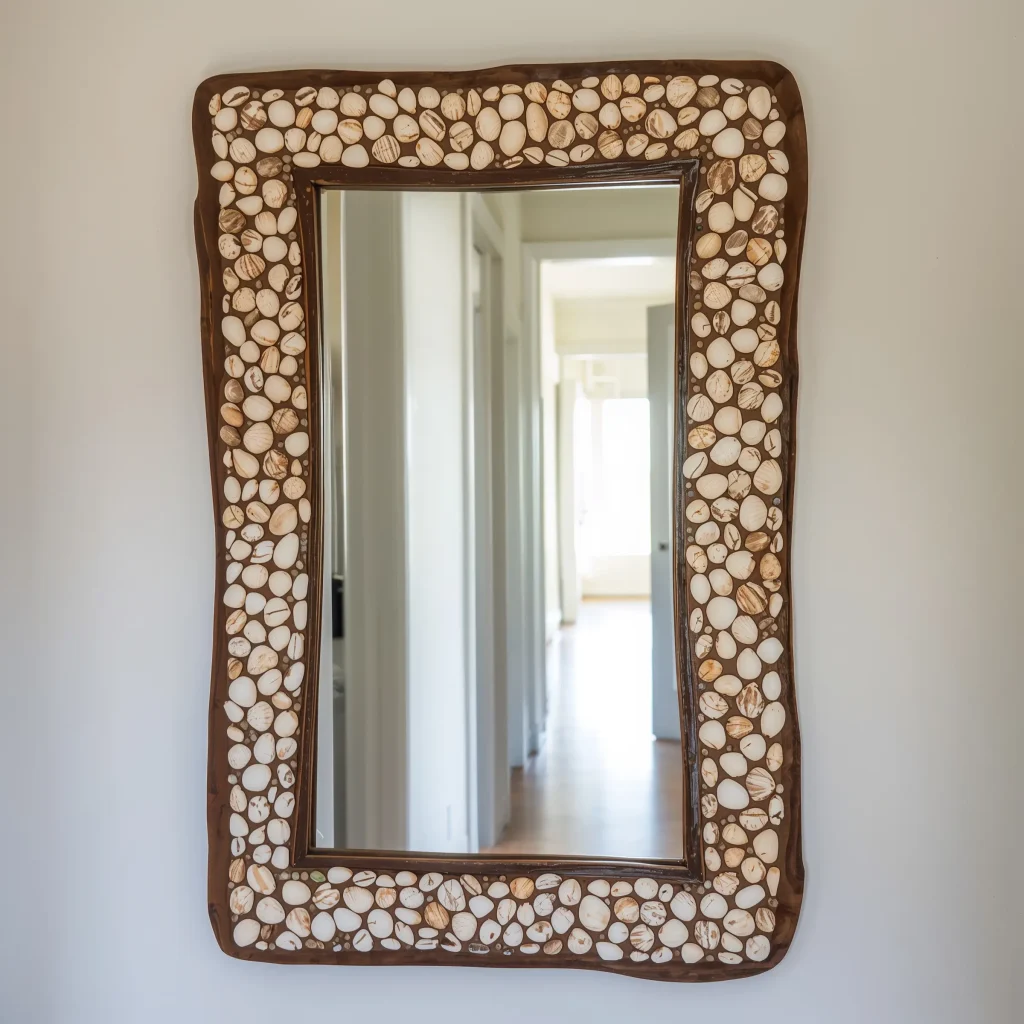
That old mirror with the dated gold frame? Don’t toss it – transform it into a statement piece. Upcycling mirror frames has become my favorite weekend project because the transformation is always dramatic and costs almost nothing.
I’ve wrapped frames in rope for a nautical vibe, glued on shells and sea glass for beach house feels, and even decoupaged one with vintage book pages (yes, I’m that person). The key is committing to your vision. Half-hearted upcycling looks exactly like what it is – a craft project gone wrong.
My latest creation involved hot-gluing wine corks around a boring rectangular mirror. Sounds weird? Maybe. But it looks absolutely perfect in my kitchen and gets compliments from everyone who sees it. Plus, it gave me an excuse to drink more wine “for the project.”
Upcycling Ideas:
- Spray paint for instant modernization
- Rope wrapping for texture
- Mosaic tiles for glamour
- Natural elements like driftwood or stones
Also Read: 15 Stunning Mid Century Modern Dining Room Ideas for Inspiration
DIY String Light Photo Display

String lights aren’t just for dorm rooms and Christmas trees anymore. Creating a photo display with string lights adds warmth and personality to any space while showcasing your favorite memories. It’s basically Instagram in real life, but better because you can actually touch it.
Skip the basic white lights everyone uses. Warm Edison bulbs or those trendy geometric cage lights elevate this project from college kid to actual adult with taste. String them in a deliberate pattern – maybe a zigzag across one wall, or frame a window, or create a canopy effect in a corner.
Attach photos with mini clothespins or clips for easy swapping. I change mine seasonally – beach photos in summer, cozy family shots in winter. The combination of soft lighting and personal photos creates the kind of ambiance that makes people want to stay longer. IMO, it’s the easiest way to make a house feel like home 🙂
Clay Wall Art Plates

Who decided plates only belong in the kitchen? Decorative clay plates on walls have been a thing forever, and making your own takes this classic idea to a personal level. You don’t need a pottery wheel or kiln – air-dry clay and some paint work perfectly.
Roll out your clay, cut circles (or don’t – organic shapes look amazing too), and create patterns using household items. Fork tines make great texture, lace creates beautiful impressions, and leaves give you instant botanical vibes. Once dry, paint them however you want. I went through a phase where everything was terracotta and white – very Pinterest 2019 – but now I’m into bold, colorful patterns.
Arrange them asymmetrically on your wall for a modern gallery effect. Mix sizes and patterns but keep a common element to tie them together – maybe all earth tones, or all geometric patterns. The 3D element adds depth that flat art can’t achieve.
Clay Plate Tips:
- Air-dry clay is forgiving and beginner-friendly
- Seal painted plates with mod podge
- Use plate hangers or adhesive discs for mounting
- Group odd numbers for visual appeal
Recycled Magazine Wall Mosaic
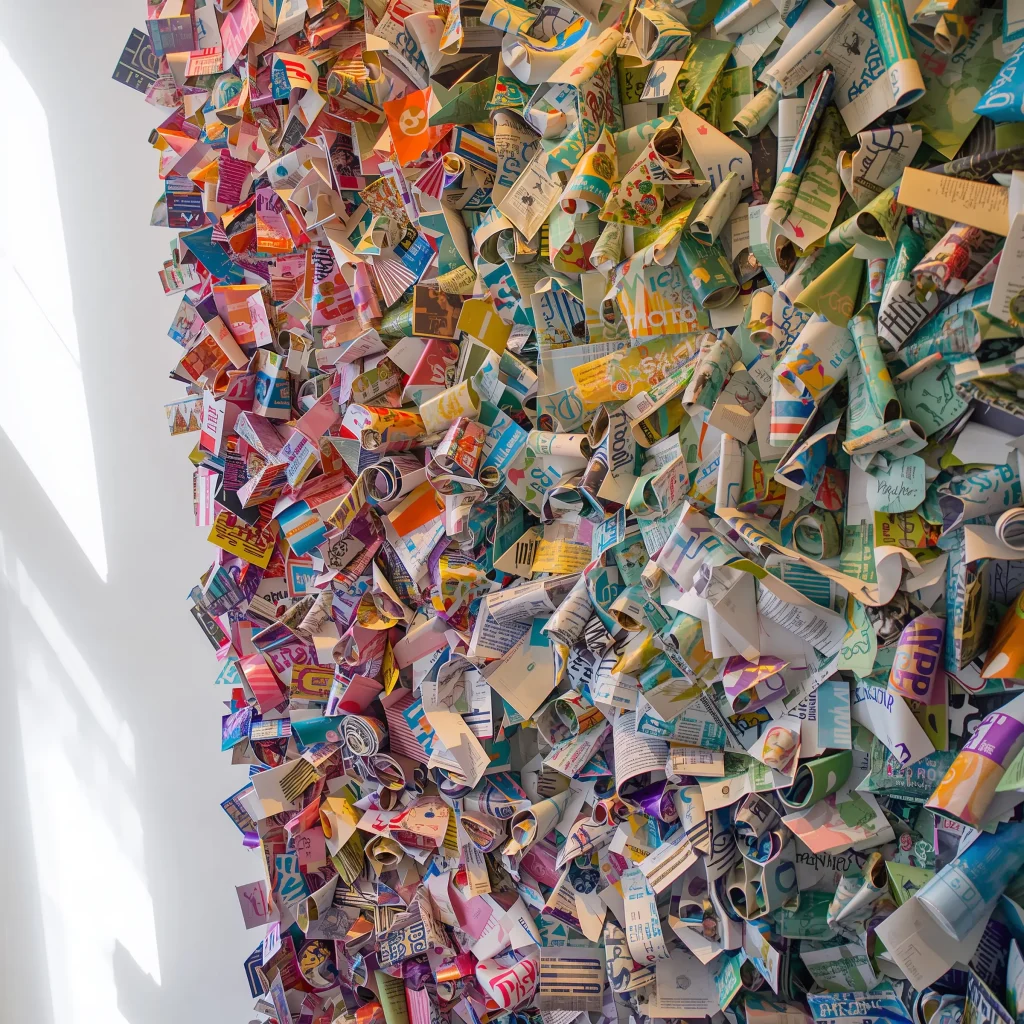
Got a stack of old magazines you can’t bear to throw away? Time to turn that hoarder tendency into art. A magazine mosaic wall sounds complicated but really just requires patience, mod podge, and the ability to ignore people who ask “isn’t that just a collage?”
Choose your approach – color-blocked sections create a modern look, while mixing everything creates controlled chaos that somehow works. I spent one rainy weekend creating an ombre wave effect using only blue and green pages from National Geographic magazines. Three years later, it’s still my favorite wall in the house.
The process is meditative in a weird way. Tearing, arranging, gluing – it’s basically adult kindergarten. Start small with a single canvas or frame, then expand if you love the result. Fair warning: this project is addictive. You’ll start seeing potential mosaic material everywhere.
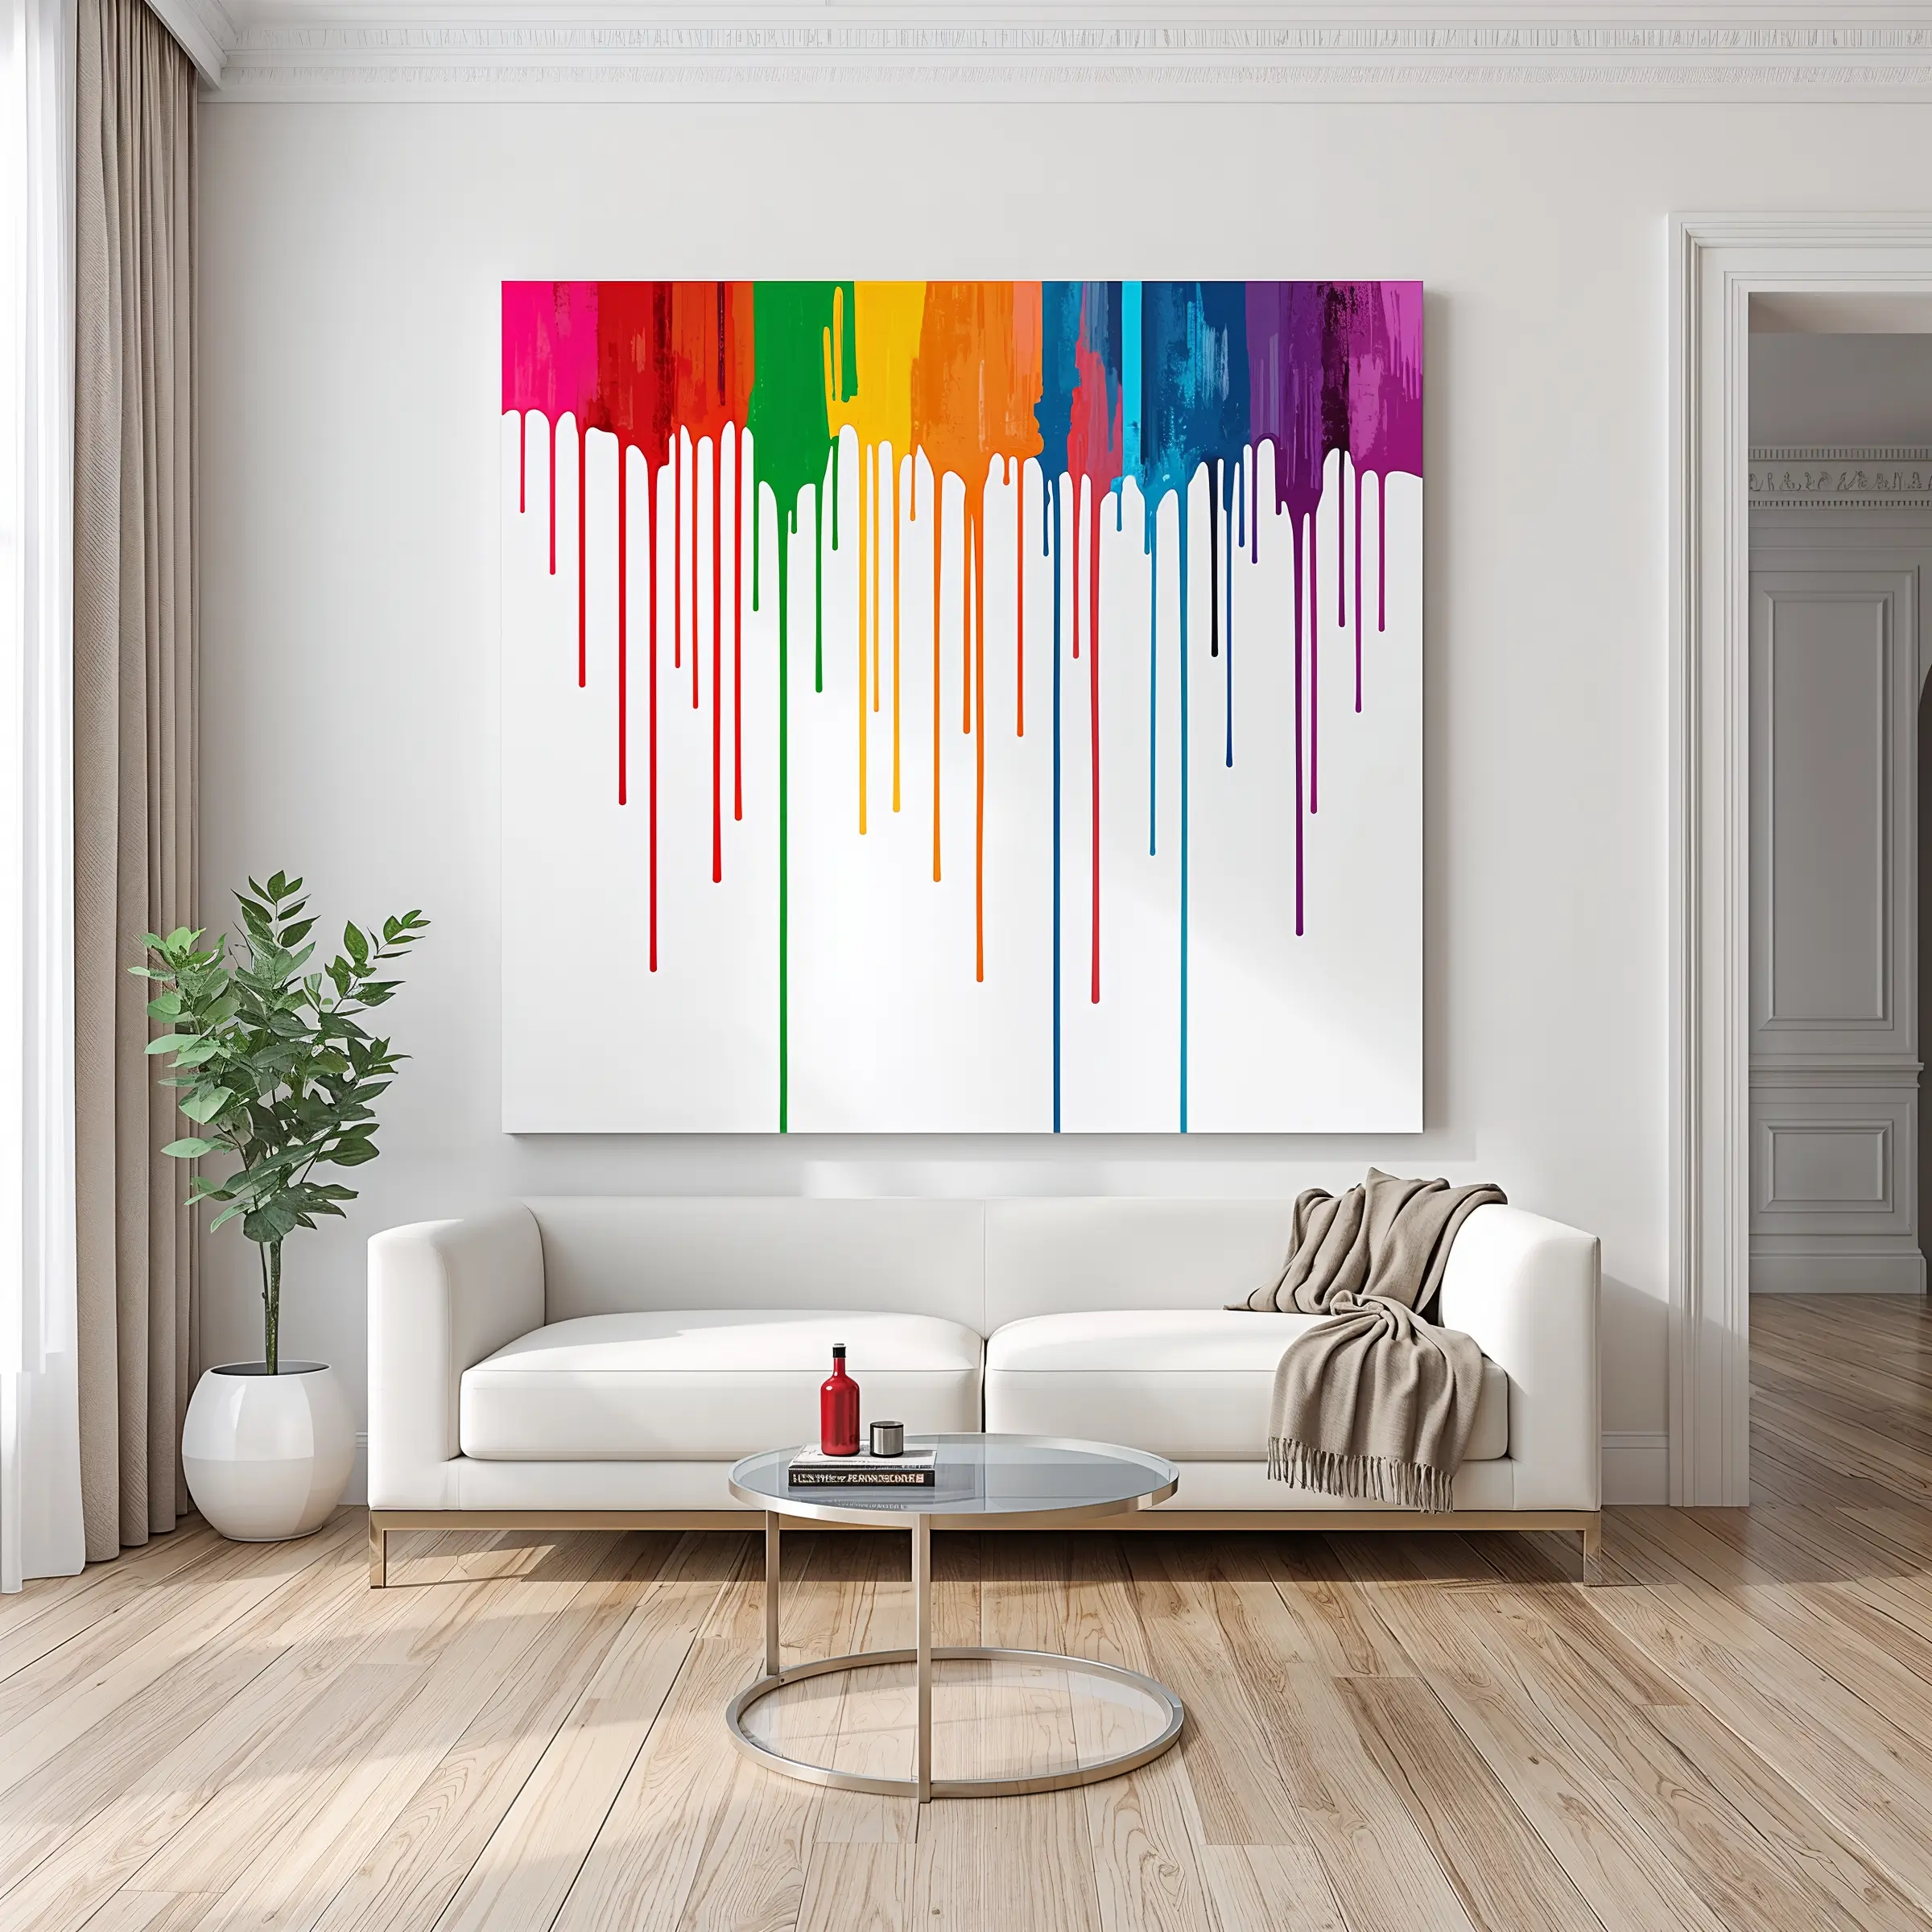
Abstract Paint Drip Art
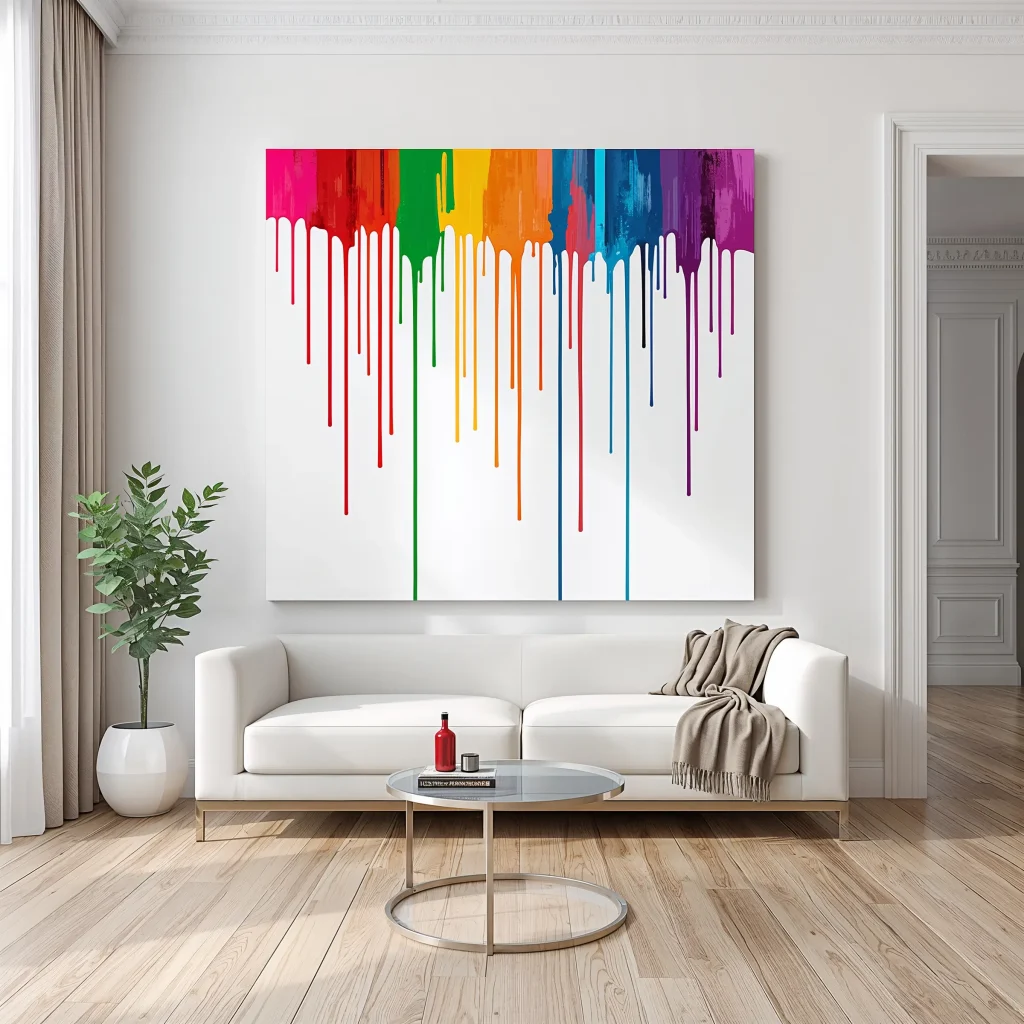
Channel your inner Jackson Pollock with abstract paint drip art that looks way more expensive than it actually is. This technique works because even “mistakes” look intentional when you’re going for abstract. Can’t draw a straight line? Perfect. This is your calling.
Thin your acrylic paint with water until it’s the consistency of heavy cream. Prop your canvas at an angle and let gravity do the work. Start with one color, let it dry partially, then add another. The layering creates depth that makes people lean in for a closer look. My first attempt used leftover house paint, and honestly? It turned out better than the piece I planned meticulously.
Control the chaos by limiting your color palette. Three colors maximum keeps it sophisticated rather than kindergarten craft project. I stick to variations of the same color family – all blues, all earth tones, or go bold with black and gold on white.
Drip Technique Tips:
- Protect your floors (seriously, learn from my mistakes)
- Work in thin layers for best results
- Tilt canvas different directions for organic flow
- Embrace the unpredictability
Vintage Record Wall Display

Those old records collecting dust in your parents’ basement? They’re actually instant wall art waiting to happen. Vintage record displays bring music history to your walls while adding that perfect circle element designers are always talking about.
I started with three records I found at a garage sale for 50 cents each. Now I’ve got an entire wall showcasing album covers from the ’60s and ’70s. The colors and graphics from that era are absolutely unmatched. Even if you don’t care about the music, the visual impact is undeniable.
Display them using simple picture ledges for easy swapping, or mount them directly with special record frames that let you flip them occasionally. Mix in some modern albums for contrast, or stick to a specific genre for a themed display. Jazz albums in the living room, punk rock in the garage – you get the idea.
DIY Wall Basket Arrangement

Baskets on walls might sound like something from your grandma’s house, but done right, they create incredible texture and visual interest. The key is choosing baskets that tell a story – not just random wicker circles thrown up haphazardly.
I collect baskets from my travels now (they pack flat, making them perfect souvenirs). Each one reminds me of a specific place and time, creating a wall that’s basically a 3D travel journal. Mix different sizes, textures, and colors, but keep some unifying element. Maybe they’re all natural fibers, or all have similar weaving patterns.
The arrangement matters more than the individual baskets. Create movement with varied sizes and heights. Think of it like a constellation rather than a grid. Start with your largest basket as an anchor, then build around it. The shadows they cast add another layer of interest that changes throughout the day.
Basket Display Guidelines:
- Mix shallow and deep baskets for dimension
- Use removable adhesive strips for easy rearranging
- Include at least one statement piece
- Consider painting some for color pops
Making It All Work Together
Here’s the thing about DIY wall decor – perfection is overrated. The slight wonkiness, the visible brushstrokes, the not-quite-matching colors? That’s what gives your space personality. That’s what makes people ask “where did you get that?” instead of scrolling past it on their phones.
Start with one project that speaks to you. Don’t try to transform your entire house in a weekend (trust me, that way lies madness and a very annoyed partner). Build your skills, find your style, and most importantly, have fun with it. The walls aren’t going anywhere, and neither is your creativity.
Remember, the best wall decor tells your story. Whether it’s macrame you learned from YouTube at 2 AM or a geometric wall you painted after three glasses of wine, each piece adds to the narrative of your space. Your walls should make you smile every time you walk by – not because they’re perfect, but because they’re perfectly you.
So grab those supplies, clear your weekend schedule, and start creating. Your blank walls are practically begging for some personality, and now you’ve got 15 ways to deliver. Who knows? You might just discover you’re more artistic than you thought. At the very least, you’ll have something way more interesting to look at than that sad, empty wall that’s been judging you for months :/