15 Stylish DIY Laundry Room Ideas and Quick DIY Projects
Let’s face it – your laundry room probably looks like a forgotten corner of your home where socks mysteriously disappear and that pile of “I’ll fold it later” clothes keeps growing. Mine certainly did until I decided enough was enough.
After transforming my cramped laundry space into something I actually enjoy being in (yes, really!), I’m here to share the DIY projects that actually work – not just the Pinterest-pretty ones that fall apart after a week.
You know what’s funny? We spend so much time making our living rooms Instagram-worthy, but the laundry room – where we actually spend hours every week – gets zero love. Well, that changes today.
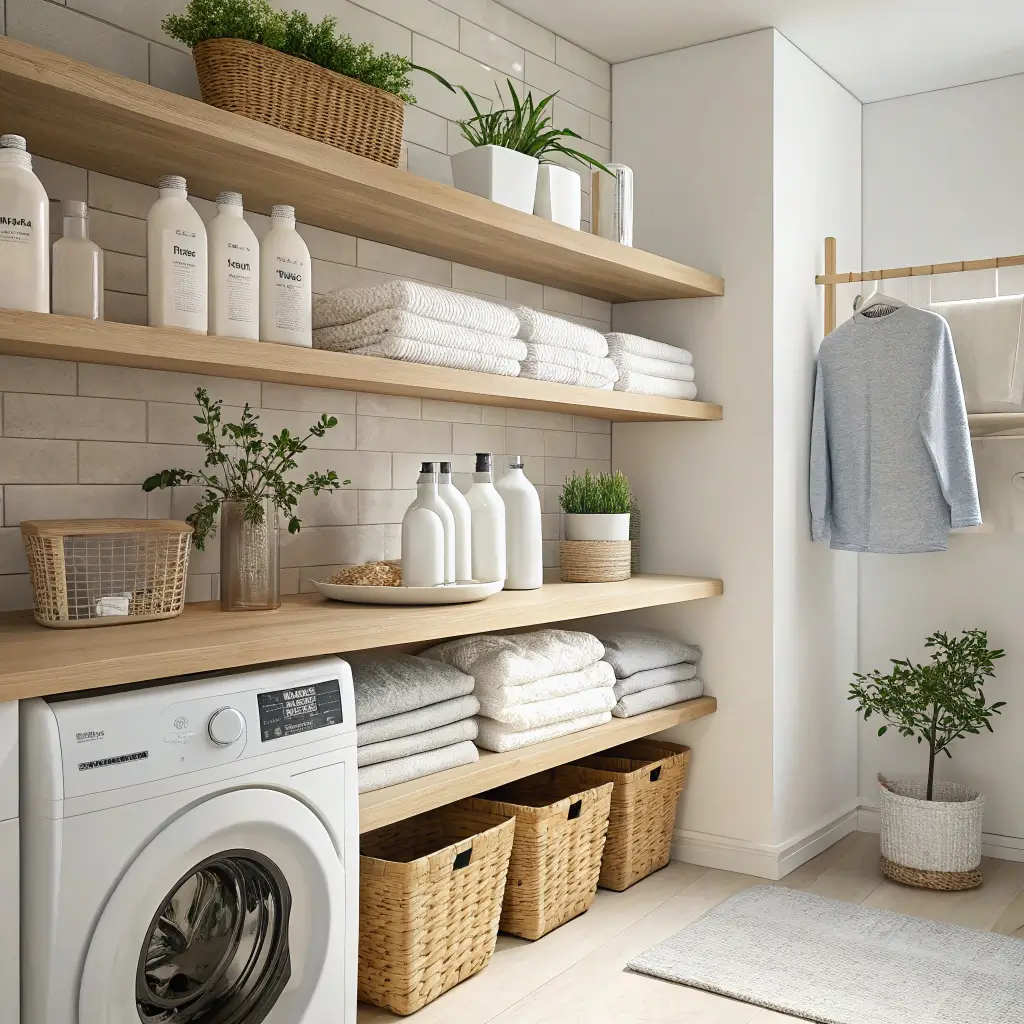
Floating Shelves for Extra Storage

Remember when I said laundry rooms get no love? Floating shelves changed everything for my space. I installed three simple white shelves above my washer, and suddenly I had room for all those bottles of detergent that used to crowd my machine tops.
Here’s what makes floating shelves such a game-changer: they literally take up zero floor space. You can grab a set of brackets for about $20, add some decent wood (I used pine because I’m not made of money), and boom – instant storage that looks like you hired a designer.
The trick is mounting them at the right height. Mount your first shelf at least 15 inches above your washer – trust me, you’ll need that clearance when the lid’s open. I learned this the hard way when my first attempt resulted in a nice dent in my brand-new shelf. 🙂
Quick Installation Tips:
- Use a stud finder (seriously, don’t skip this)
- Level everything twice before drilling
- Weight capacity matters – those detergent bottles add up fast
- Consider adding a lip to prevent bottles from sliding off
Rolling Laundry Cart DIY

Ever tried carrying a full laundry basket up stairs while dodging a cat? Yeah, not fun. That’s why I built a rolling cart that’s basically become my laundry room MVP.
You can make one for under $50 using basic materials from any hardware store. I used plywood for the shelves and added industrial casters that actually roll smoothly (cheap ones will drive you crazy). The best part? It fits perfectly between my washer and dryer when not in use.
My cart has three tiers: top for folded clothes, middle for supplies, and bottom for that inevitable “mystery pile” we all have. Pro tip: add a small raised edge around each shelf. Socks won’t escape anymore, and your sanity stays intact.
Want to get fancy? Add some hooks on the sides for hanging bags or that lonely shirt that needs air-drying. IMO, this project gives you the most bang for your buck in terms of functionality.
Wall-Mounted Folding Station

Who actually has space for a permanent folding table? Not me, and probably not you either. That’s where a wall-mounted folding station becomes your new best friend.
I installed mine using heavy-duty hinges and a piece of butcher block that folds flat against the wall when not needed. Takes up literally zero floor space when closed, but gives me a full work surface when I need it. Genius, right?
The key is mounting it at the right height – about 36 inches from the floor works for most people. Any higher and you’ll strain your back; any lower and you’ll be hunching over like Quasimodo.
Materials You’ll Need:
- Solid wood board (at least 3/4 inch thick)
- Heavy-duty piano hinges
- Wall brackets for support
- Optional: folding support legs for extra stability
Pegboard Organizer for Supplies

Pegboard isn’t just for garages anymore. I installed a 4×4 pegboard panel in my laundry room, and suddenly all those random supplies had a home. Measuring cups for detergent? Hanging right there. Stain removal pen? Got its own hook.
What I love about pegboard is its flexibility. Having a lint roller phase? Add more hooks. Discovered you actually don’t need seventeen different fabric softeners? Remove some baskets. The whole system adapts to your actual needs, not what some organizing guru thinks you need.
Paint it a fun color to make it less workshop-y. I went with sage green, and it actually looks intentional rather than “I raided Home Depot’s clearance section.”
Hidden Hamper Cabinet
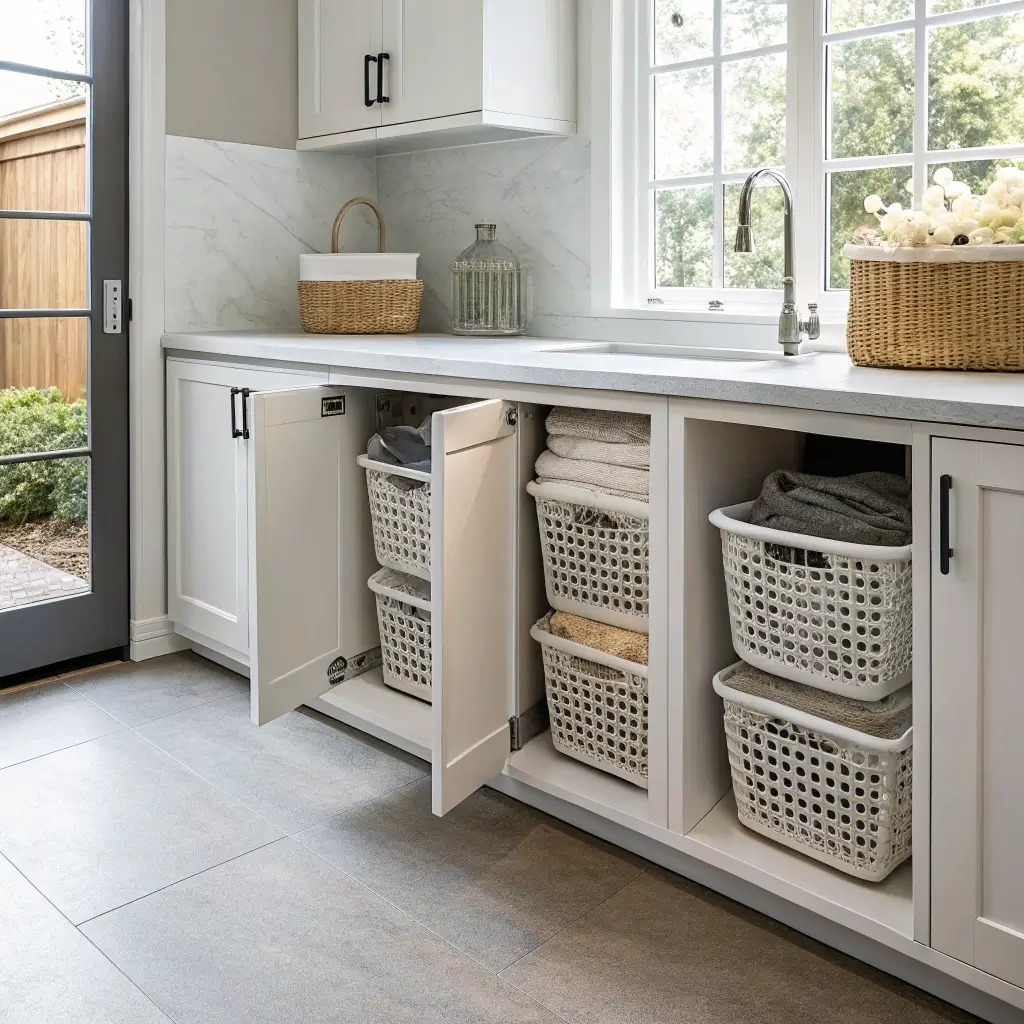
Nothing kills a laundry room vibe faster than dirty clothes spilling everywhere. My solution? Built-in hamper cabinets that hide the mess completely.
I converted a lower cabinet by removing the shelves and installing a tilting hamper frame. Now dirty clothes disappear behind a cabinet door, and pulling out the hamper takes two seconds. It’s like magic, except it’s just smart carpentry.
If you’re renting or can’t modify cabinets, try this: get a narrow bookshelf, add some decorative baskets, and create the same effect. Nobody needs to know your dirty secrets (literally).
DIY Options for Renters:
- Standalone cabinet with pull-out hampers
- Curtained alcove with hidden baskets
- Decorative room divider hiding standard hampers
DIY Laundry Room Chalkboard Wall
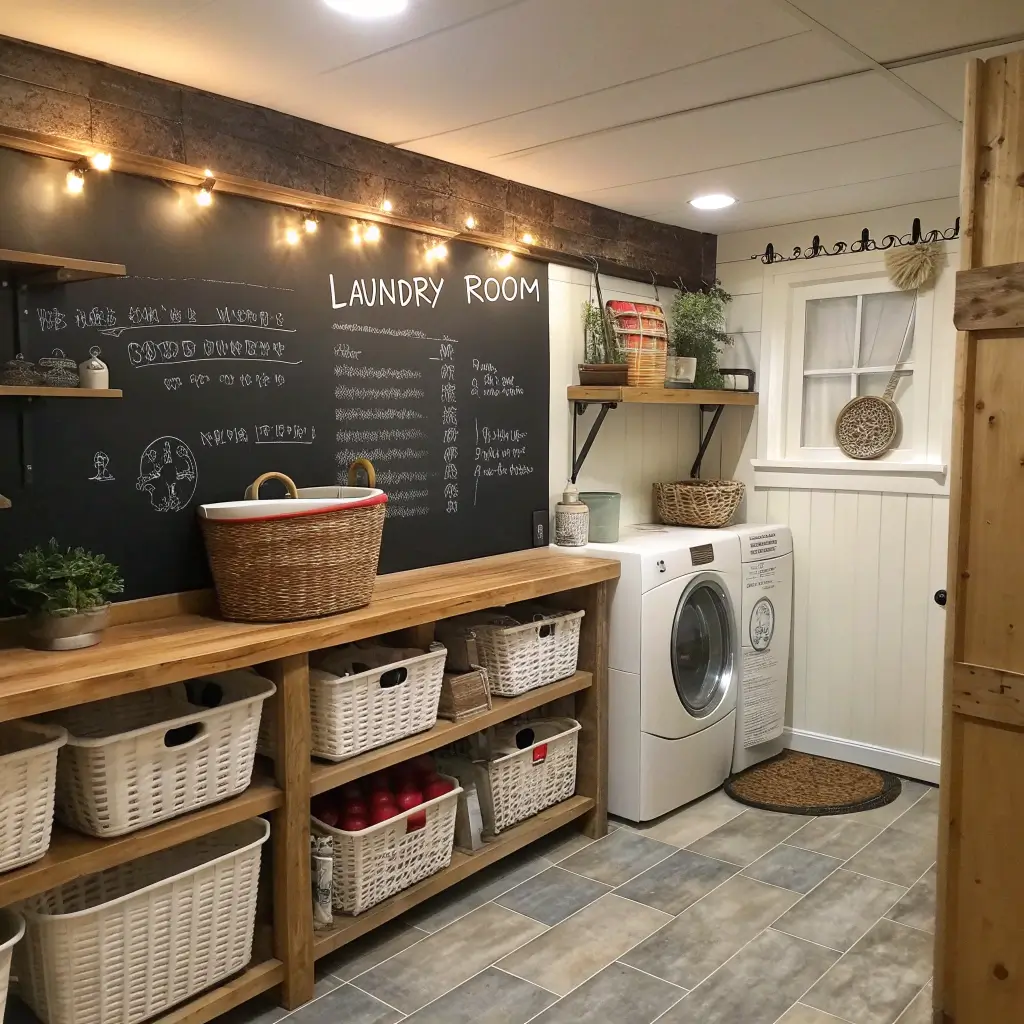
Okay, this one’s more fun than functional, but hear me out. I painted one wall with chalkboard paint, and it’s become command central for our house. Stain removal tips? Written right there. Whose socks are whose? Color-coded on the board.
Chalkboard paint costs about $15 for enough to cover a decent-sized wall. Application is stupid-simple – just roll it on like regular paint. The hardest part is waiting for it to cure before you can write on it.
My kids love leaving me “helpful” laundry notes (mostly drawings of cats, but whatever). Plus, it’s oddly satisfying to cross off completed loads. Small victories, people.
Also Read: 15 Trendy Laundry Room Tile Ideas for Chic Interiors
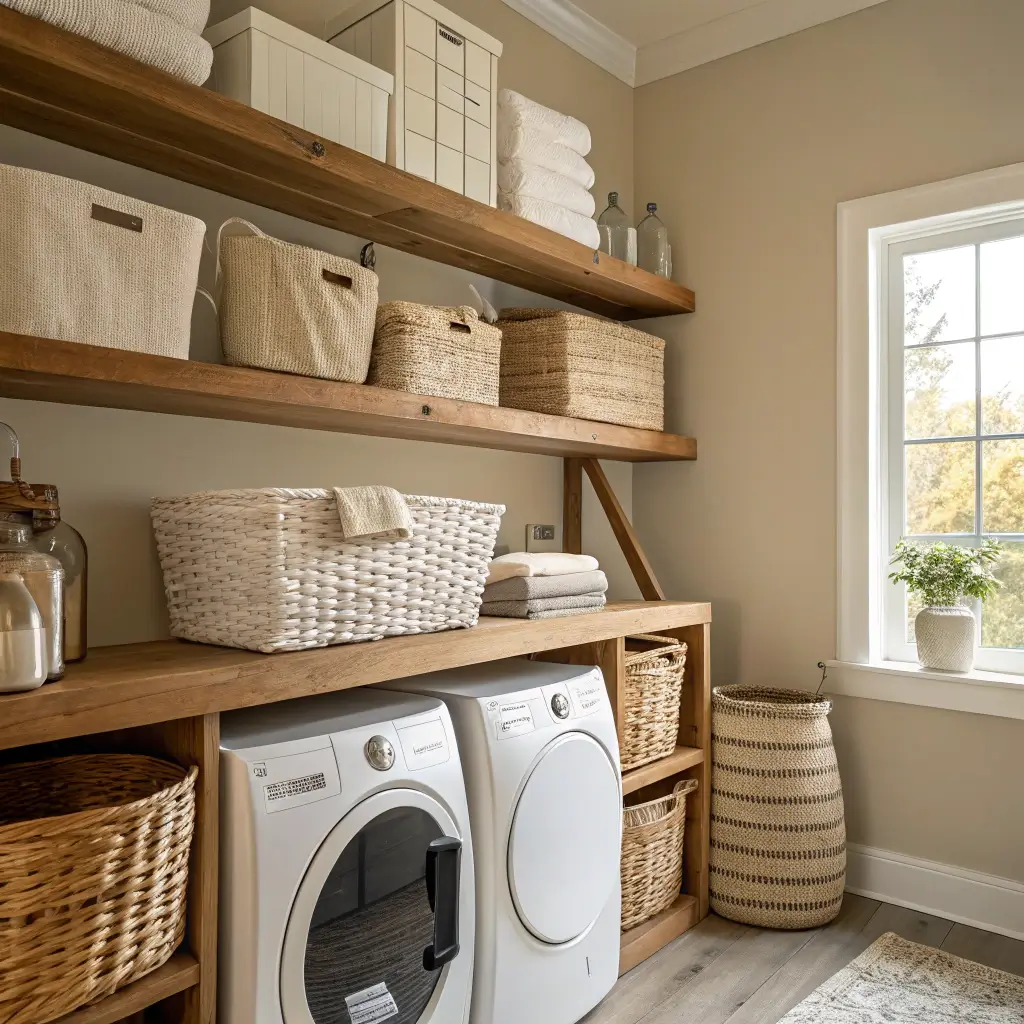
Upcycled Crates for Storage
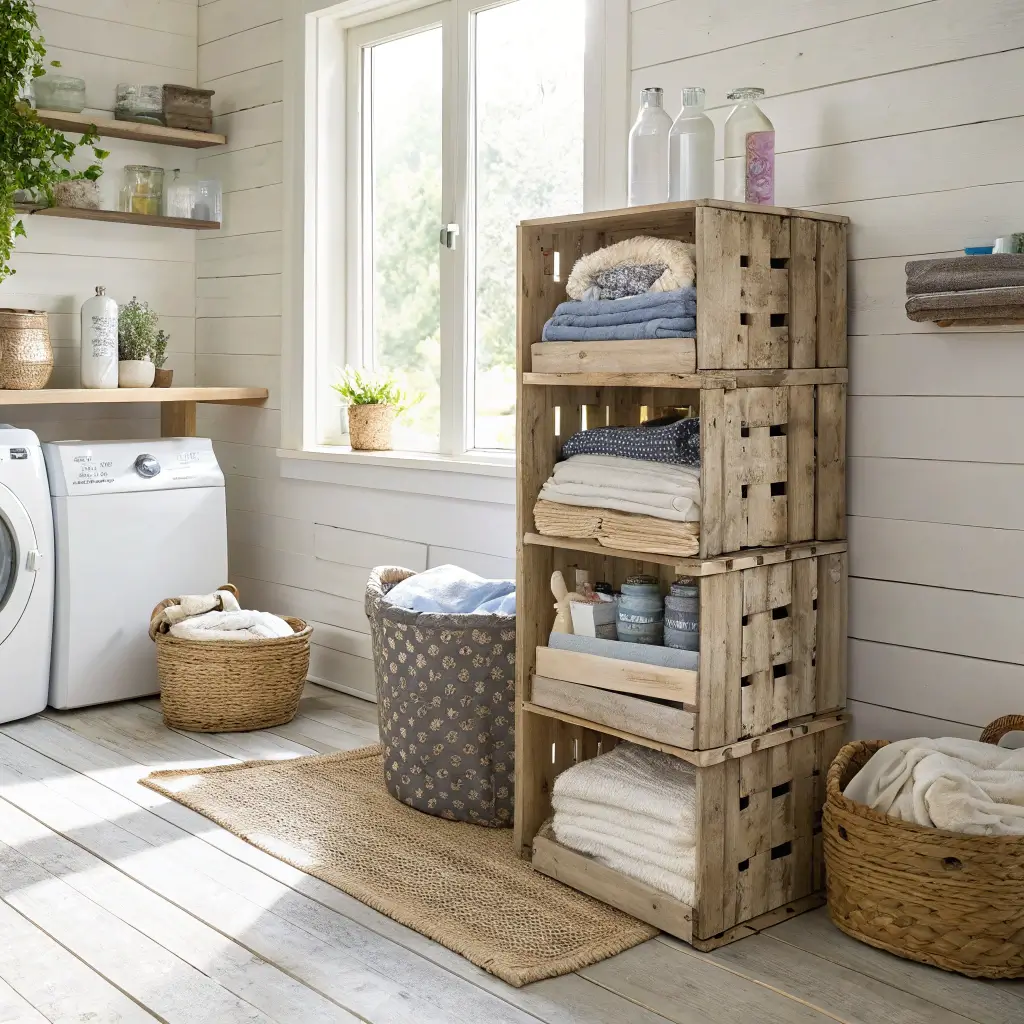
Found some old wooden crates at a flea market for $5 each. Sanded them down, gave them a coat of white stain, and suddenly I had rustic storage that people think I bought from Pottery Barn.
Stack them, mount them on walls, or just set them on shelves. Each crate holds about 10 rolls of toilet paper or a mountain of dryer sheets. They’re also perfect for sorting clean clothes by family member – everyone gets their own crate.
The beauty of crates? They already have that worn, vintage look that’s impossible to fake. Even if your DIY skills are questionable (mine definitely are sometimes), crates look good with minimal effort.
Hanging Drying Rack Solution

Ceiling-mounted drying racks are lifesavers for delicate items. I installed mine using a pulley system, so it lowers when needed and practically disappears against the ceiling when not in use.
Cost me about $40 total, including the pulleys and rope. Compare that to those fancy Swedish ones for $200+, and you’ll see why DIY wins here. The rack holds about 20 pounds of wet clothes without any issues.
Installation Must-Knows:
- Find ceiling joists (not optional)
- Use proper ceiling hooks rated for weight
- Consider placement near a heat source for faster drying
- Leave clearance for walking underneath when raised
Customized Cabinet Makeover

Those builder-grade cabinets in your laundry room? They don’t have to stay ugly. I transformed mine with some paint and new hardware for less than $100 total.
The secret sauce? Proper prep work. Clean, sand, prime – don’t skip steps or you’ll regret it when paint starts peeling in six months. I used cabinet-specific paint that’s designed to handle moisture and temperature changes.
New handles made the biggest visual impact. Swapped those boring knobs for long, modern pulls, and suddenly the whole room looked expensive. Sometimes it’s the little things, you know?
Also Read: 15 Adorable Toca Boca Laundry Room Ideas and Fun Designs
DIY Countertop Over Washer & Dryer

Front-loaders just beg for a countertop above them. I created one using a piece of butcher block cut to size, secured with brackets to the wall. Total cost: about $75 for a massive folding and storage surface.
Make sure to seal the wood properly – laundry rooms get humid. I used three coats of polyurethane, and two years later, it still looks perfect. No water damage, no warping, just a beautiful workspace that makes folding actually pleasant.
Ever notice how a continuous surface makes a room look bigger? This countertop trick unified my machines and made the whole space feel intentional rather than just “where we stuck the washer.”
Laundry Room Peg Hooks for Accessories
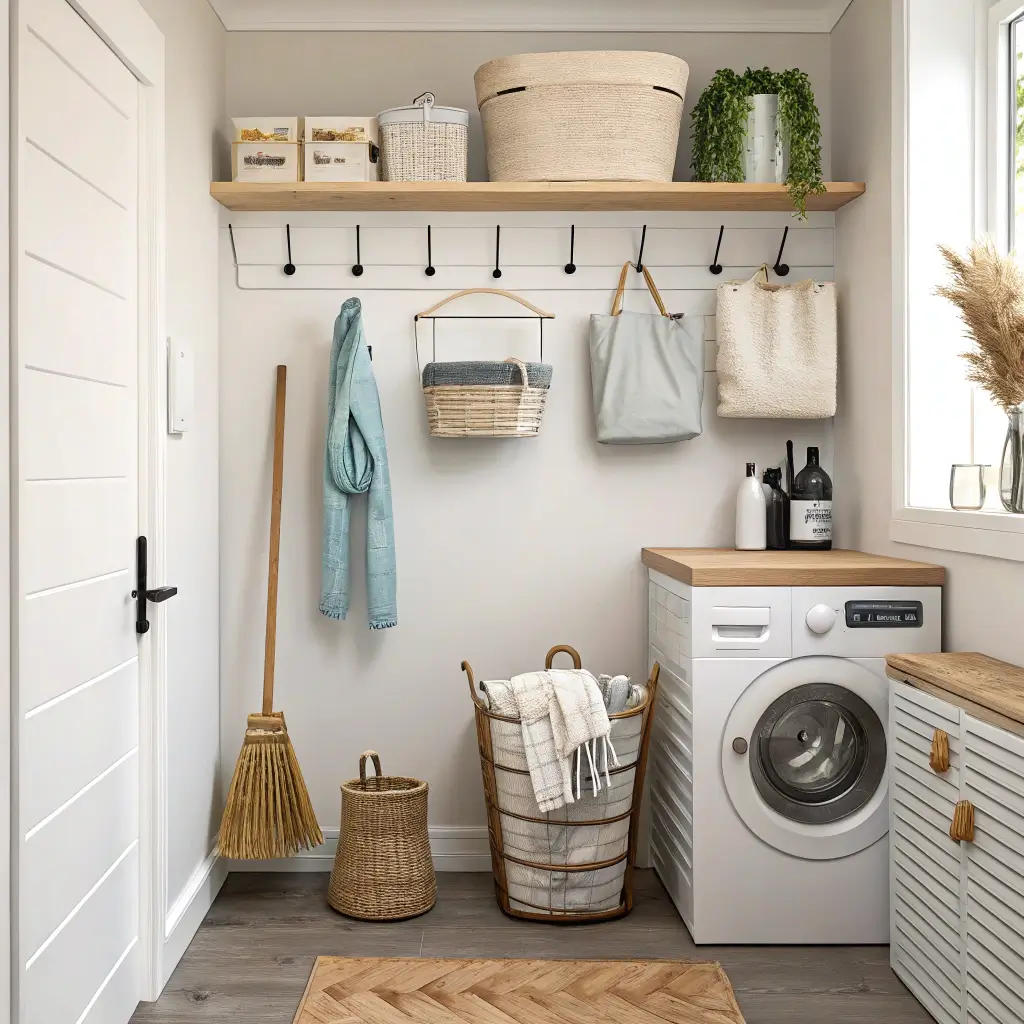
Shaker peg rails aren’t just for farmhouse aesthetics – they’re seriously practical. I installed a rail along one wall for hanging everything from ironing boards to mesh laundry bags.
Each peg holds surprising weight when properly installed into studs. Mine regularly support wet towels, full laundry bags, and that random stuff that doesn’t fit anywhere else.
Best part? You can adjust what hangs where based on what you’re doing. Ironing day? Hang the iron and spray bottle within reach. Delicate wash day? Those mesh bags are right there.
Minimalist Open Shelf Design
Sometimes less really is more. I removed upper cabinet doors and embraced open shelving. Everything stays in matching containers, creating this clean, organized look that makes me feel like I have my life together (spoiler: I don’t).
Clear containers are key – you can see when supplies run low. Label everything unless you enjoy playing “guess what’s in this jar” at 11 PM. I use a label maker because my handwriting looks like a doctor’s prescription.
Container Organization Tips:
- Group similar items together
- Keep frequently used items at eye level
- Use uniform containers for visual cohesion
- Leave some breathing room – don’t pack shelves completely
Also Read: 15 Genius Laundry Room Sink Ideas for Space-Saving Solutions
Decorative Storage Baskets DIY
Plain plastic baskets are functional but ugly. So I wrapped mine in rope using hot glue, creating these boho-style baskets that actually look good on open shelves.
Takes about an hour per basket and maybe $5 in rope. Start at the bottom and work your way up, keeping the rope tight. Add handles by leaving loops at the sides – way easier than trying to attach them later.
These baskets hide all the ugly stuff (looking at you, dryer sheets box) while adding texture to the room. Plus, they’re surprisingly durable. Mine have survived two years of daily use and one memorable incident involving a leaking bleach bottle. :/
Foldable Ironing Station
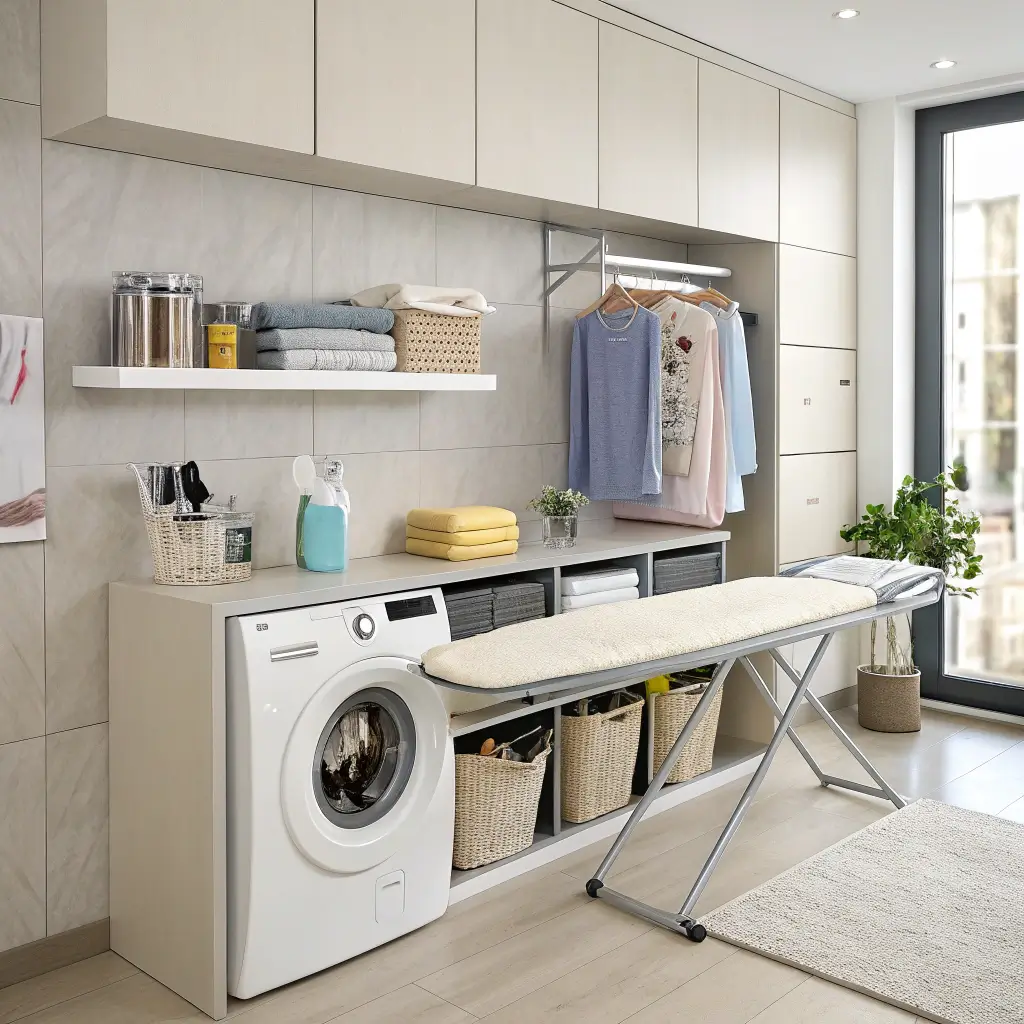
Wall-mounted ironing boards that fold flat are game-changers for small spaces. I installed mine inside a cabinet door, so it’s completely hidden when not in use.
The hardware kit cost about $25, and installation took maybe an hour. Make sure your cabinet door can handle the weight – I reinforced mine with an extra piece of plywood on the back.
Position it at a comfortable height (usually 36-38 inches from the floor). Add a heat-resistant mat underneath for your iron, and you’ve got a complete ironing station that takes up zero floor space.
Vertical Storage for Small Spaces

Got a narrow gap beside your washer? That’s prime real estate! I built a sliding vertical organizer that fits in a 6-inch gap and holds all my cleaning supplies.
Used plywood and drawer slides to create this pull-out tower. Five shelves in less than one square foot of floor space – tell me that’s not brilliant. Each shelf has a lip to keep bottles from tumbling off when you slide it out.
The top shelf holds dryer sheets, middle shelves for detergents, bottom for bulky items like bleach bottles. Everything accessible but completely out of sight when pushed back.
Building Tips for Vertical Storage:
- Measure your gap precisely (twice!)
- Use quality drawer slides – cheap ones will frustrate you daily
- Add stops to prevent pulling it out too far
- Consider adding dividers for smaller items
Making It All Work Together
Here’s what nobody tells you about laundry room DIYs: you don’t need to do everything at once. Start with one project that solves your biggest annoyance. Can’t find anything? Begin with organization. No folding space? Tackle that wall-mounted station first.
My laundry room transformation took six months because I did one project every few weeks. Each improvement motivated the next one, and spreading out the cost made it manageable. Plus, I learned what actually worked for our family versus what just looked good on Instagram.
Remember, the best laundry room is one that works for YOUR life. Maybe you need tons of hanging space, or perhaps you’re all about that folding station life. There’s no wrong answer as long as it makes laundry less of a chore.
FYI, most of these projects can be completed in a weekend with basic tools. You don’t need a fully equipped workshop or contractor-level skills. If I can do it while juggling kids and a questionable attention span, you definitely can too.
The biggest game-changer? Actually enjoying the space where you do laundry. Once you’ve invested time and creativity into your laundry room, you might even find yourself wanting to keep up with the washing. Okay, maybe that’s pushing it, but at least you won’t dread it quite as much!