15 Creative DIY Bedroom Decor Ideas for Cozy Stylish Spaces
Look, we both know your bedroom needs a refresh. You’ve been staring at those same blank walls for months, and that Pinterest board titled “Dream Bedroom” isn’t going to decorate itself. The good news? You don’t need to sell a kidney to make your bedroom look like it belongs in a magazine.
I’ve spent the last few years experimenting with DIY bedroom decor ideas, and honestly, some of my biggest wins came from projects that cost less than a fancy coffee drink.
We’re talking about transforming your space with nothing more than some creativity, basic supplies, and maybe a YouTube tutorial or two. Ready to actually make something happen this weekend?
DIY Macrame Wall Hanging

Remember when macrame was just something your grandma did? Well, guess what – it’s back, and it’s cooler than ever. I started my first macrame project thinking I’d end up with a tangled mess, but macrame is surprisingly forgiving once you get the hang of basic knots.
You’ll need some macrame cord (cotton works best), a wooden dowel, and about two hours of your time. The square knot and half hitch are literally all you need to know to create something stunning. Pro tip: watch the tutorial at half speed the first time – trust me on this one.
Getting Started with Macrame
- Basic supplies cost: $15-20
- Time investment: 2-3 hours for beginners
- Difficulty level: Easier than it looks
The best part about macrame? Even if you mess up, it still looks intentionally bohemian. Mine has a few “creative variations” (aka mistakes), and visitors always compliment it 🙂
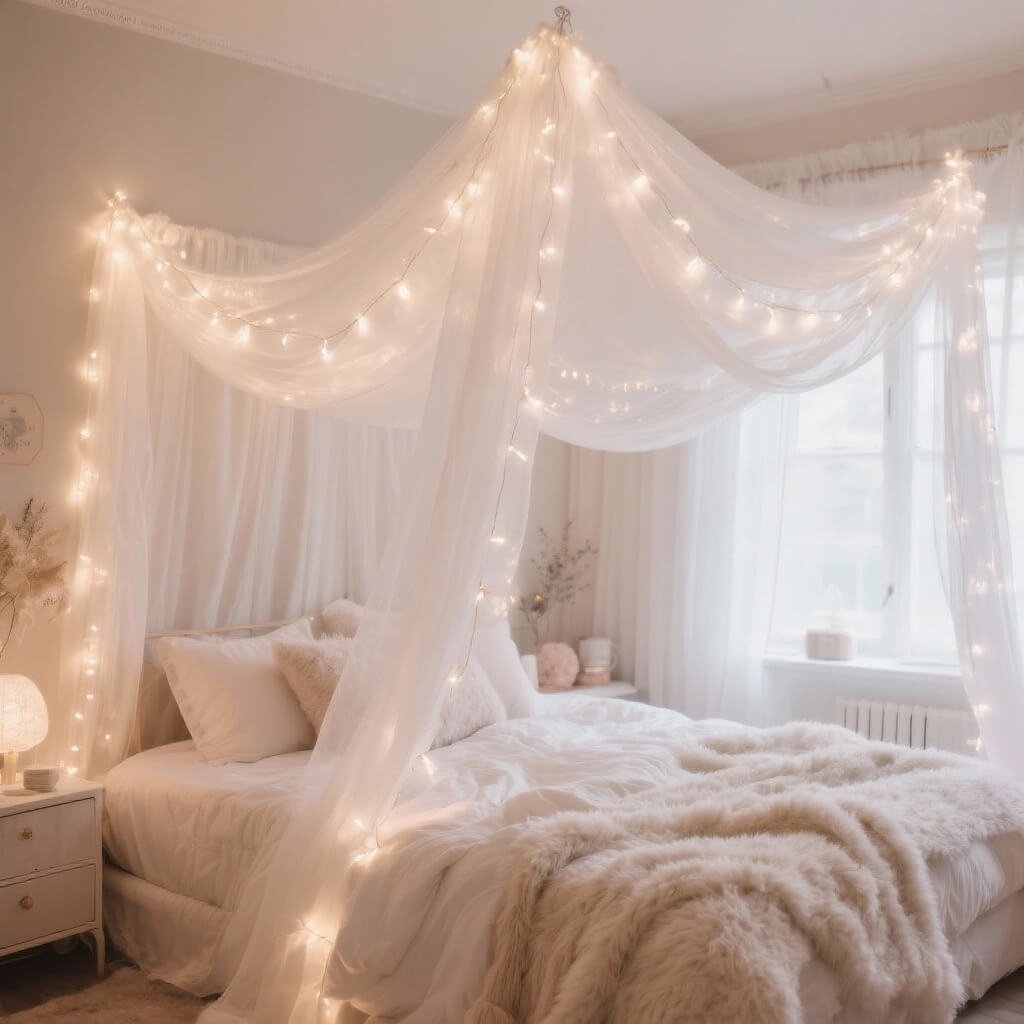
Fairy Light Canopy

Who doesn’t want to feel like they’re sleeping under the stars? Creating a fairy light canopy transformed my bedroom from basic to magical, and it took me less than an hour to set up.
You can go two routes here: the classic draped canopy or the minimalist ceiling installation. I went with ceiling hooks and sheer curtains, then wove battery-operated LED lights through them. The result? Instant ambiance that makes Netflix binges feel like cinema experiences.
Installation Tips
Skip the plug-in lights unless you enjoy tripping over cords at 2 AM. Battery-operated or USB-rechargeable lights give you way more flexibility with placement. Mount your lights using removable adhesive hooks – your security deposit will thank you later.
Want to get fancy? Add a dimmer switch or smart plug to control the mood lighting from your phone. Because why get out of bed when you don’t have to?
Handmade Photo Collage Wall

Instagram might have killed the printed photo, but there’s something special about having physical memories on your wall. I created my photo collage wall after realizing I had thousands of photos on my phone and zero on display.
Creating Your Perfect Collage
Start by printing your photos in different sizes – mixing 4×6, 5×7, and square prints creates visual interest. Arrange them on the floor first before committing to the wall. This saves you from the heartbreak of realizing your “perfect” arrangement is actually lopsided.
Use washi tape or removable mounting strips for a damage-free installation. Frame some photos, leave others bare, and throw in some postcards or concert tickets for variety. The messier it looks, the more “artistic” it becomes – at least that’s what I tell myself.
Also Read: 15 Creative Boys Bedroom Decor Ideas for Fun Stylish Spaces
Painted Mason Jar Vases

Mason jars are the Swiss Army knife of DIY decor. Transform them into chic vases with nothing more than some chalk paint and creativity. I’ve made dozens of these for my room and as gifts (because I’m cheap but thoughtful).
First, clean your jars thoroughly – any residue will make your paint look wonky. Apply thin coats of chalk paint, letting each dry completely. Want a distressed look? Sand down the edges after painting. Going for glam? Add metallic accents or glitter while the paint’s still tacky.
Design Ideas That Actually Work
- Ombre effect: Dilute paint with water for gradient colors
- Rope-wrapped: Hot glue twine for a rustic vibe
- Frosted glass look: Use frosted glass spray paint
Fill them with fresh flowers, fairy lights, or use them as makeup brush holders. Versatility is the name of the game here.
DIY Floating Shelves

Floating shelves make any room look more expensive than it actually is. Building your own floating shelves sounds intimidating, but if I can do it with my questionable power tool skills, so can you.
You’ll need wooden boards (I used reclaimed wood for that rustic charm), heavy-duty brackets, wall anchors, and a level. Please use a level – learning this the hard way isn’t fun. Mount your brackets into studs whenever possible, unless you enjoy watching your belongings crash to the floor at 3 AM.
Styling Your Shelves
The secret to Pinterest-worthy shelves? Follow the rule of three. Group items in odd numbers, vary heights, and mix textures. Books, plants, and small decorative objects work perfectly. Leave some breathing room between items – cluttered shelves defeat the purpose.
Fabric Headboard Makeover
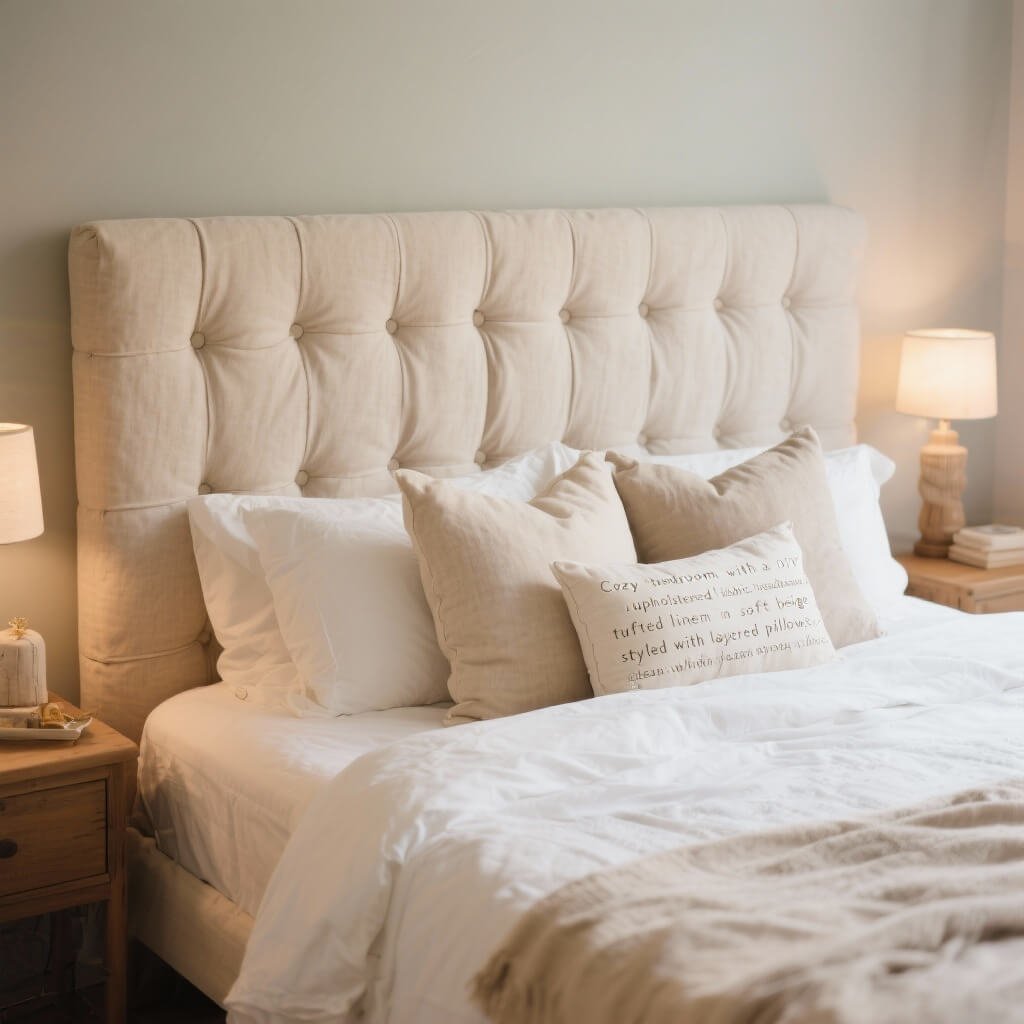
Your headboard (or lack thereof) sets the entire bedroom vibe. Creating a fabric headboard gave my room an instant upgrade without the furniture store price tag.
I used plywood, batting, fabric, and a staple gun for my DIY headboard. Choose a fabric that complements your bedding but doesn’t match exactly – you want coordination, not a matchy-matchy situation. Add button tufting if you’re feeling ambitious, though flat upholstery looks just as good IMO.
Installation Methods
- Wall-mounted: Use French cleats for easy removal
- Bed-attached: Modify mounting brackets to fit your frame
- Leaning: Just prop it against the wall (apartment-friendly!)
The whole project cost me under $50 and took a Saturday afternoon. Compare that to store-bought headboards starting at $200+, and you’ll understand why DIY wins.
Also Read: 15 Stunning Shelf Decor Bedroom Ideas for Stylish Spaces
Pallet Wood Nightstand
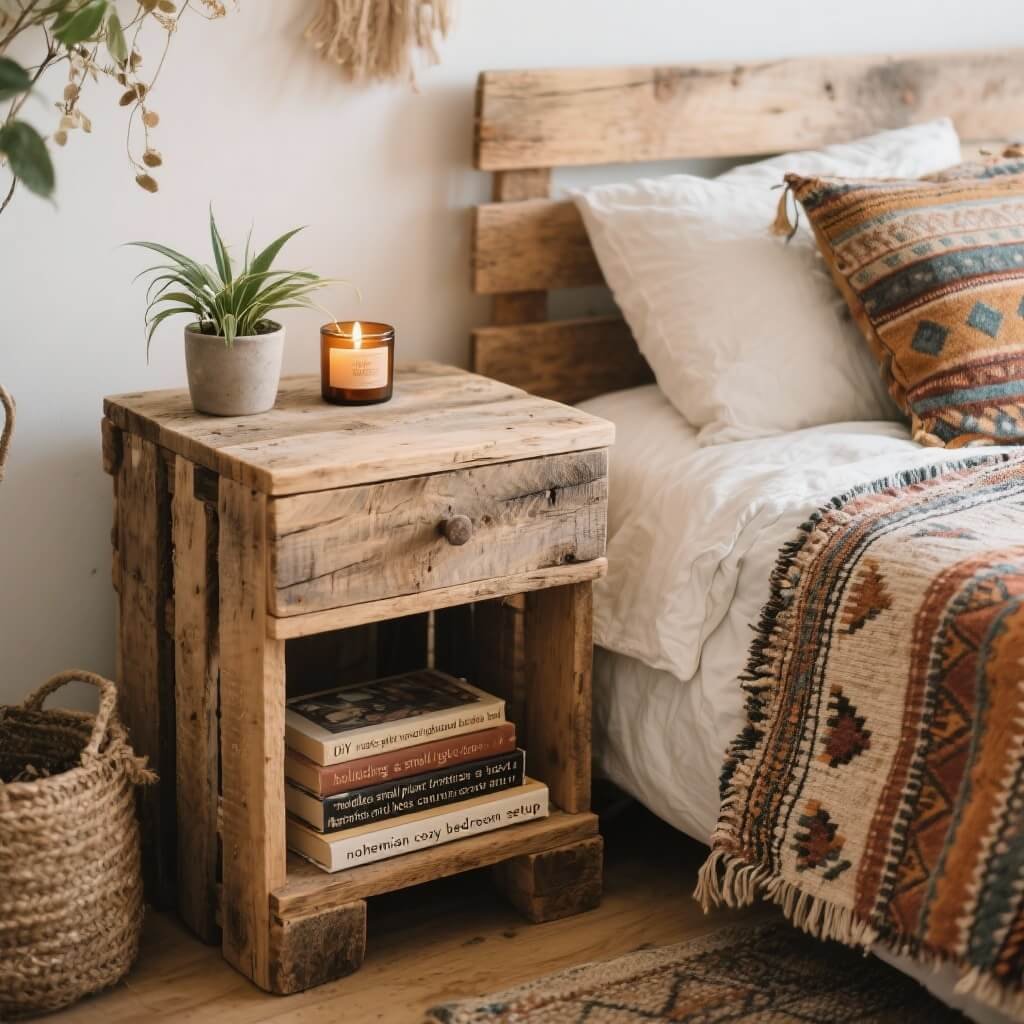
Pallets are everywhere, and most places give them away for free. Building a pallet wood nightstand combines sustainability with style – plus, you get to use power tools, which always makes me feel accomplished.
Sourcing and Prep Work
Look for heat-treated pallets (marked “HT”) rather than chemically treated ones. Sand everything thoroughly – splinters in your bedroom aren’t the vibe we’re going for. Apply a wood stain or paint to match your aesthetic.
Stack two pallets for height, add casters for mobility, or attach legs for a more refined look. Mine has a bottom shelf for books and a top surface perfect for my phone, lamp, and that glass of water I never drink.
Washi Tape Wall Art
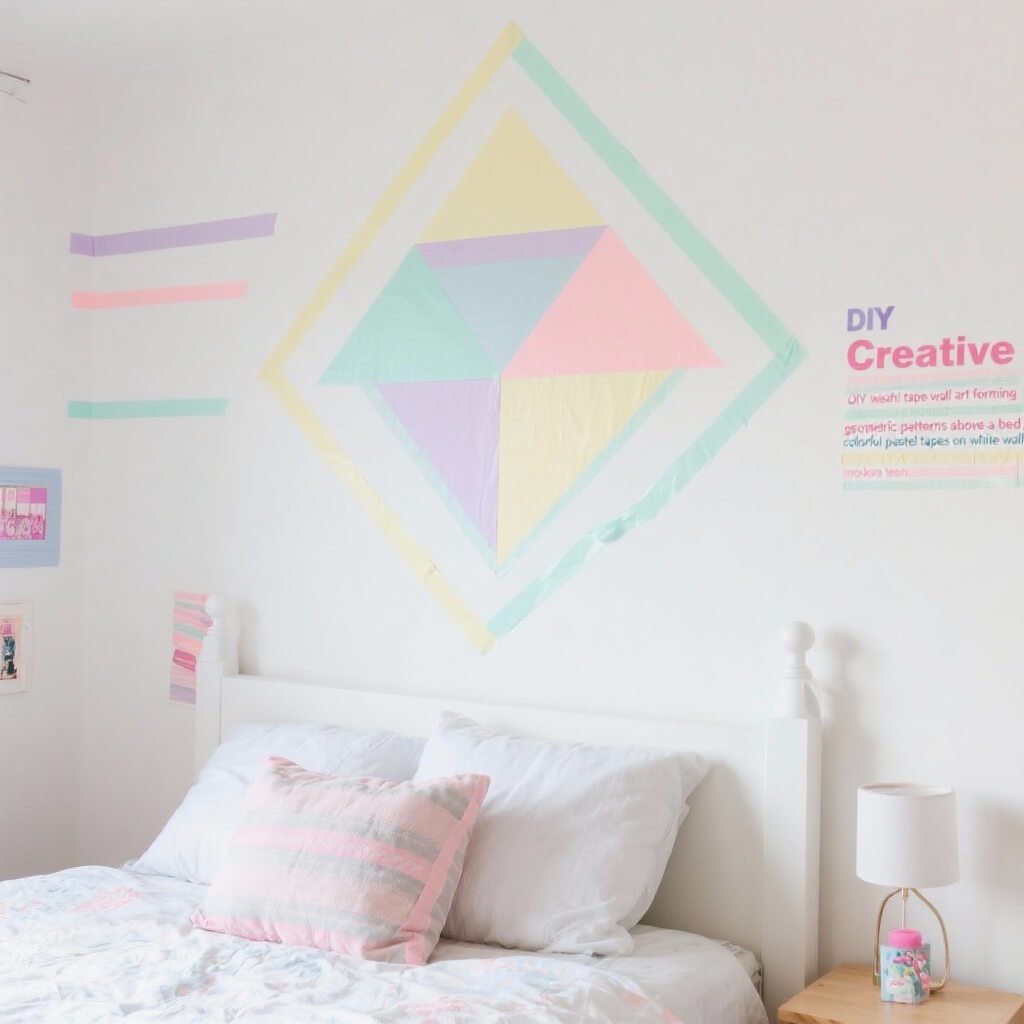
Can’t paint your walls? Enter washi tape – the renter’s best friend. Washi tape wall art lets you create geometric patterns, frames, or even faux wallpaper without risking your deposit.
I created a geometric mountain range above my bed using different shades of blue and gray tape. Start with a pencil sketch if you’re nervous, though the beauty of washi tape is that mistakes peel right off. Work in sections, stepping back frequently to check your progress.
Design Inspiration
- Geometric patterns: Triangles, hexagons, or abstract shapes
- Faux frames: Create “frames” around artwork or mirrors
- Accent walls: Cover an entire wall in striped or chevron patterns
The tape costs about $3-5 per roll, and you’ll need 5-10 rolls depending on your design complexity. Still cheaper than wallpaper, and infinitely more removable.
DIY Dreamcatcher Decor

Dreamcatchers aren’t just for summer camps anymore. Making your own dreamcatcher adds bohemian flair while supposedly filtering out bad dreams (can’t hurt, right?).
You’ll need an embroidery hoop, string or yarn, feathers, and beads. The web pattern looks complicated but follows a simple rhythm once you start. Watch a tutorial, pour yourself a glass of wine, and embrace the meditative process.
Customization Options
Ditch traditional colors for something that matches your room. I made mine in blacks and grays with metallic accents – modern meets mystical. Add LED lights for extra magic, or incorporate dried flowers for a cottagecore twist.
Also Read:15 Stunning Dresser Decor Bedroom Ideas for a Stylish Look
Repurposed Ladder Shelf
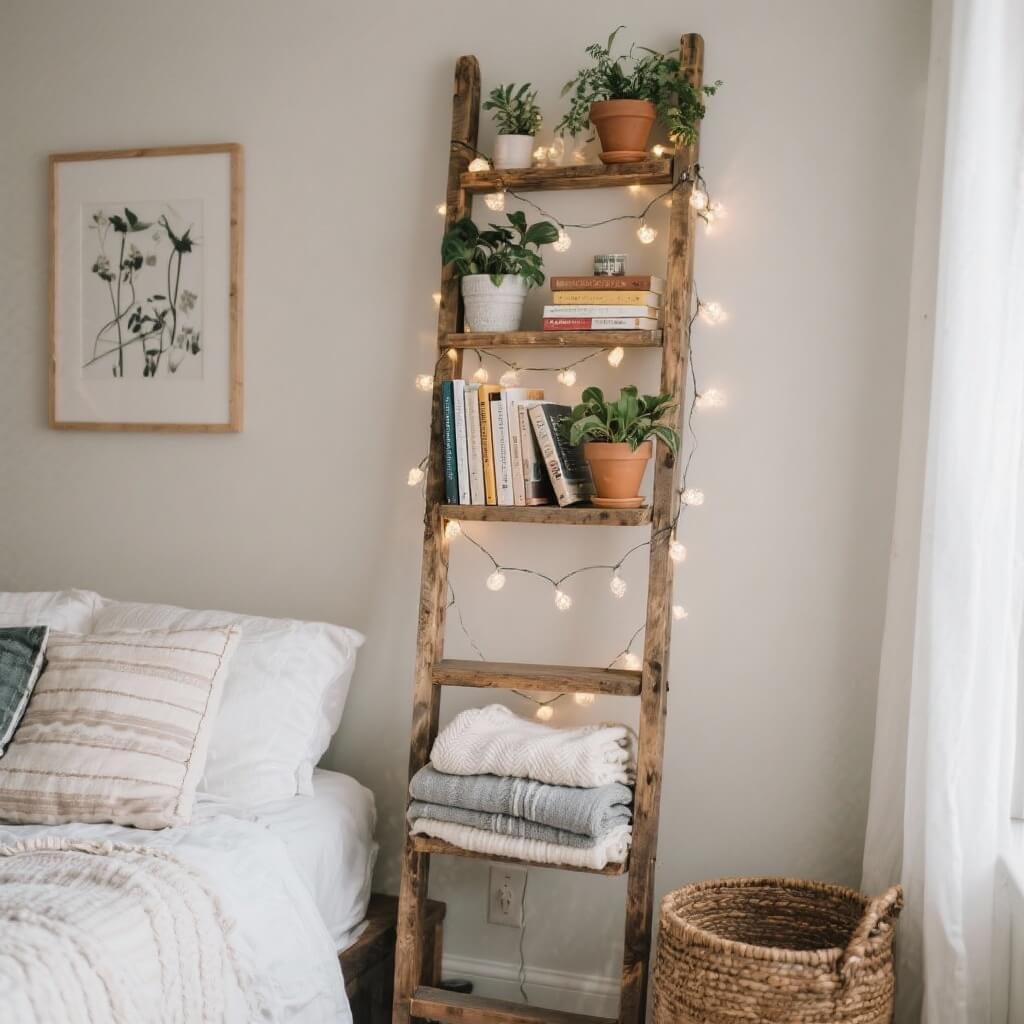
Found an old ladder at a garage sale? Perfect. Turning a ladder into a shelf creates instant vertical storage with character. I scored a wooden ladder for $10 and transformed it into my favorite bedroom piece.
Sand down any rough spots, apply your chosen finish, and lean it against the wall. Each rung becomes a shelf for books, plants, or decorative items. Add S-hooks for hanging storage – perfect for scarves, bags, or jewelry.
Safety Considerations
- Secure the top to the wall with an anti-tip strap
- Check weight limits – old ladders weren’t made for heavy storage
- Test stability before loading it up
The ladder shelf trend isn’t going anywhere because it works in any style room. Rustic, modern, minimalist – it adapts to your aesthetic.
Hand-Painted Accent Pillows
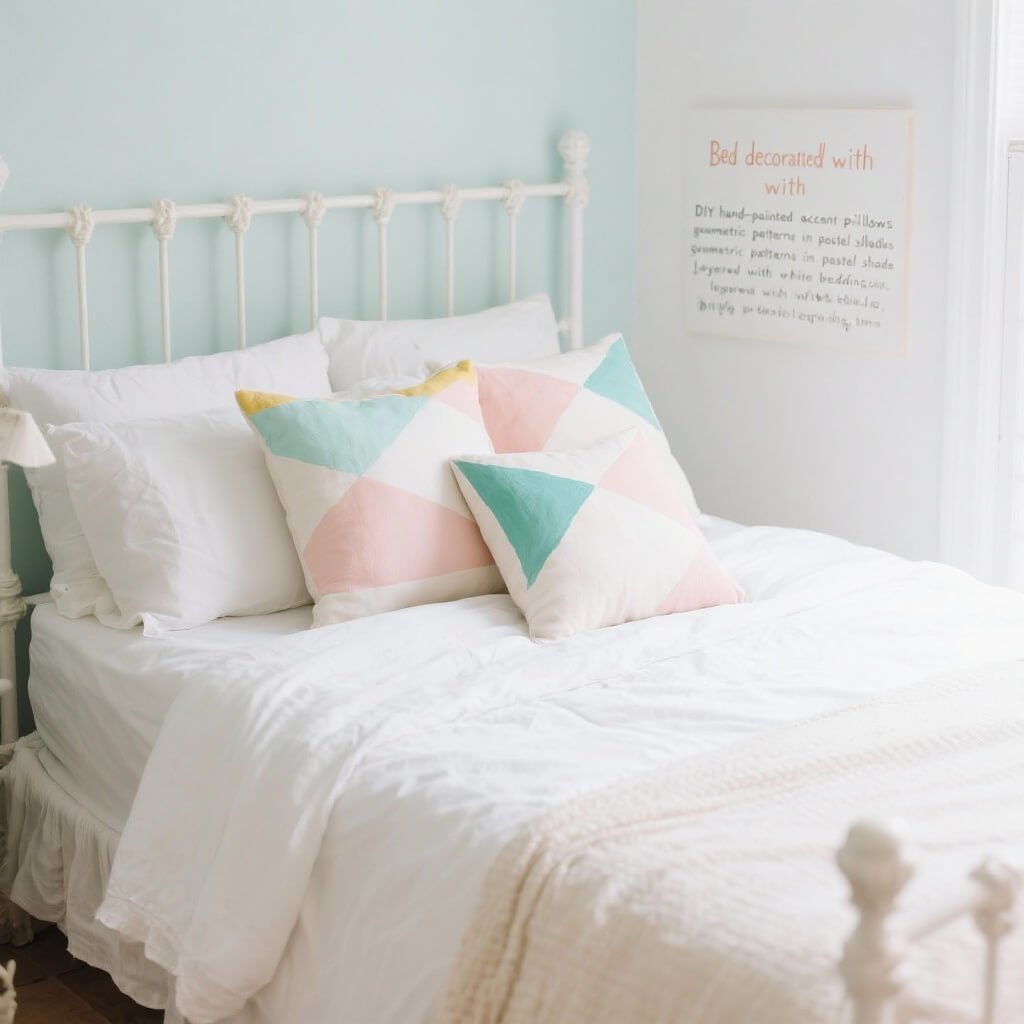
Store-bought accent pillows cost a fortune for what’s essentially a fabric square. Painting your own pillows lets you customize colors and patterns while saving serious cash.
Buy plain pillow covers (or make them from drop cloth), then use fabric paint to create your design. Stencils help if you’re not artistically inclined, though abstract designs hide imperfections beautifully. Heat-set your paint with an iron for washability.
Technique Tips
- Use fabric medium mixed with acrylic paint for softer results
- Place cardboard inside the pillow cover while painting
- Start simple – geometric shapes or botanical prints work great
I painted a set of four pillows for less than what one designer pillow costs. They’re conversation starters and perfectly match my room’s color scheme.
String Art Wall Piece
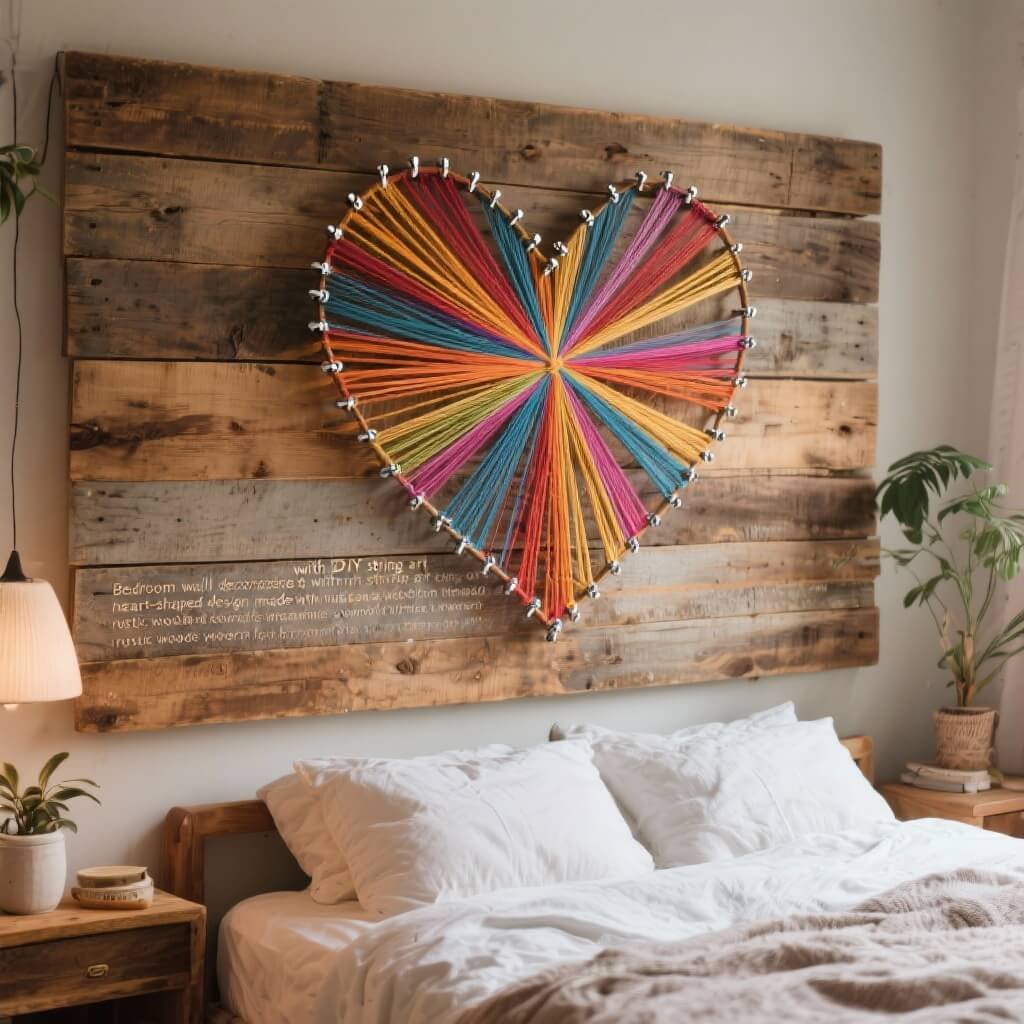
String art sounds complicated but really just requires patience and basic math skills. Creating string art gives you custom wall decor that looks way more expensive than it is.
The Basic Process
Draw or print your design, then hammer nails along the outline into a wooden board. Wrap string around the nails to fill in the design. Simple shapes work best for beginners – hearts, stars, or words are foolproof options.
My first attempt was my initial, and while it’s slightly wonky, it adds personality to my gallery wall. Use embroidery thread for thin lines or yarn for bolder statements. Mix colors for an ombre effect that’ll make people think you’re an actual artist.
DIY Jewelry Organizer Frame
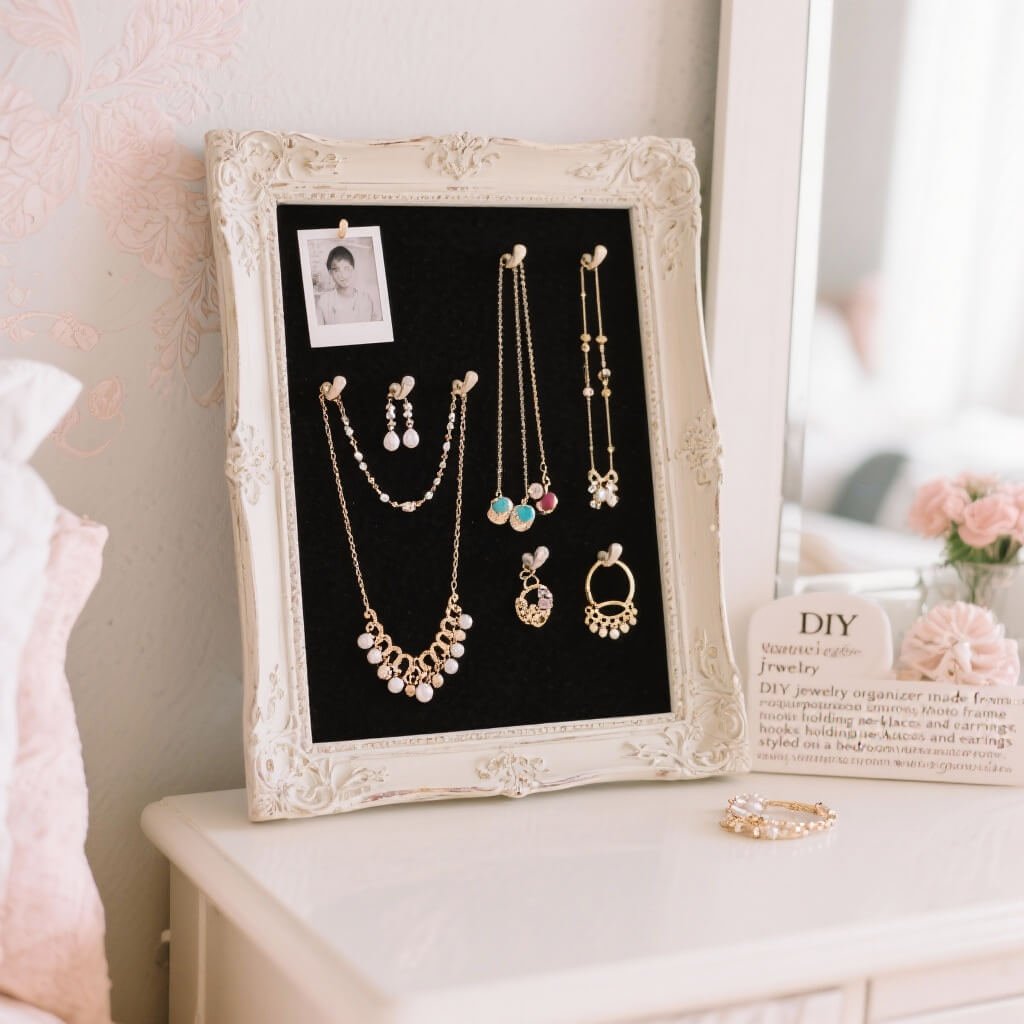
Tired of untangling necklaces every morning? Building a jewelry organizer frame solved my accessory chaos while doubling as wall art.
Take an old picture frame (thrift stores are goldmines for these), remove the glass, and add chicken wire or decorative mesh to the back. Paint the frame to match your decor, then hang it up. Hook earrings directly onto the mesh, drape necklaces from added hooks, and suddenly your jewelry becomes functional decor.
Upgrade Options
- Add cork backing for pin-style earrings
- Install small hooks along the bottom for bracelets
- LED strip lighting around the frame for boutique vibes
FYI, this also works as a hair accessory organizer or even a place to display polaroids with mini clothespins.
Upcycled Mirror Frame
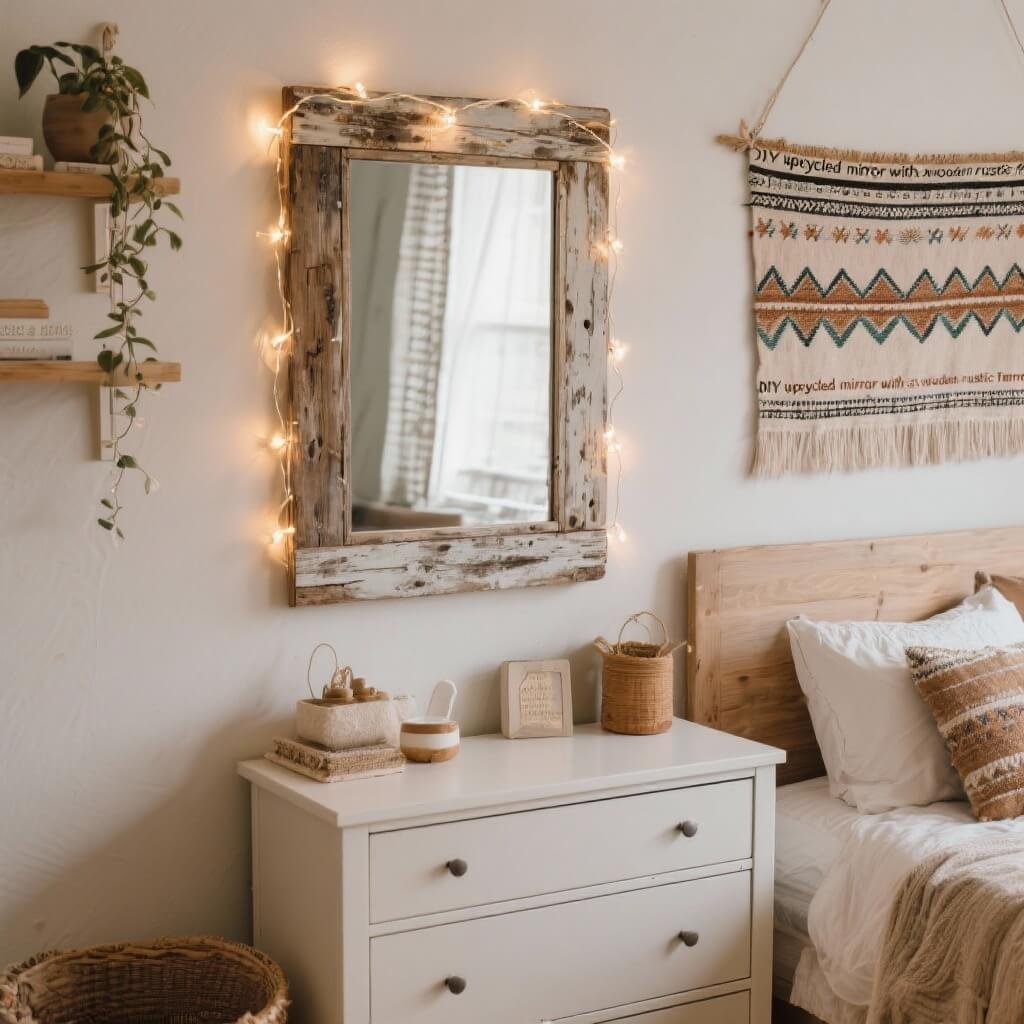
That boring builder-grade mirror deserves better. Upcycling a mirror frame transforms a basic necessity into a statement piece. I’ve done this with three different mirrors now, and each one completely changed the room’s feel.
For a rustic look, glue driftwood or branches around the frame. Want glamour? Hot glue faux flowers or metallic elements. Going minimalist? Paint the frame matte black and call it a day.
Creative Frame Ideas
- Rope-wrapped for nautical vibes
- Mosaic tiles for Mediterranean flair
- Vintage book pages for literary charm
The transformation takes about two hours and costs under $20, depending on materials. Compare that to designer mirrors starting at $100+, and you’ll see why this DIY wins.
Homemade Scented Candle Holders

Sure, you could buy candle holders, but making your own scented candle holders adds personal touch and custom fragrance to your space. Plus, melting wax feels surprisingly therapeutic.
Start with containers – mason jars, vintage teacups, or small terracotta pots work perfectly. Melt soy wax (it’s eco-friendly and burns cleaner), add essential oils, and secure a wick in the center. The hardest part? Waiting for them to set.
Scent Combinations That Work
- Lavender + vanilla for relaxation
- Eucalyptus + mint for energy
- Sandalwood + jasmine for romance
I make batches of these as gifts because who doesn’t love custom candles? Pro tip: add dried flowers or herbs to the wax for visual interest. Just keep them away from the wick unless you want a fire hazard.
Bringing It All Together
Look at you – armed with 15 DIY bedroom decor ideas that’ll transform your space without maxing out your credit card. The beauty of these projects? You can mix and match based on your style, budget, and attention span.
Start with one project this weekend. Seriously, pick the one that made you think “I could actually do that” and just start. Once you finish your first DIY success, you’ll be hooked.
Before you know it, your bedroom will look like those Pinterest photos you’ve been saving, except better – because you made it yourself.
Remember, perfect is boring. Those little imperfections in your DIY projects? They’re not mistakes; they’re character. They’re proof that a real person with real creativity lives in that space.
And honestly, isn’t that so much better than another mass-produced room that looks like everyone else’s?
Your bedroom should be your sanctuary, your creative expression, your favorite place to be. These DIY projects help you achieve that without needing a trust fund or interior design degree. So grab your hot glue gun, channel your inner artist, and let’s make something amazing.
Your future self (and your bank account) will thank you :/